multipass from Canonical is like Docker Desktop, but for getting Ubuntu instead of a Docker daemon. It works on MacOS, Linux, and Windows with the same consistent UX. It's not fully open-source, and uses some proprietary add-ons / binaries, but is free to use.
For Linux using Ubuntu, you can install the packages directly, or use sudo snap install multipass --classic and follow this tutorial. For Raspberry Pi, see my tutorial here.
John McCabe has also tested faasd on Windows with multipass, see his tweet.
Try out faasd in a single command using a cloud-config file to get a VM which has:
- port 22 for administration and
- port 8080 for the OpenFaaS REST API.
The above screenshot is from my tweet, feel free to comment there.
It took me about 2-3 minutes to run through everything after installing multipass.
-
Get multipass.run
-
Get my cloud-config.txt file
curl -sSLO https://raw.githubusercontent.com/openfaas/faasd/master/cloud-config.txt
-
Boot the VM
The
cloud-config.txtcontains an ssh key to allow your local machine to access the VM. However, this must be updated with your local ssh key. This command will update the key with your local public key value and start the VM.sed "s/ssh-rsa.*/$(cat $HOME/.ssh/id_*.pub)/" cloud-config.txt | multipass launch --name faasd --cloud-init -
This can also be done manually, just replace the 2nd line of the
cloud-config.txtwith the coPntents of your public ssh key, usually either~/.ssh/id_rsa.pubor~/.ssh/id_ed25519.pubssh_authorized_keys: - ssh-rsa AAAAB3NzaC1yc2EAAAADAQABAAABAQC8Q/aUYUr3P1XKVucnO9mlWxOjJm+K01lHJR90MkHC9zbfTqlp8P7C3J26zKAuzHXOeF+VFxETRr6YedQKW9zp5oP7sN+F2gr/pO7GV3VmOqHMV7uKfyUQfq7H1aVzLfCcI7FwN2Zekv3yB7kj35pbsMa1Za58aF6oHRctZU6UWgXXbRxP+B04DoVU7jTstQ4GMoOCaqYhgPHyjEAS3DW0kkPW6HzsvJHkxvVcVlZ/wNJa1Ie/yGpzOzWIN0Ol0t2QT/RSWOhfzO1A2P0XbPuZ04NmriBonO9zR7T1fMNmmtTuK7WazKjQT3inmYRAqU6pe8wfX8WIWNV7OowUjUsv [email protected] -
Get the VM's IP and connect with
sshmultipass info faasd Name: faasd State: Running IPv4: 192.168.64.14 Release: Ubuntu 18.04.3 LTS Image hash: a720c34066dc (Ubuntu 18.04 LTS) Load: 0.79 0.19 0.06 Disk usage: 1.1G out of 4.7G Memory usage: 145.6M out of 985.7M
Set the variable
IP:export IP="192.168.64.14"You can also try to use
jqto get the IP into a variable:export IP=$(multipass info faasd --format json| jq -r '.info.faasd.ipv4[0]')
Connect to the IP listed:
ssh ubuntu@$IPLog out once you know it works.
-
Let's capture the authentication password into a file for use with
faas-clissh ubuntu@$IP "sudo cat /var/lib/faasd/secrets/basic-auth-password" > basic-auth-password
-
Login from your laptop (the host)
export OPENFAAS_URL=http://$IP:8080 cat basic-auth-password | faas-cli login -s -
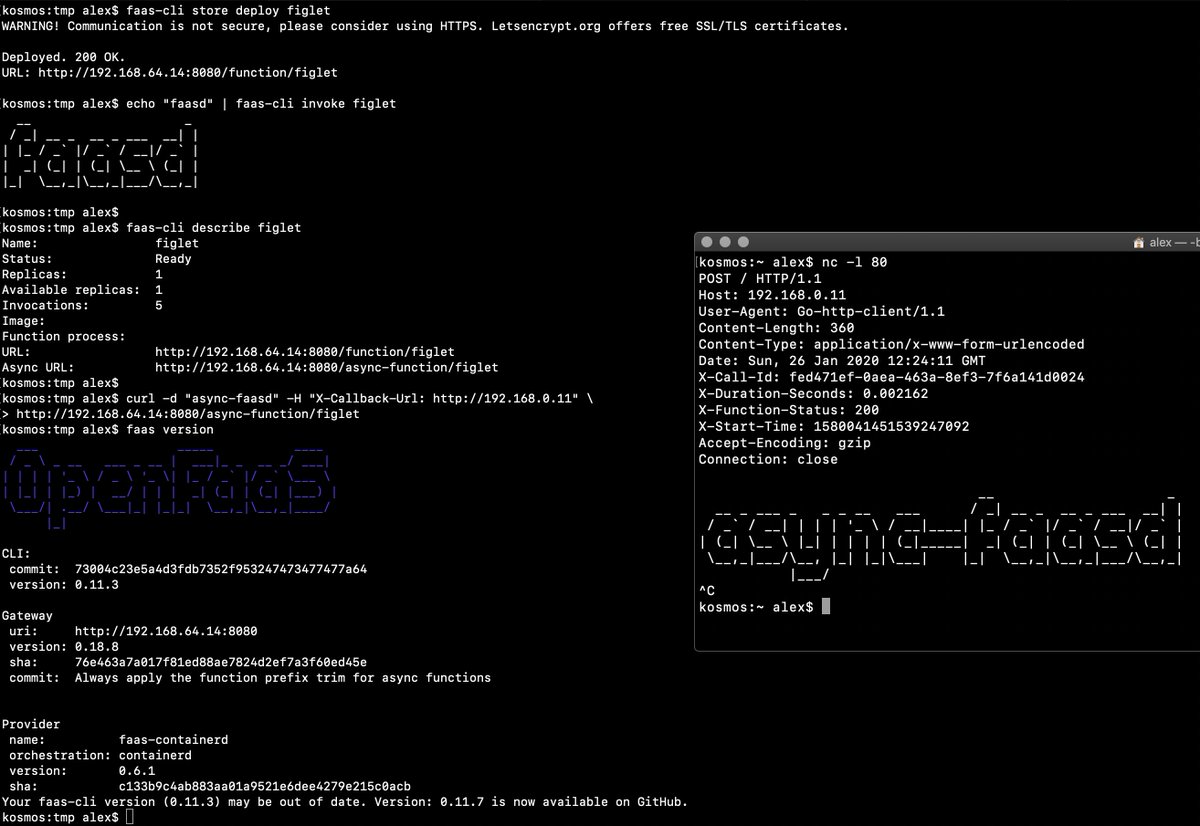
Deploy a function and invoke it
faas-cli store deploy figlet --env write_timeout=1s
echo "faasd" | faas-cli invoke figlet

faas-cli describe figlet

# Run async
curl -i -d "faasd-async" $OPENFAAS_URL/async-function/figlet

# Run async with a callback

curl -i -d "faasd-async" -H "X-Callback-Url: http://some-request-bin.com/path" $OPENFAAS_URL/async-function/figlet
You can also checkout the other store functions:
faas-cli store list -
Try the UI
Head over to the UI from your laptop and remember that your password is in the
basic-auth-passwordfile. The username isadmin:echo http://$IP:8080 -
Stop/start the instance
multipass stop faasd
-
Delete, if you want to:
multipass delete --purge faasd
You now have a faasd appliance on your Mac. You can also use this cloud-init file with public cloud like AWS or DigitalOcean.
- If you want a public IP for your faasd VM, then just head over to inlets.dev
- Try my more complete walk-through / tutorial with Raspberry Pi, or run the same steps on your multipass VM, including how to develop your own functions and services - https://blog.alexellis.io/faasd-for-lightweight-serverless/
- You might also like Building containers without Docker
- Star/fork faasd on GitHub