How To
A big special thanks to Jeronimous for these wonderful tutorials. Without him they probably would've never been written.
Also, a special thanks to Ceisuz for making his Blue Eyes White Dragon tool and related tutorial
First of all, make sure your Windows is showing file extensions. Some of the files you'll need to manage in order to use these tools are extension sensitive and sometimes even have the same name, save for their extension. If you're not sure, you can search the Internet for "how to make Windows show file extensions".
Goes without saying but don't mess with any files or tools while the game is open. Close the game before doing anything.
- Downloading the tools from Github
- Onomatopaira
- Relinquished
- Lithe
- Abaki
- Cyclone
- Vortex
- Elroy
- Launch_Ldr
- Embargo
- Previewer
- Wolf
- Blue Eyes White Dragon
-
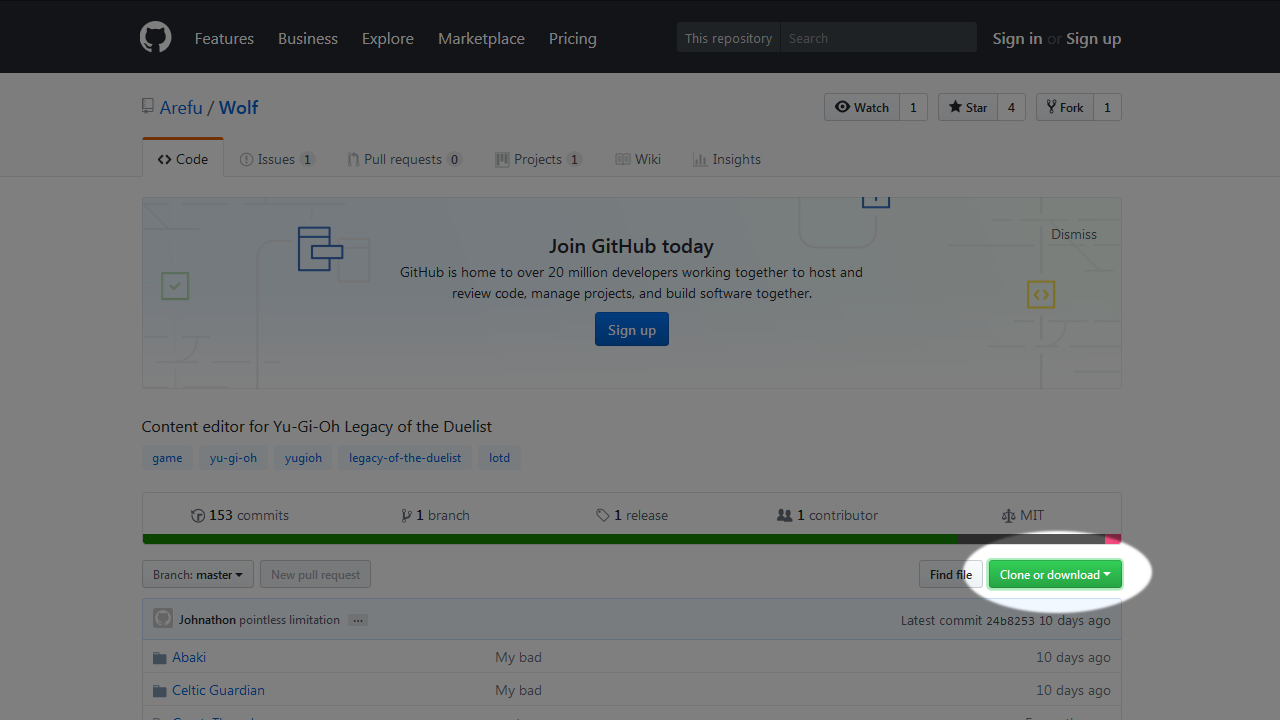
Click the green button on the right side, called Clone or download.
-
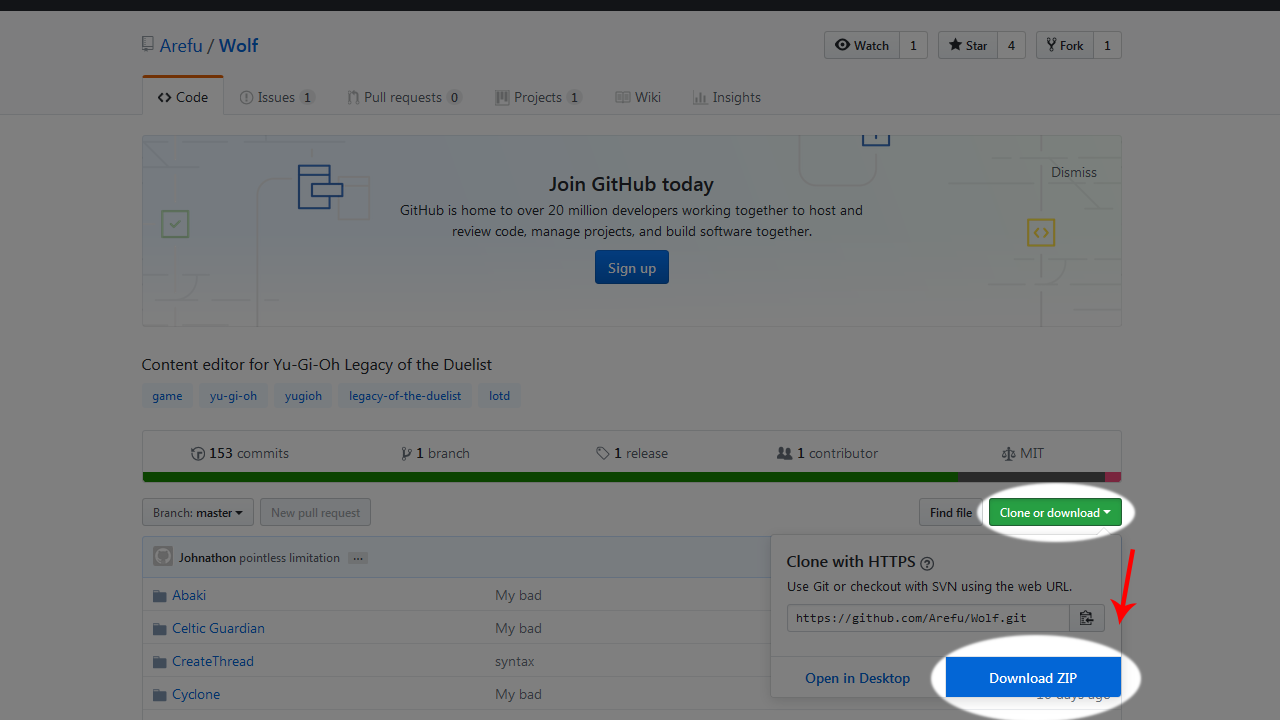
Then click on the Download ZIP option. You'll start downloading the Wolf-master.zip file.
-
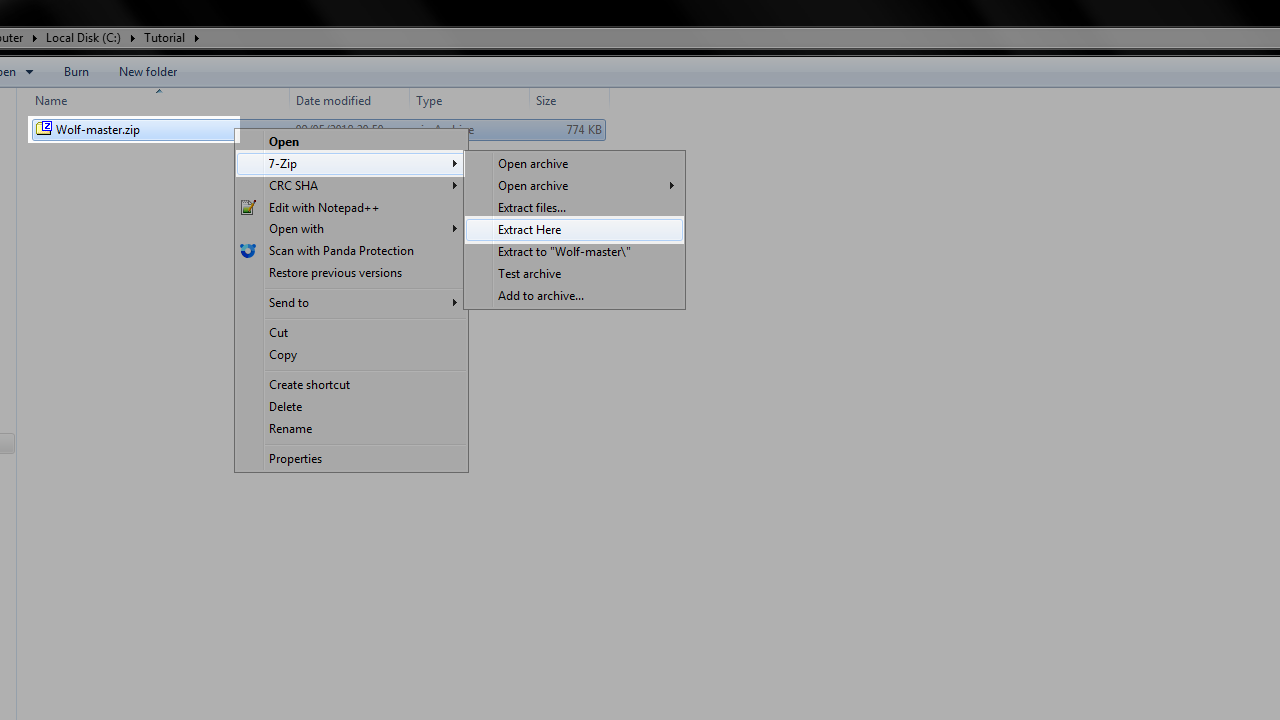
Extract the downloaded file using a program like 7-zip or Winrar.
-
A folder called
Wolf-masterwill be extracted from the Wolf-master.zip file.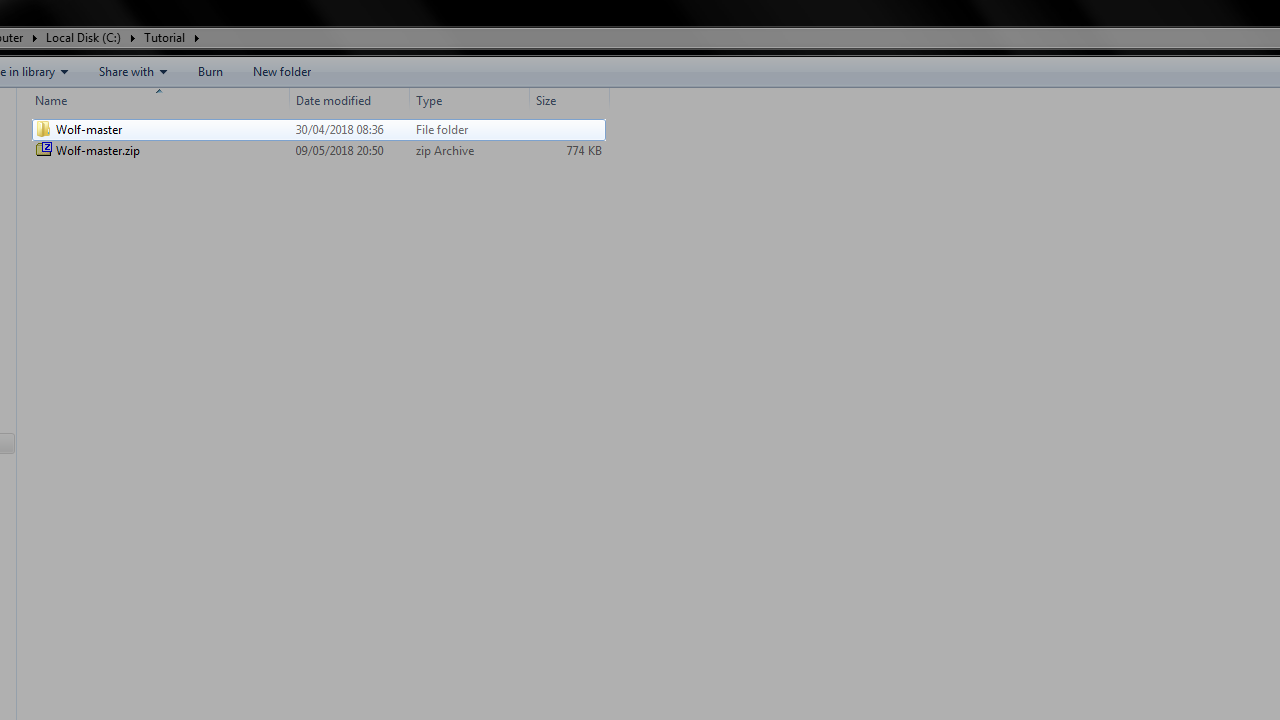
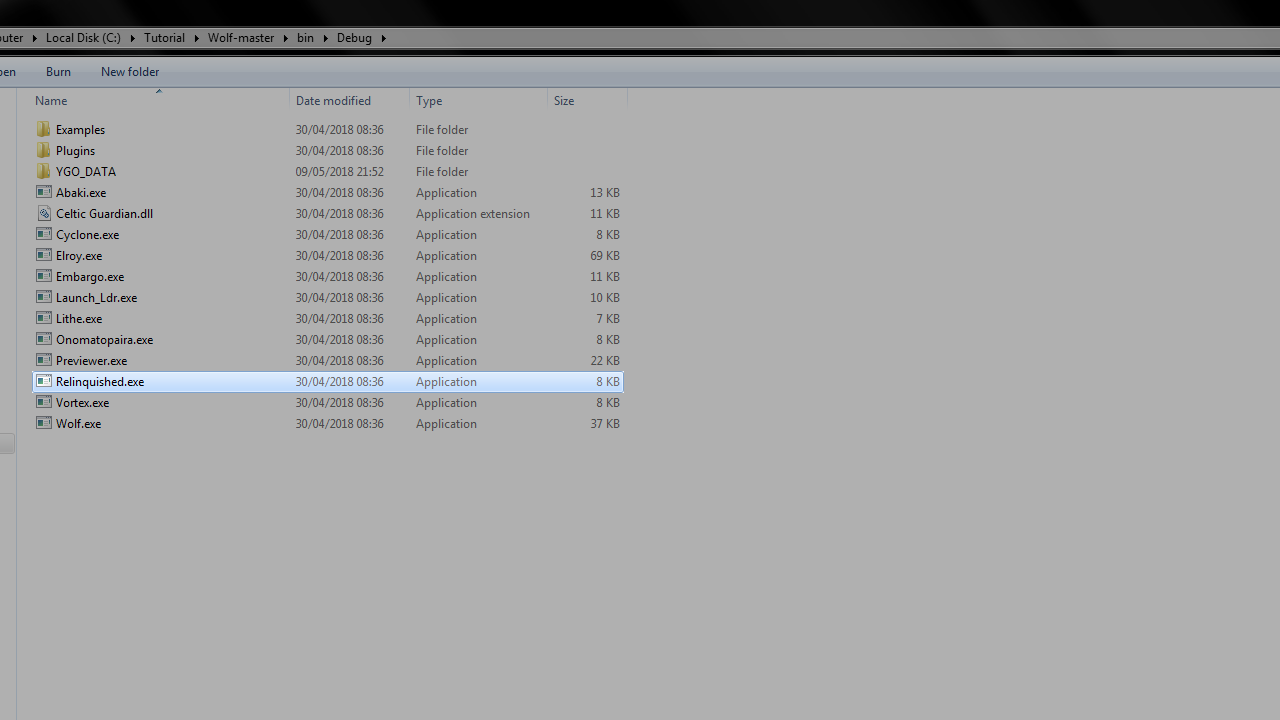
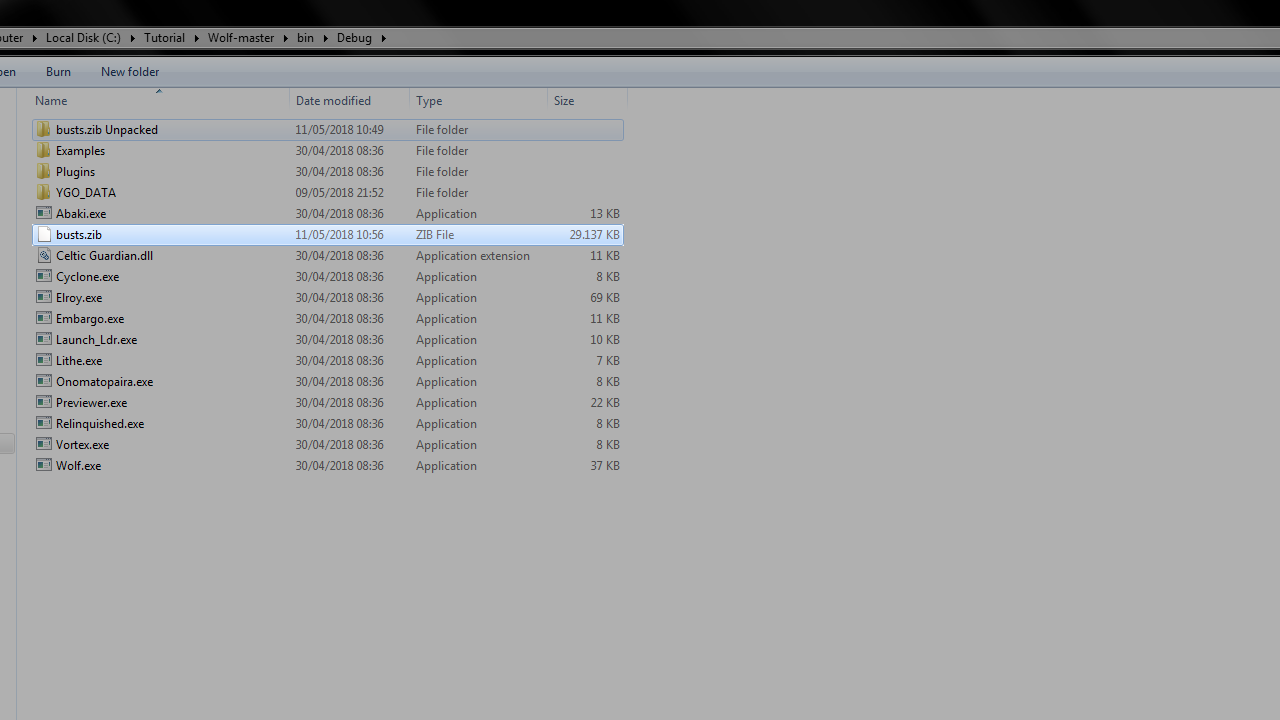
Open the extracted Wolf-master folder. Then inside it, open the bin folder, and inside that, open the Debug folder (Wolf-master\bin\Debug\).
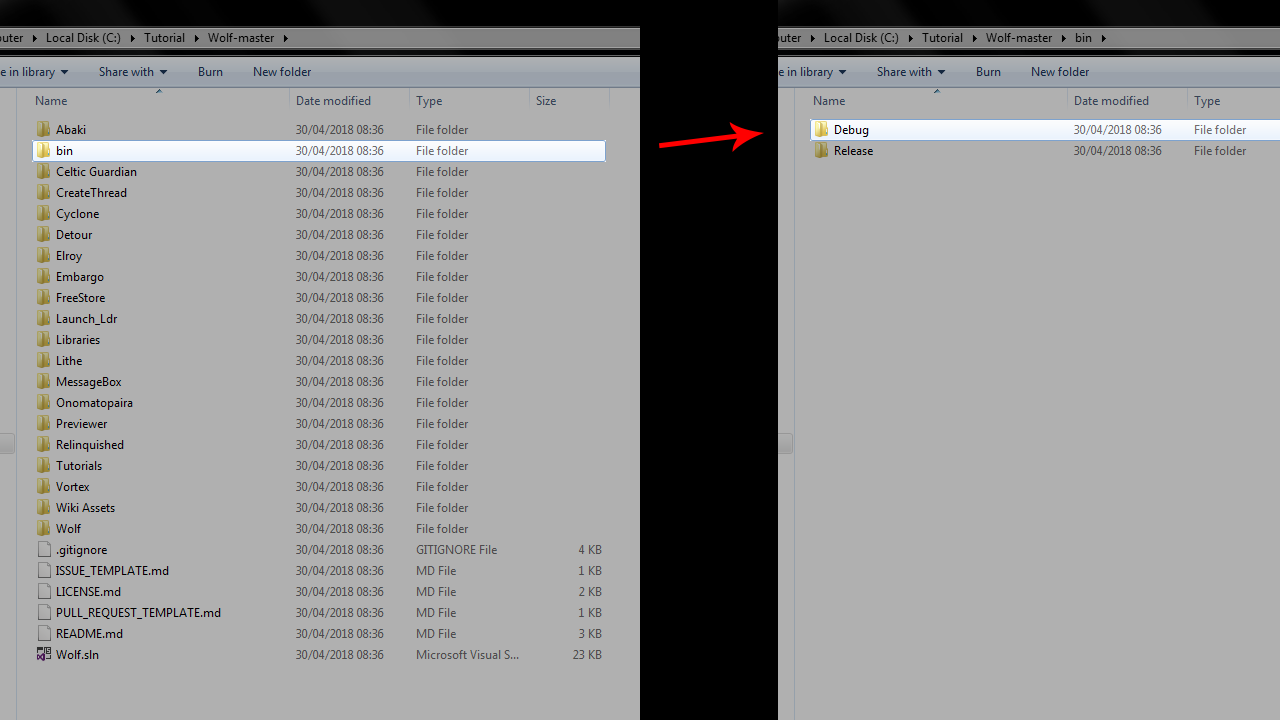
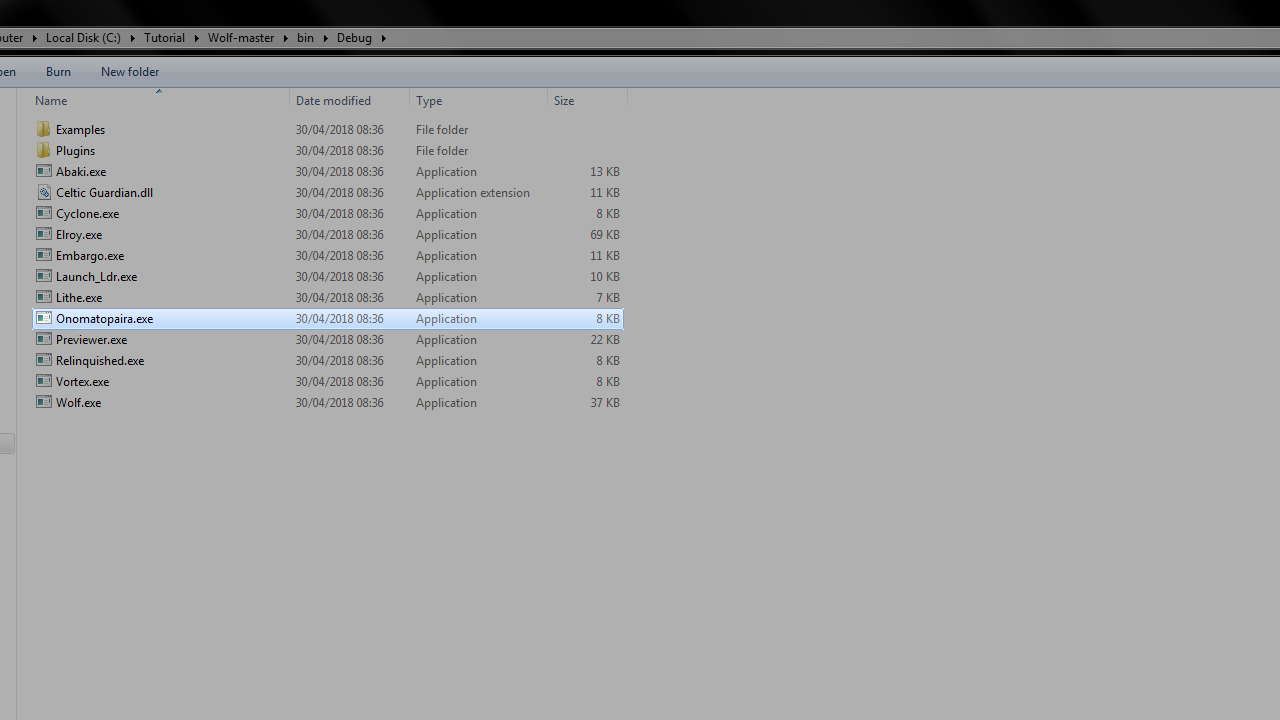
Inside this folder are the executable files for using the modding tools.
- Onomatopaira.exe
- Relinquished.exe
- Lithe.exe
- Abaki.exe
- Cyclone.exe
- Vortex.exe
- Elroy.exe
- Launch_Ldr.exe
- Embargo.exe
- Previewer.exe
- Wolf.exe
- Blue Eyes White Dragon.exe

Please read on in order to see how you're going to use all the programs. If you have any questions or the programs crash for you please report it to Johnathon/Arefu either using a Github issue on this site with as much information as you can, or join the project's Discord found here.
Used to extract the game's files.
-
Run Onomatopaira.exe
-
The program will ask you to select a file.
-
Navigate to your game's root directory (
Steam\steamapps\common\Yu-Gi-Oh! Legacy of the Duelist\) and select the YGO_DATA.toc file (the smaller of the two YGO_DATA files in this folder, usually it's about 78KB). Click Open at the bottom right of the window (make sure the game isn't running, or that file may be flagged as read-only).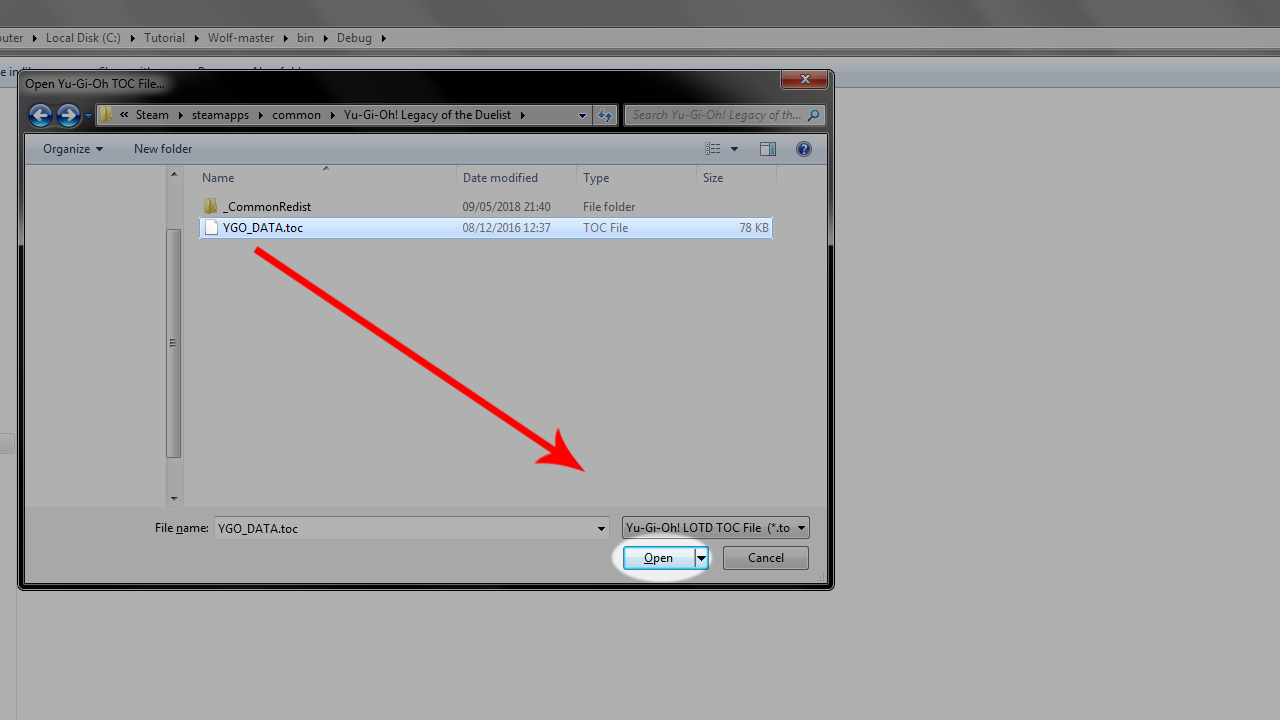
-
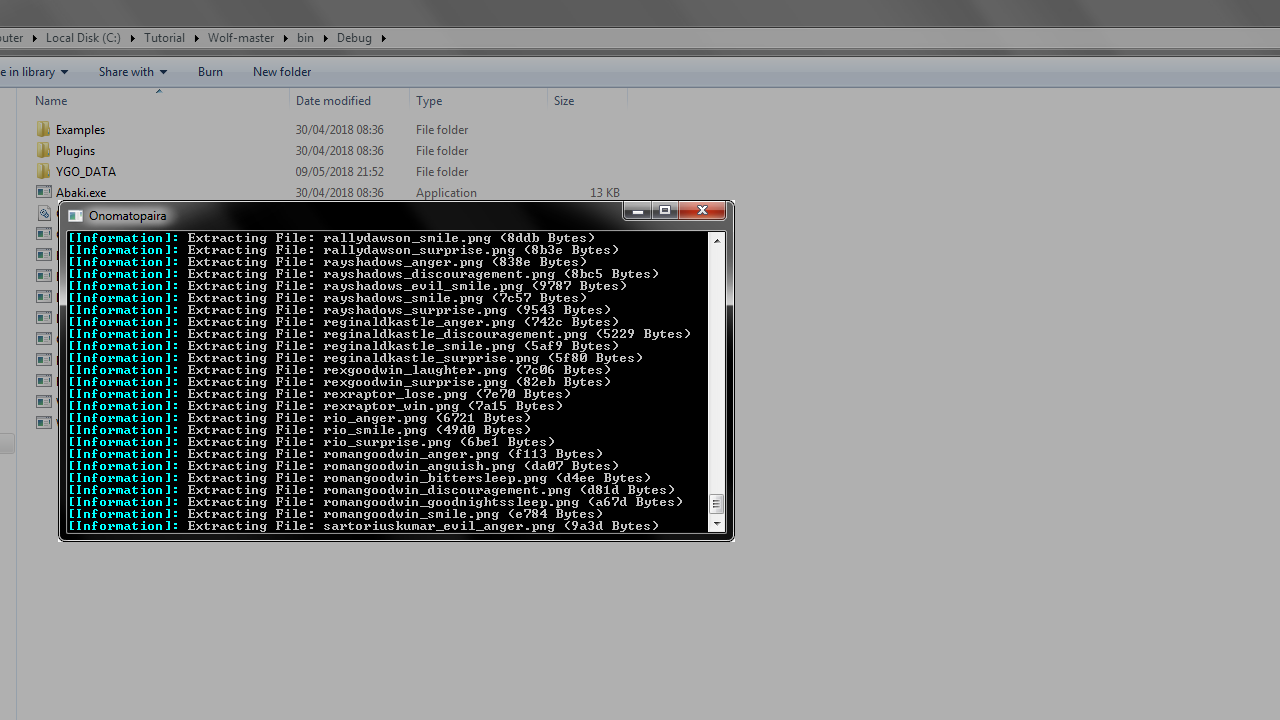
Wait for the program to finish running.
-
Now your extracted game files are in a newly created folder, called
YGO_DATA, in the same place as the Onomatopaira.exe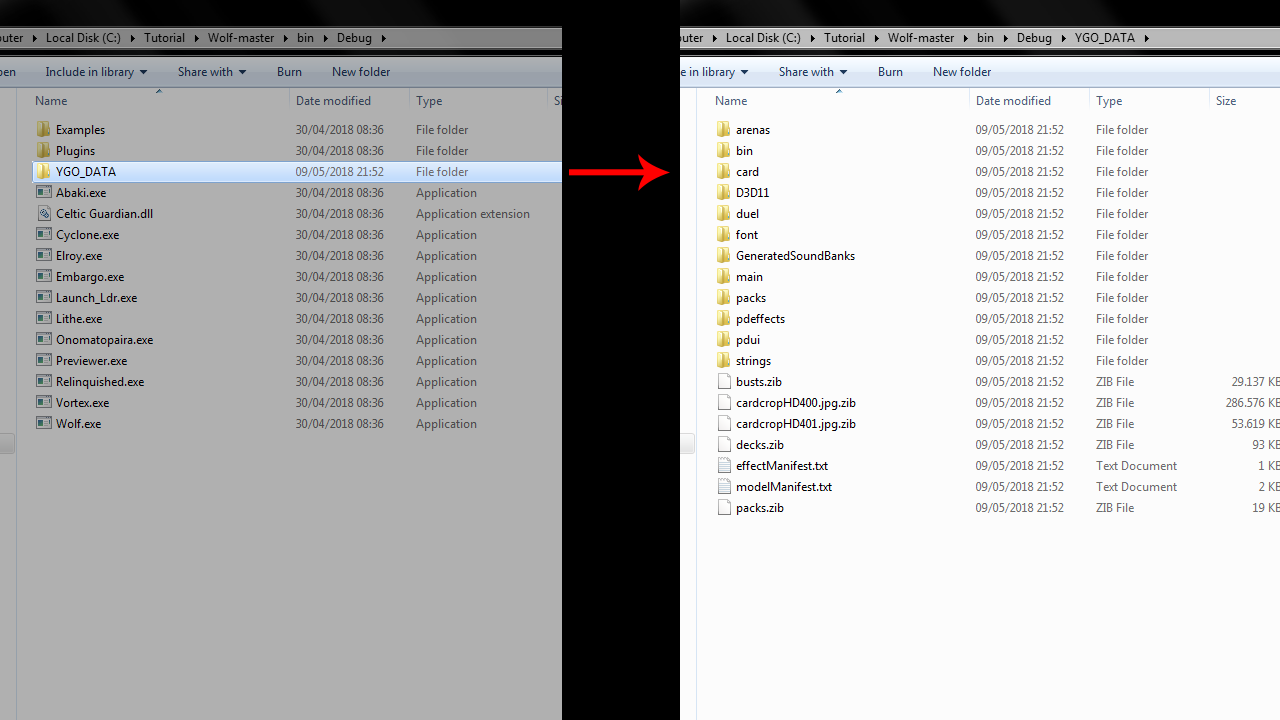
Used to unpack .zib files.
-
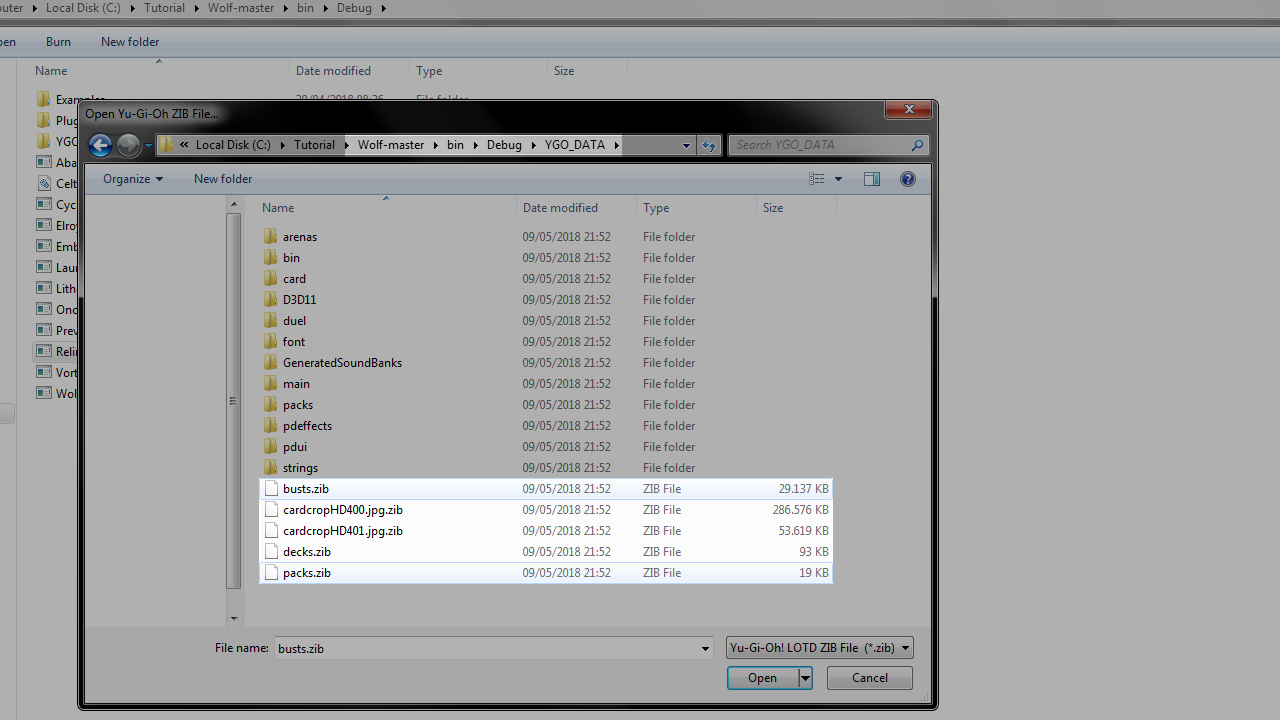
Run Relinquished.exe
-
The .zib files you can unpack are inside the YGO_DATA folder you get after using Onomatopaira.exe
-
There are five (four without the DLC) different .zip files you can unpack. Select the one you want and click Open on the bottom right side of the window.
These are the characters' busts pictures used as avatars for the decks, for both the player and AI. In the campaign they are predetermined by what characters you're playing as and against, but they're still from this file.
After you've opened the .zib file with Relinquished, it will create a folder in the same place as Relinquished.exe, called busts.zib Unpacked.
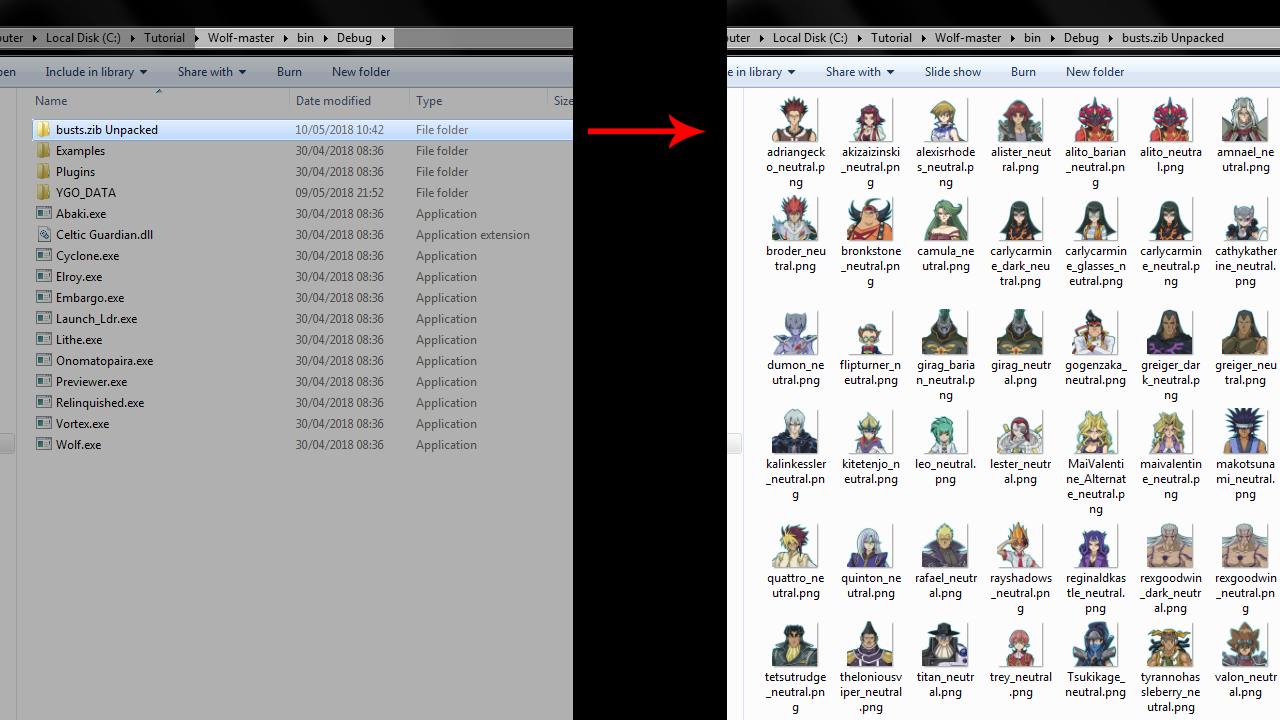
You can edit those images whoever you want, except to change their names. Also I haven't tested changing their original dimensions, so I don't know what the side-effects of that are. Try to always keep them in the same image pixel dimensions as the original to avoid unpredictable results.
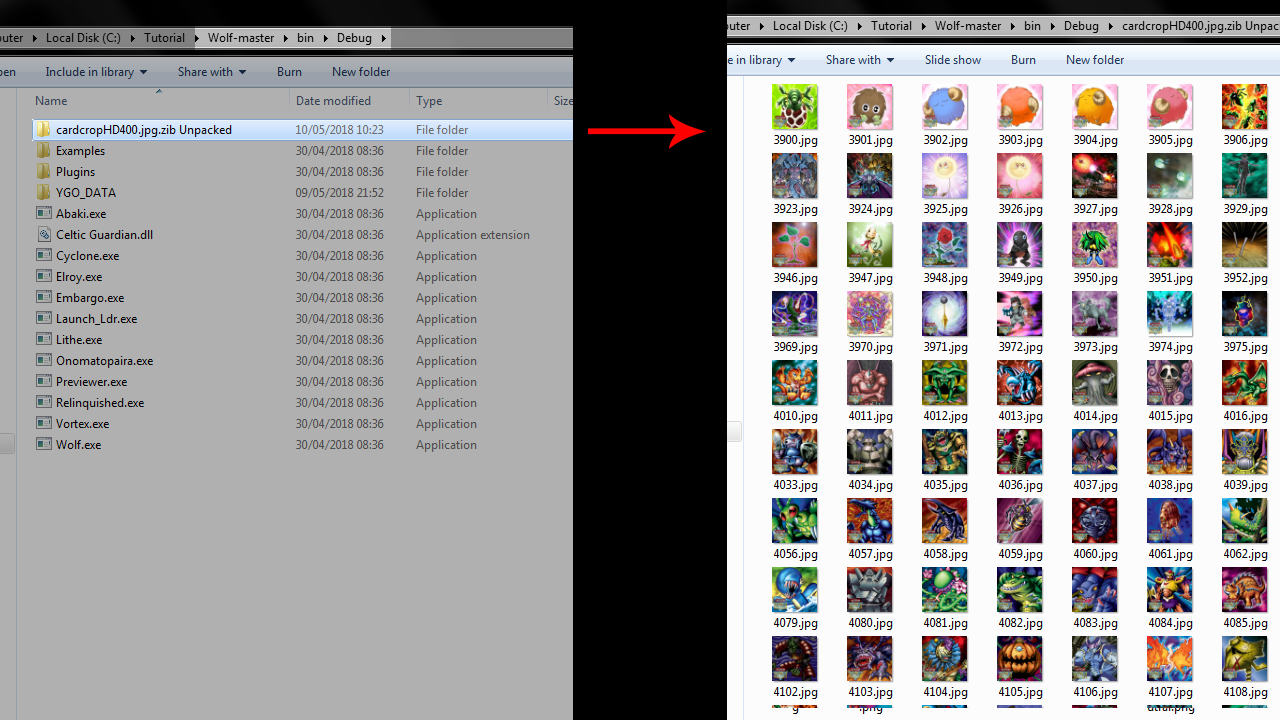
The file cardcropHD400.jpg.zib stores all the images for the card arts used in the main game. cardcropHD401.jpg.zib is for the DLC cards.
After you've opened the .zib file with Relinquished, the program will start to unpack all of the images. The cardcropHD400.jpg.zib file may take a while; wait for it to finish.
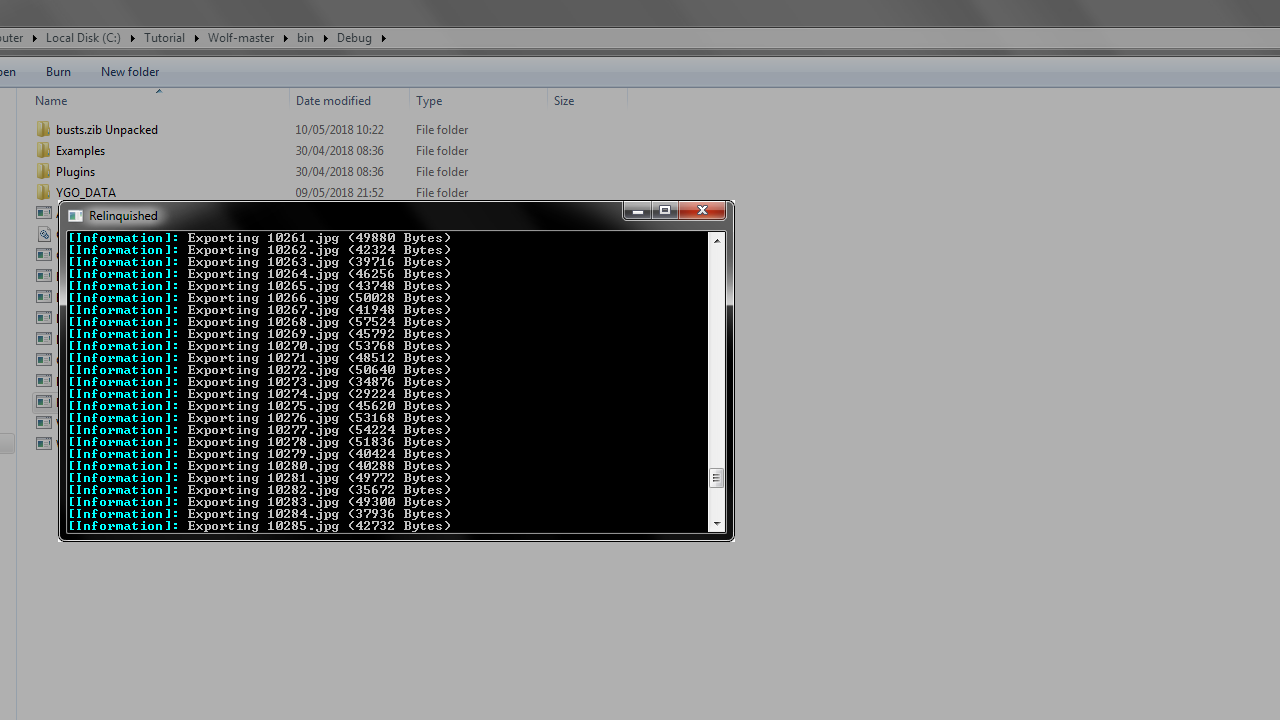
A folder called cardcropHD400.jpg.zib Unpacked will be created in the same place as Relinquished.exe
You can edit those images whoever you want, except to change their names. Also I haven't tested changing their original dimensions, so I don't know what the side-effects of that are. Try to always keep them in the same image pixel dimensions as the original to avoid unpredictable results.
These are the files that store all deck information for all characters in the (probably) whole game.
After you've opened the .zib file with Relinquished, the program will create a folder in the same place as Relinquished.exe, called decks.zib Unpacked.
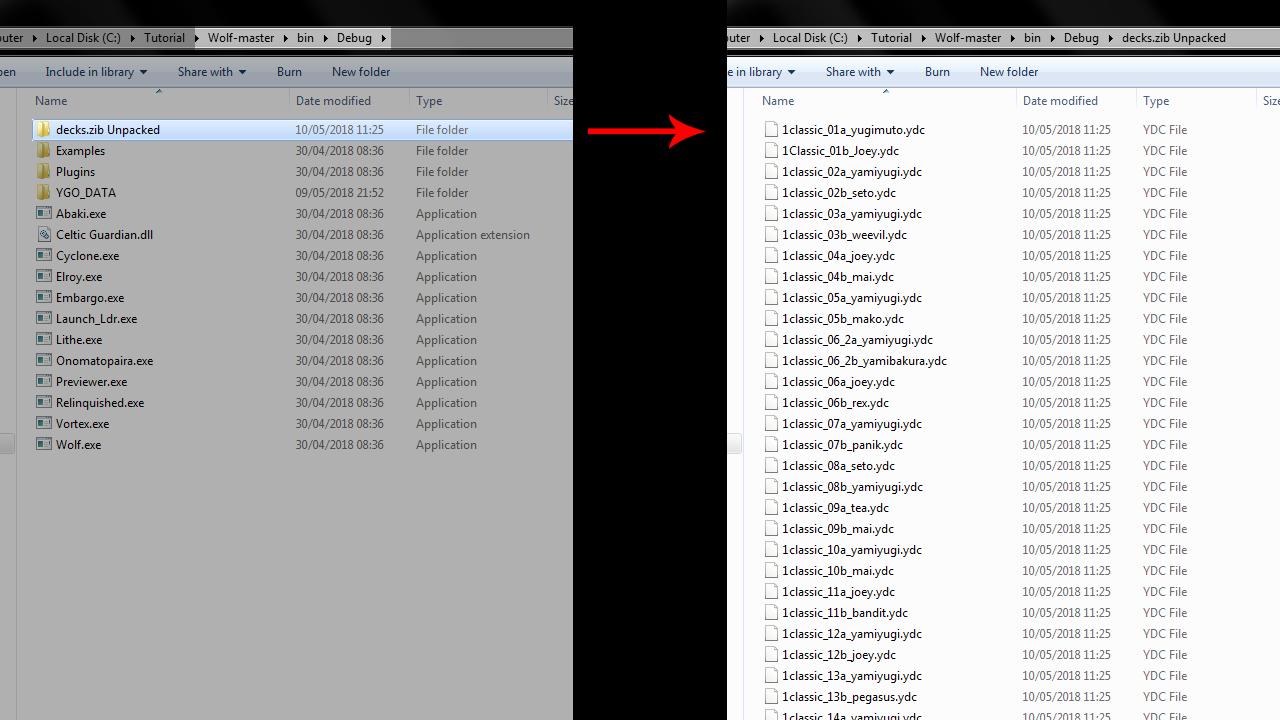
Currently you can't edit those files with the Wolf-tools, but you can (probably) move them around and replace them with one another. More information soon.
These are the files that store all card information relating to the battle/booster pack options.
After you've opened the .zib file with Relinquished, the program will create a folder in the same place as Relinquished.exe, called packs.zib Unpacked.
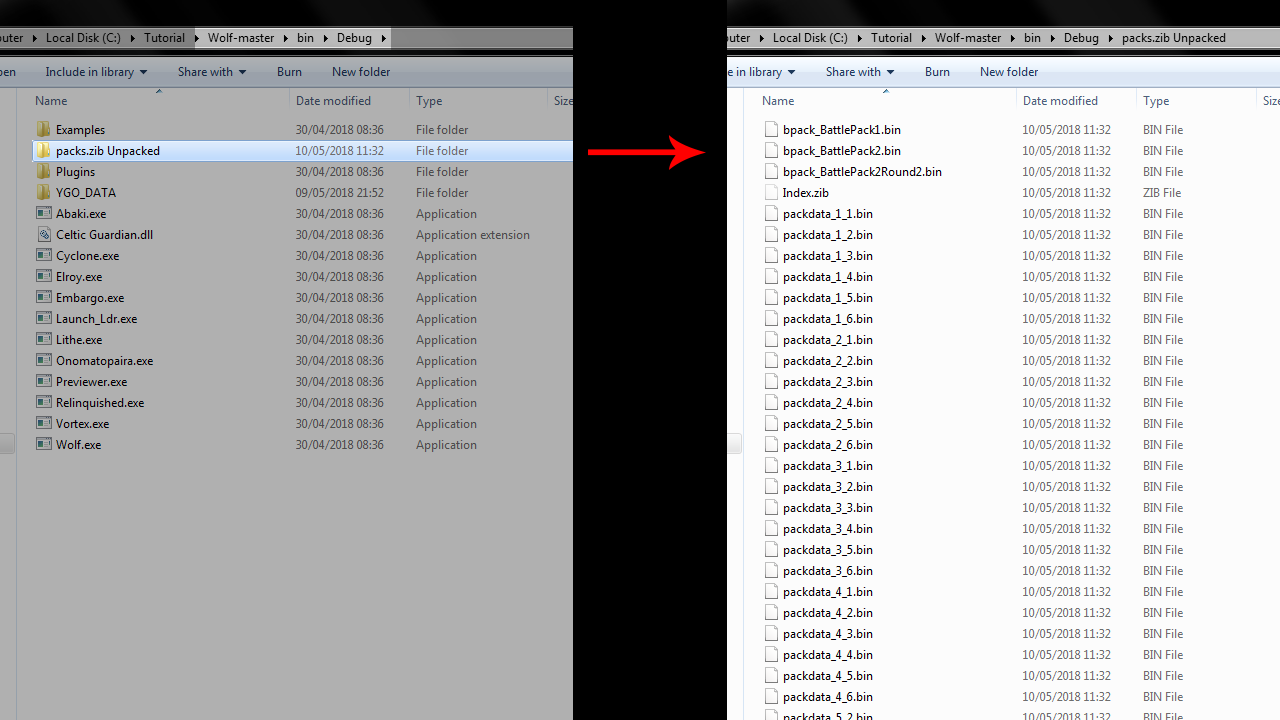
Currently you can't edit those files with the Wolf-tools. Little info is known. Messing with those files is not advised. More information soon.
Used to convert the credits.dat file, which is used to store the game's credits, into a .txt file that can be edited with any text editor. It also converts that .txt file back to .dat format, to be read by the game.
-
Run Lithe.exe
-
Select and open the game's .dat credit file, located at
\Wolf-master\bin\Debug\YGO_DATA\main\ui\credits\after extracting the game's files with Onomatopaira.exe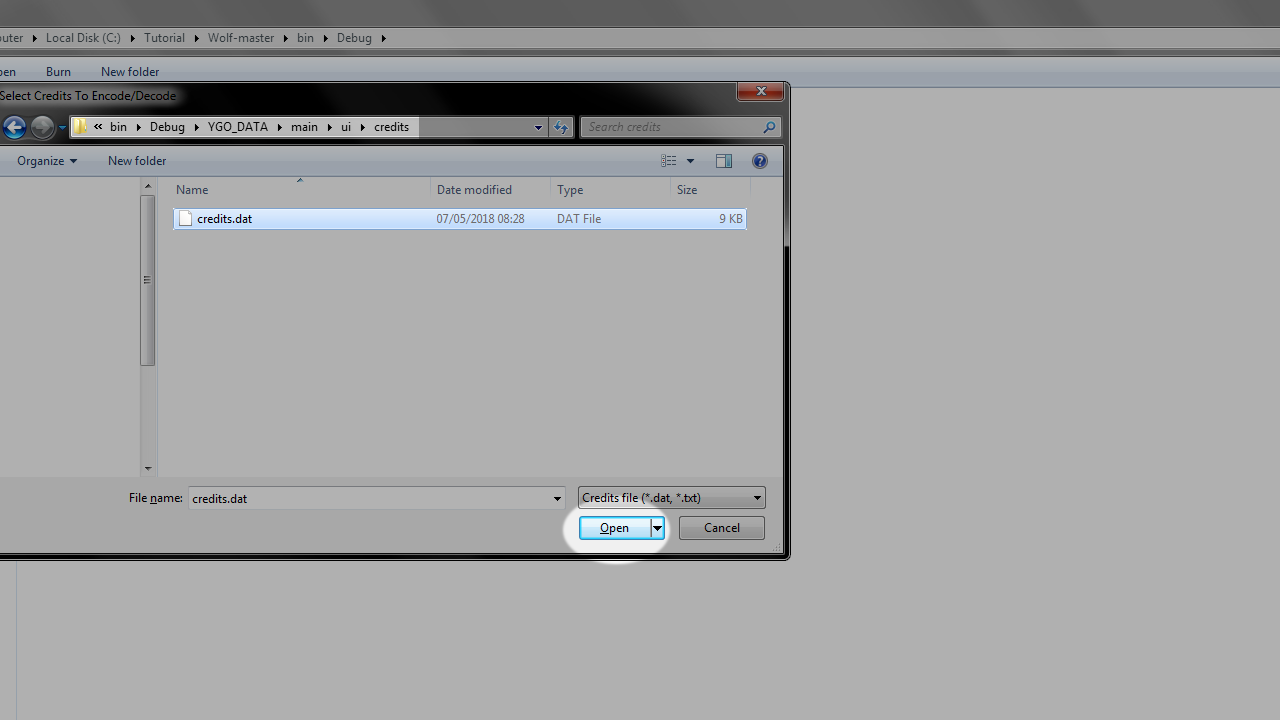
-
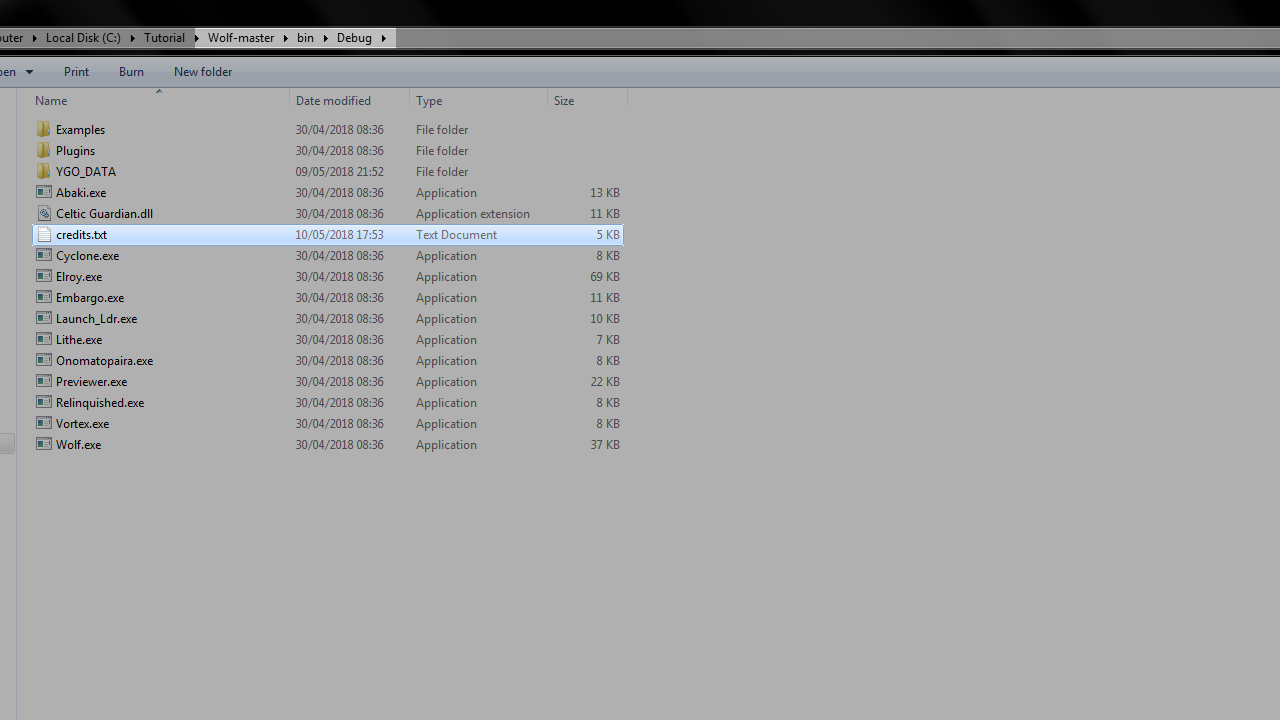
The program will create a .txt file named credits.txt in the same place as Lithe.exe
-
You can edit that .txt file whoever you want, EXCEPT what's between the two * at the end (like wwise_white). Those are references to file names, messing with them without knowing what you're doing will make the game crash on startup.
-
After you're done editing the credits.txt file, open Lithe.exe again, but this time instead of selecting credits**.dat, you'll select the credits**.txt file you just edited.
-
The program will create a new credits.dat file, in the same place as Lithe.exe, that you can then replace (manually) the original file with (at
\Wolf-master\bin\Debug\YGO_DATA\main\ui\credits\).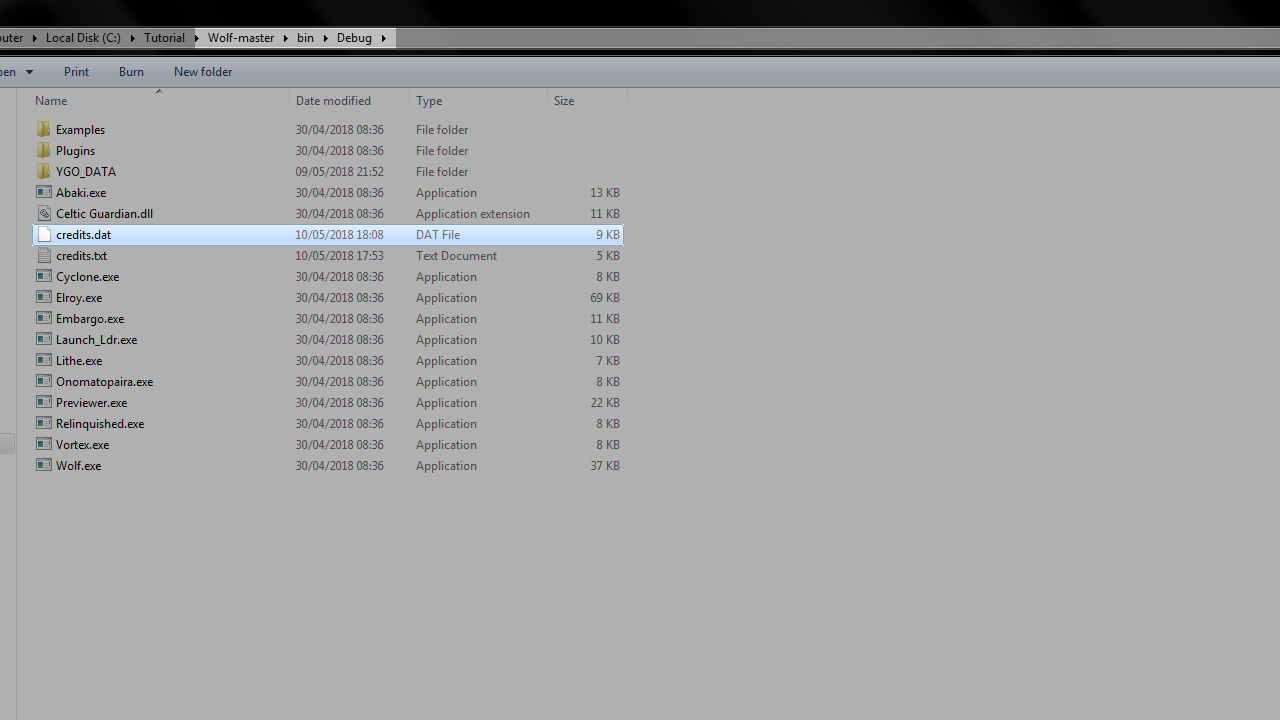
Used to to load, modify and export the game's .BND string files. It has it's own GUI (Graphical User Interface).
-
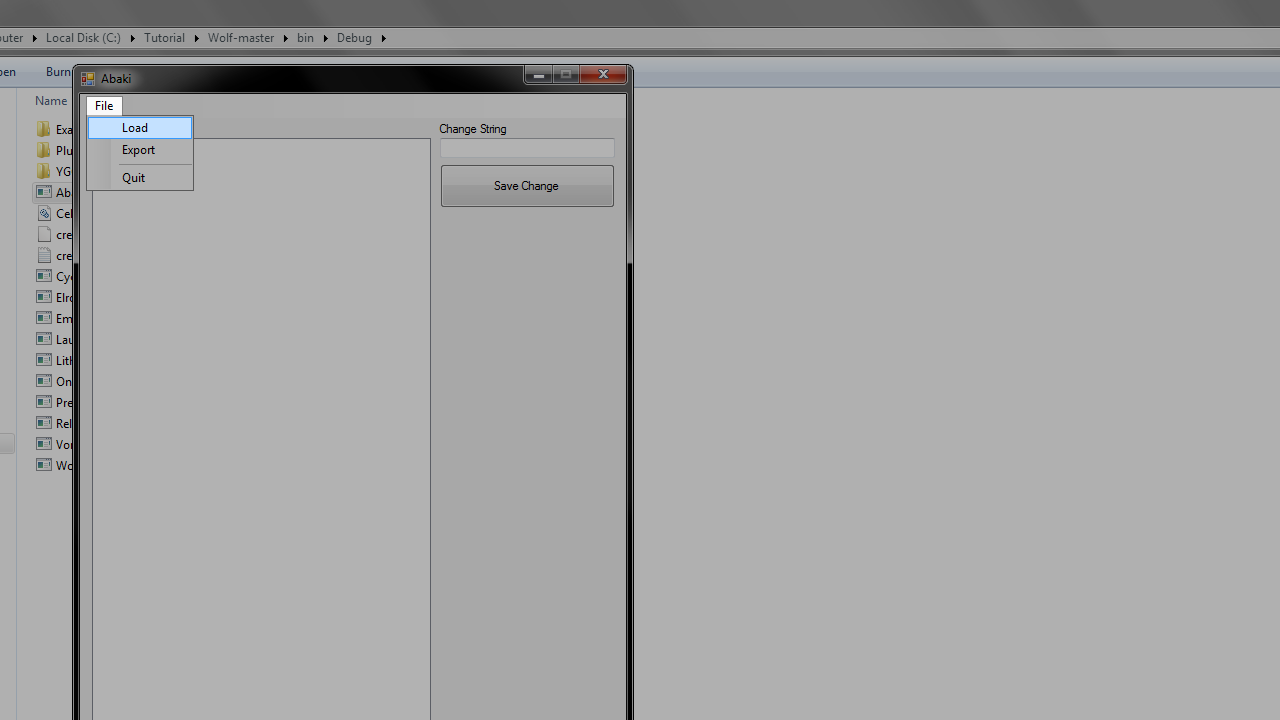
Run Abaki.exe
-
Click File, at the top left of the window, and then Load.
-
The program will ask you to select a file.
-
You can select any of the .BND files located at
\Wolf-master\bin\Debug\YGO_DATA\strings\after you have extracted the game's files with Onomatopaira.exe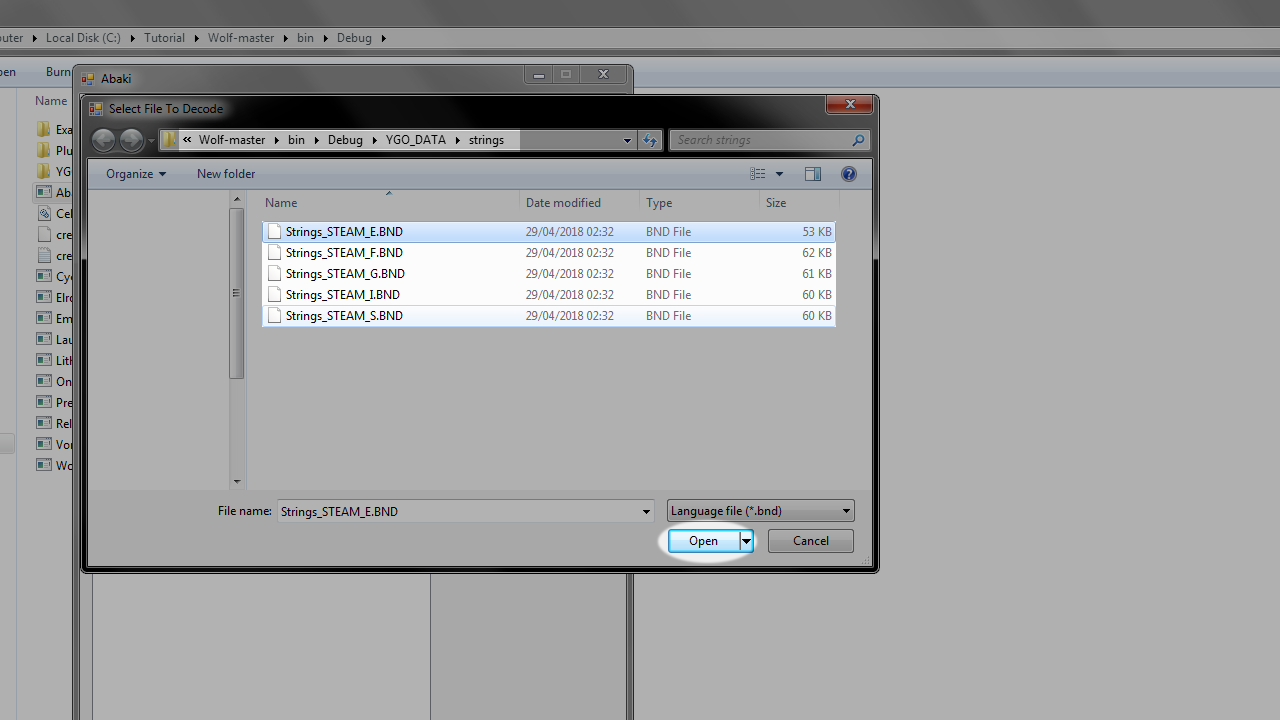
-
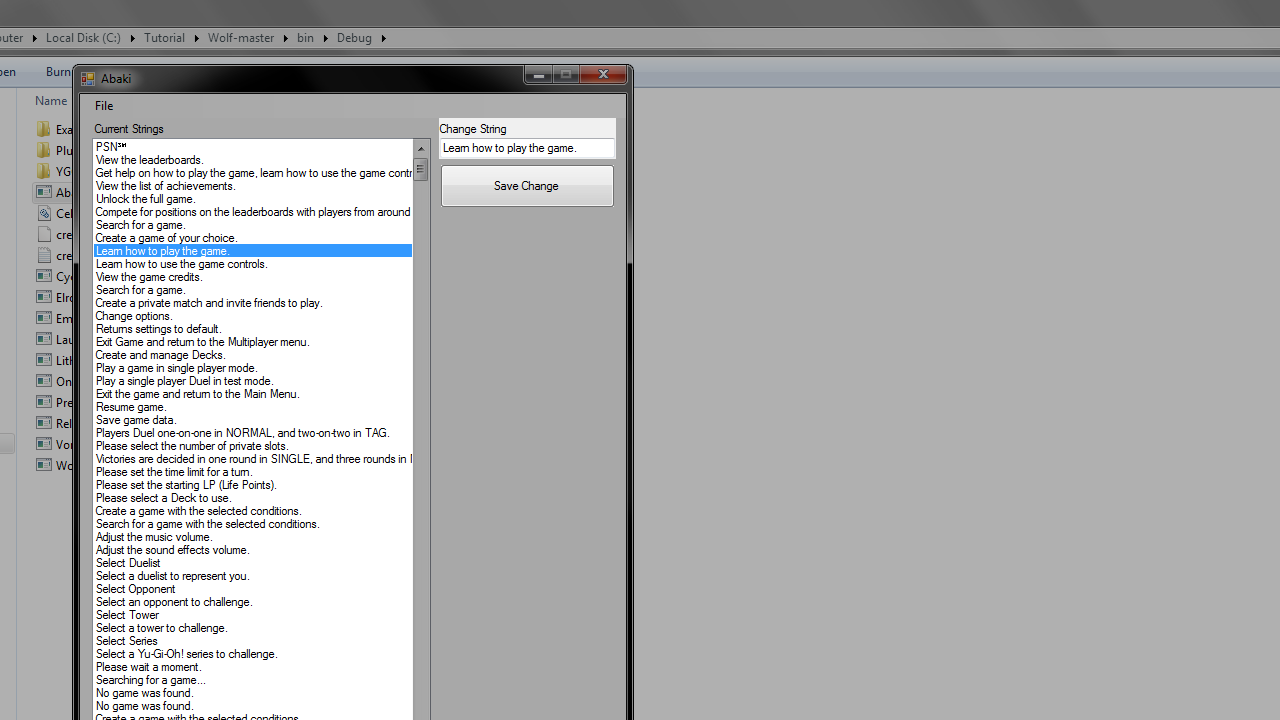
After you've selected a file, all the strings stored in that file will appear under Current Strings inside the program. You can select any of those and modify them whoever you want, under Change Strings. To apply your modifications click the big Save Change button. Many special characters haven't been tested, so be careful adding those.
-
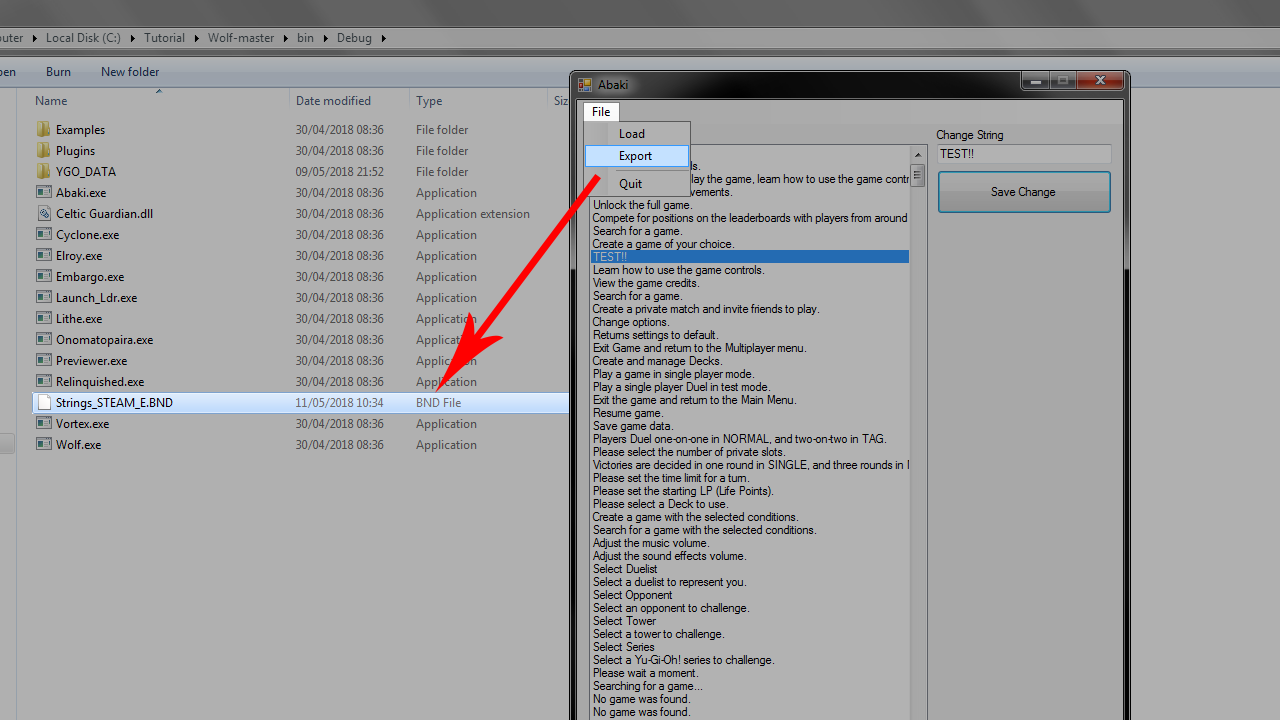
After you've done all the modifying you want click File again, at the top left of the program, and select Export.
-
The program will create a new file, in the same folder as Abaki.exe, with your modified string file that has the same name as the original .BND file you loaded into the program.
-
Now you can manually replace the original file (at
\Wolf-master\bin\Debug\YGO_DATA\strings\) with your modified one.
Used to repack .zib files from their unpacked folders.
-
Run Cyclone.exe
-
Navigate to and select the unpacked
.zib UnpackedFOLDER that was extracted with Relinquished.exe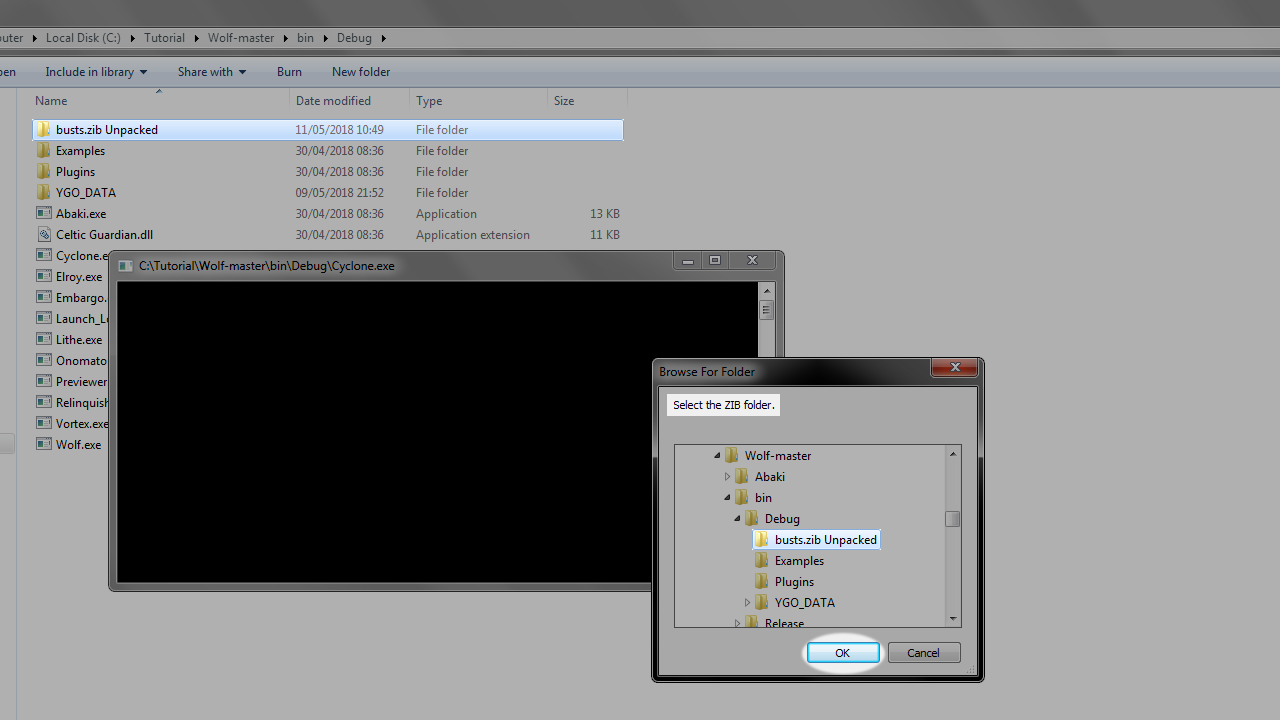
-
When you click OK the program you run. It may take a while to finish or it'll be so fast you won't even notice, it depends on the size of the selected folder. Afterwards it will create a new .zib file, in the same folder as Cyclone.exe, with the original name of the file you extracted the folder from (as long as you didn't mess with that folder's name, which you shouldn't have).
-
Now you can manually replace the original file (at
\Wolf-master\bin\Debug\YGO_DATA\) with your modified version.
Used to repack the extracted YGO_DATA folder into both YGO_DATA**.dat** and YGO_DATA**.toc** files to be read by the game.
-
Run Vortex.exe
-
Navigate to and select the
YGO_DATAfolder inside\Wolf-master\bin\Debug\that was created with Onomatopaira.exe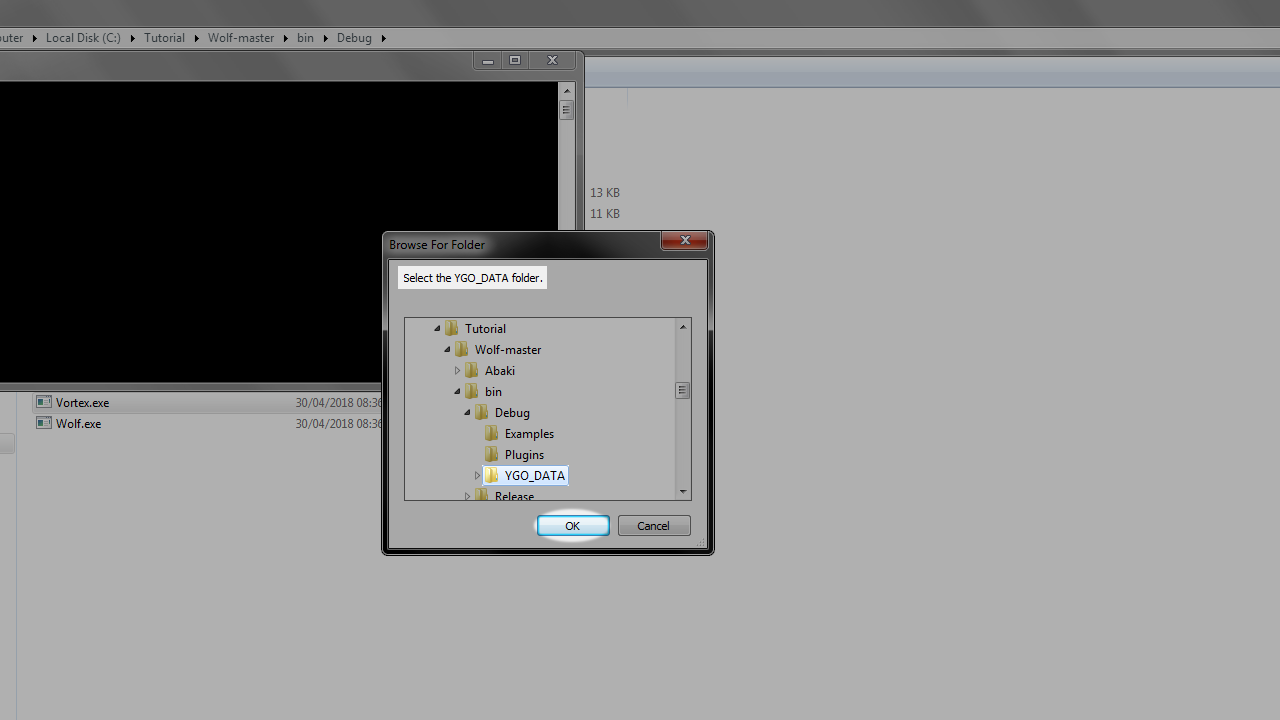
2.5 If your game is not setup on Steam properly the program will now ask you for your game's .exe. Just select YuGiOh.exe inside the your game's install directory. If the program doesn't ask you for this, it's normal, it just means it was able detect the game in your Steam's games folder as expected.
-
Wait for the program to finish running (may take a while depending on how much modification you made to the original files and their sizes).
-
The program will then create two new files inside
\Wolf-master\bin\Debug\, YGO_DATA.dat and YGO_DATA.toc.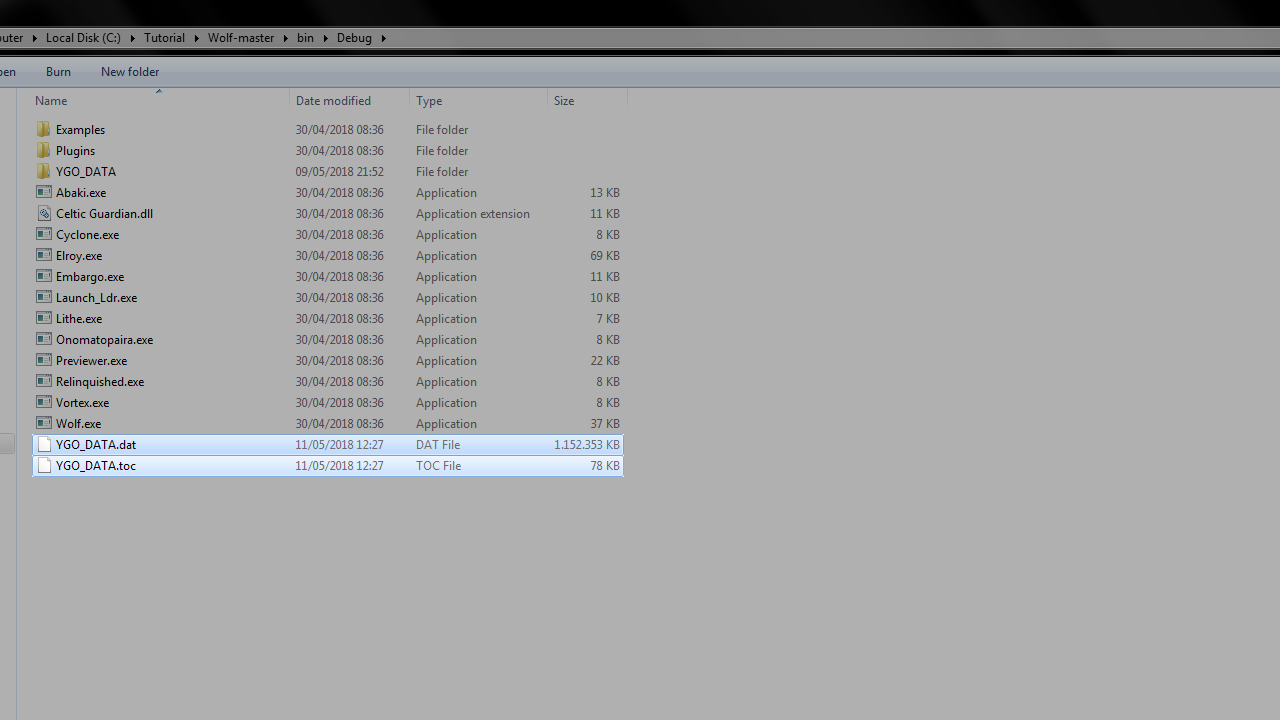
-
To run the game with these modified files you need to copy/move BOTH of them into your game's root folder, the same place with YuGiOh.exe (usually
Steam\steamapps\common\Yu-Gi-Oh! Legacy of the Duelist\), and overwrite the two files with the same name already there(make a backup of them first!).
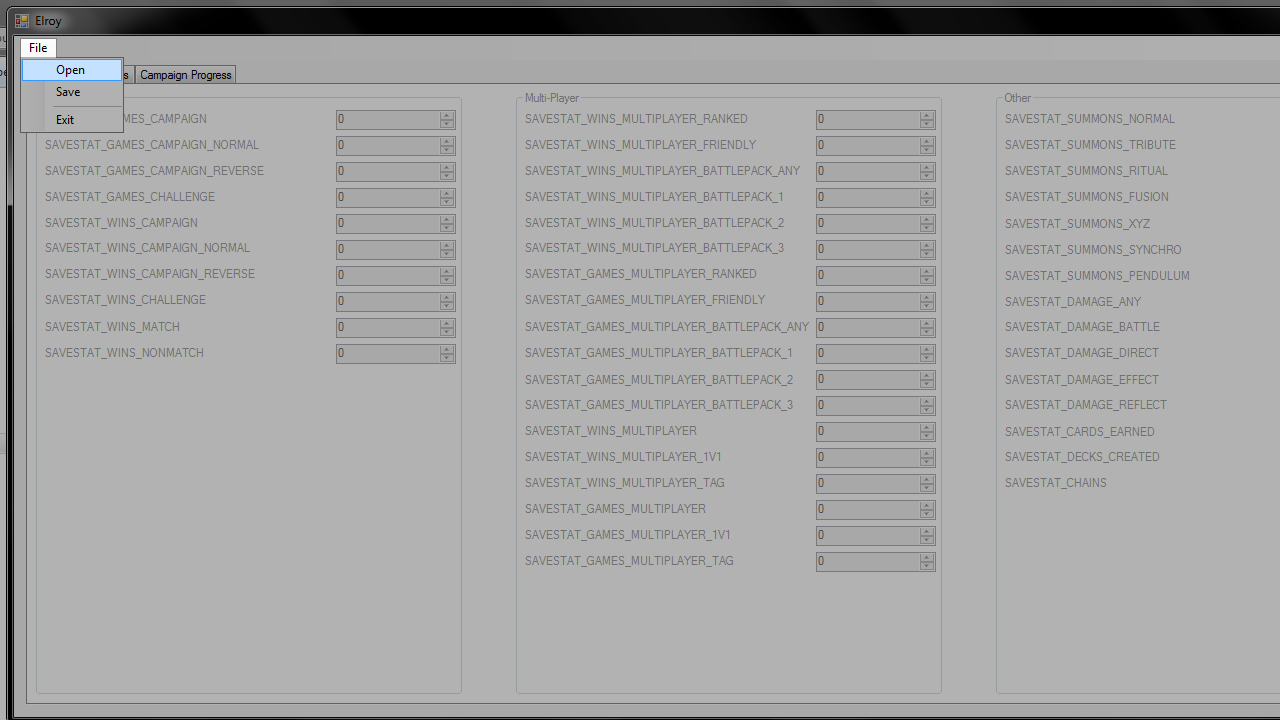
Used to load, edit and save the game's save file (savegame.dat). It has it's own GUI (Graphical User Interface). It can import, export and overwrite your Decks, modify your Campaign progress and edit some other stats that are stored in your game's save file. Make sure to BACKUP your save file before you even LOAD it into the program, because if you exit the program without saving a loaded file it WILL BREAK THAT SAVE FILE and you'll lose your data.
-
Run Elroy.exe
-
When you first open the program it won't let you do anything until you load up a save file first. Click File at the top left and then Open.
-
Navigate to your save file's location (usually
\Steam\userdata\<Your Steam ID>\480650\remote\) and select the savegame.dat file.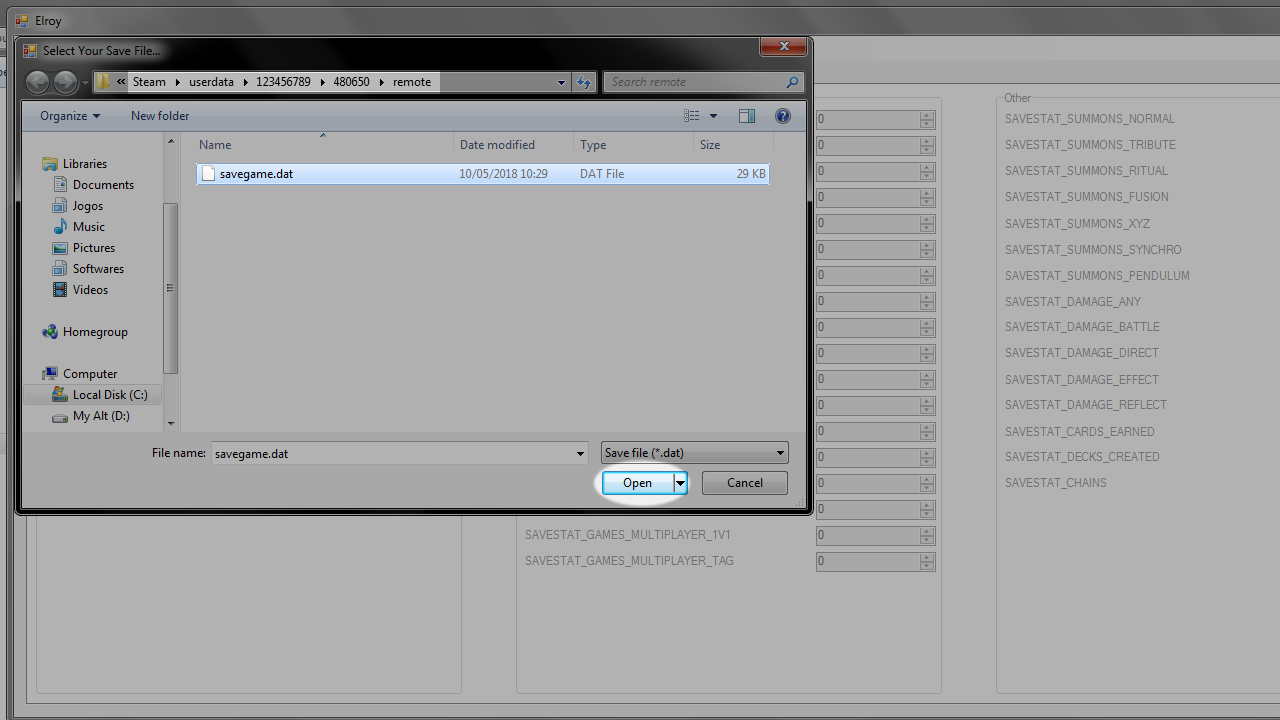
-
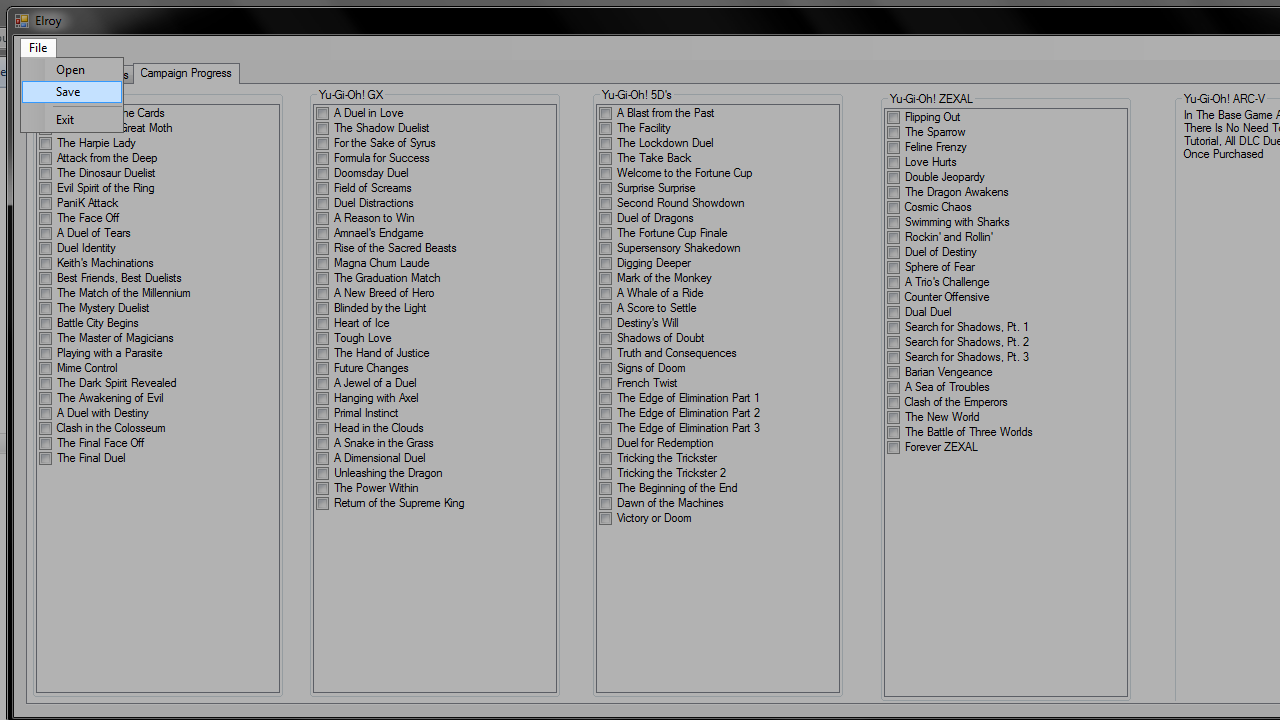
Now you can modify whatever data the program will let you, including your decks and campaign progress. The GUI should be fairly simple and self-explanatory (As the program's features are expanded and the need for more explanation rises, this tutorial will be updated as such).
-
Click File and then Save to save your edited save file. The program will save the modifications directly to your original save file, so you don't have to do anything else to apply them.
WARNING! You have to save before exiting the program every time you load a save, even if you don't make any modifications, or you will break that save file! Please make a backup of your save file before even thinking of opening this program.
Used to load plugins/DLL files to modify game behavior.
The Wolf-tools comes with a few plugins, currently. These are:
-
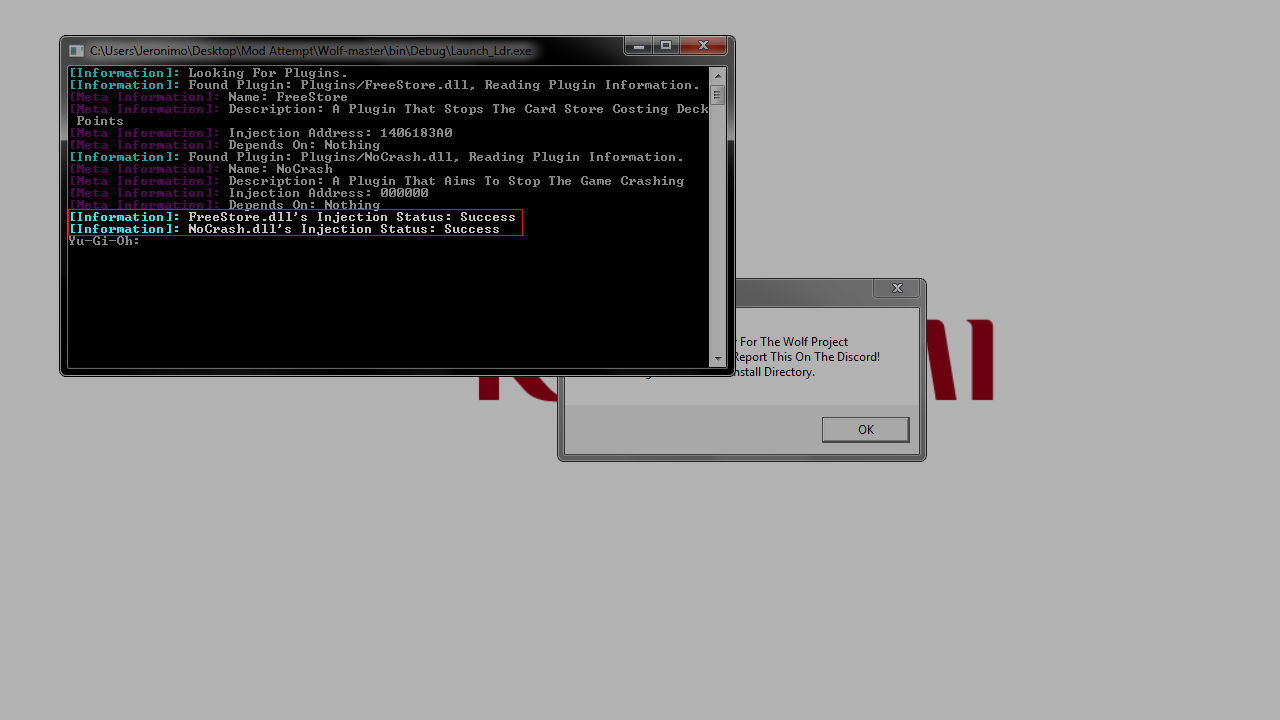
FreeStore.dll It makes you not lose any Duel Points when purchasing at the Card Shop.
-
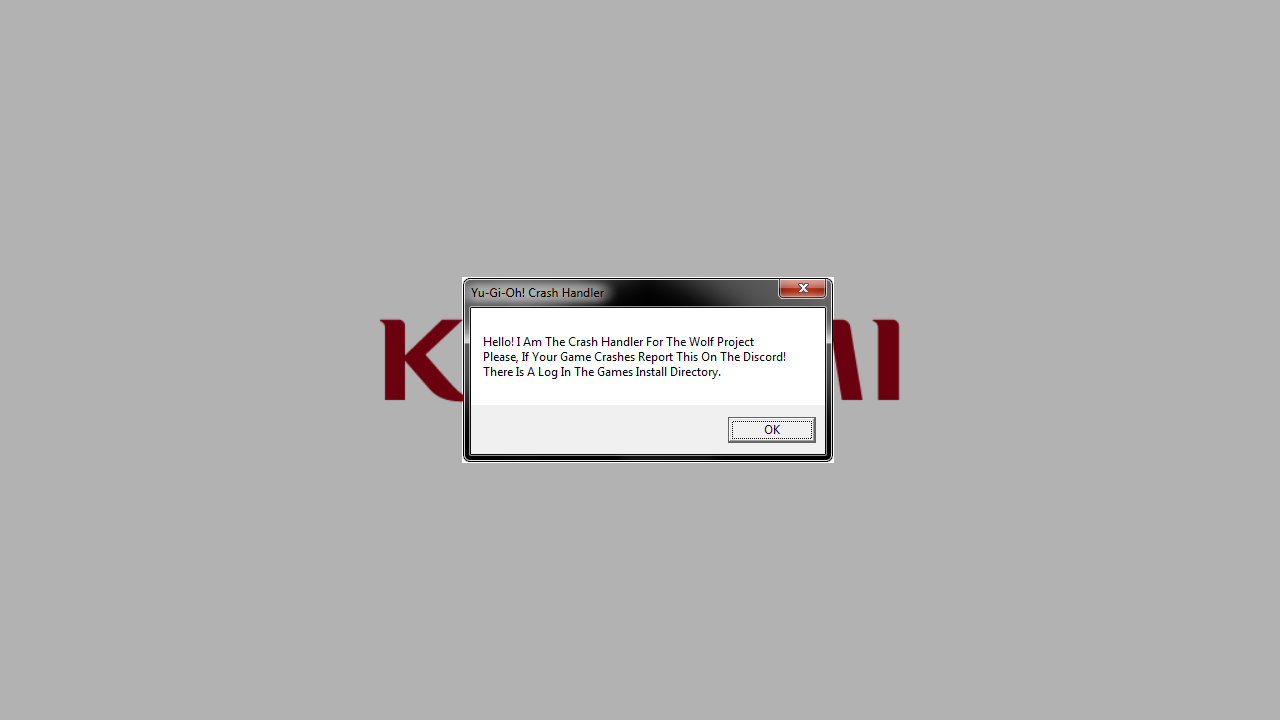
NoCrash.dll A Plugin that aims to stop the game crashing.
-
Put any .DLL you want to inject into the game in the
Pluginsfolder (\Wolf-master\bin\Debug\Plugins\)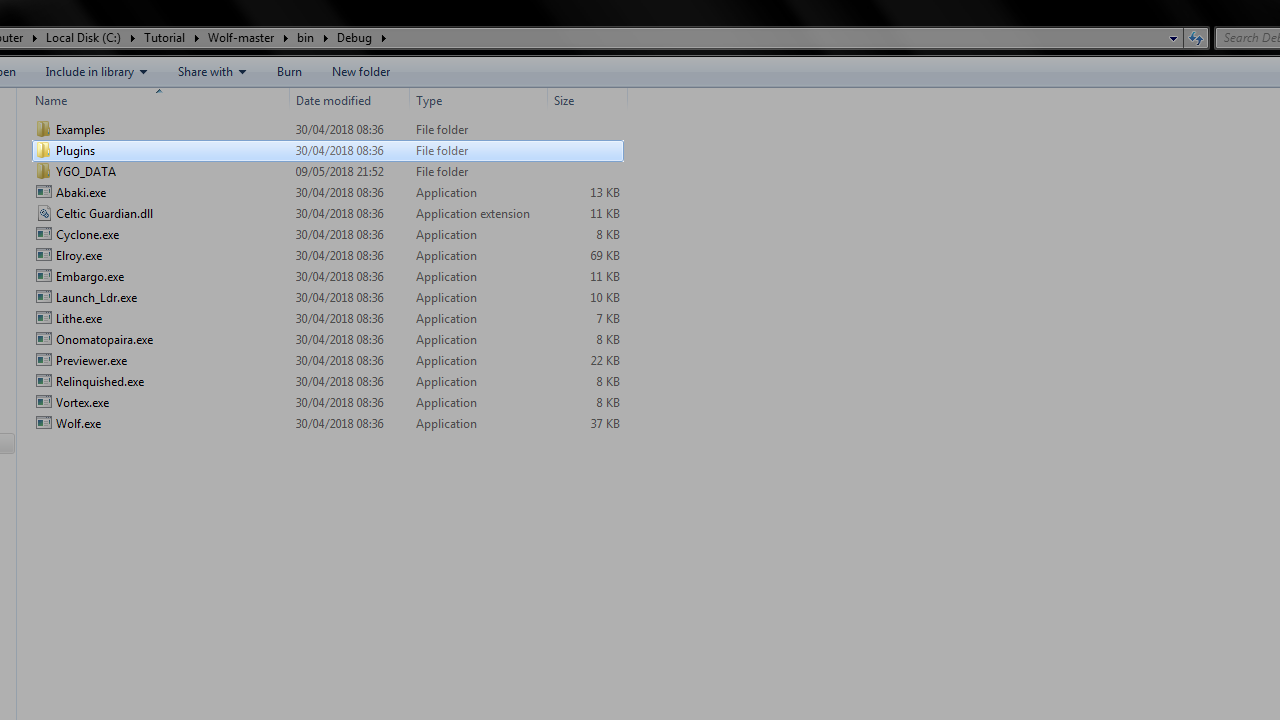
-
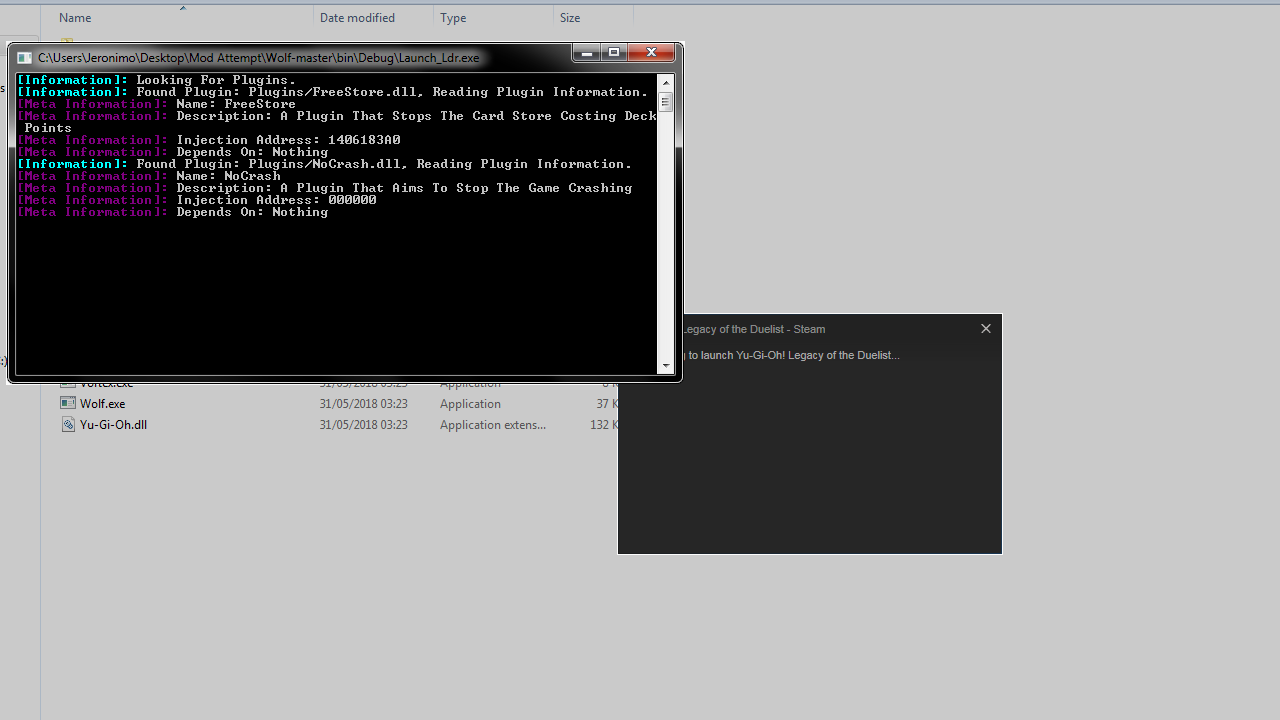
Run Launch_Ldr.exe and wait for the game to launch.
-
The program's window will open and your game will be launched automatically.
-
You can check the program's window to see if the DLL files were injected successfully.
-
This is the NoCrash.dll plugin. Click Ok to continue with the game's launch.
dll injector, this is mainly used for Johnathon/Arefu to test DLLs before letting Launch_LDR load them, or if someone wants to inject their own DLL once the game is running. This is likely to be either removed or replaced with a parameter in Launch_LDR at a later date so don't depend on this program.
Card editor and viewer. (This program is currently WIP and you can't edit anything yet. Many features are missing, like the ability to open DLC cards)
-
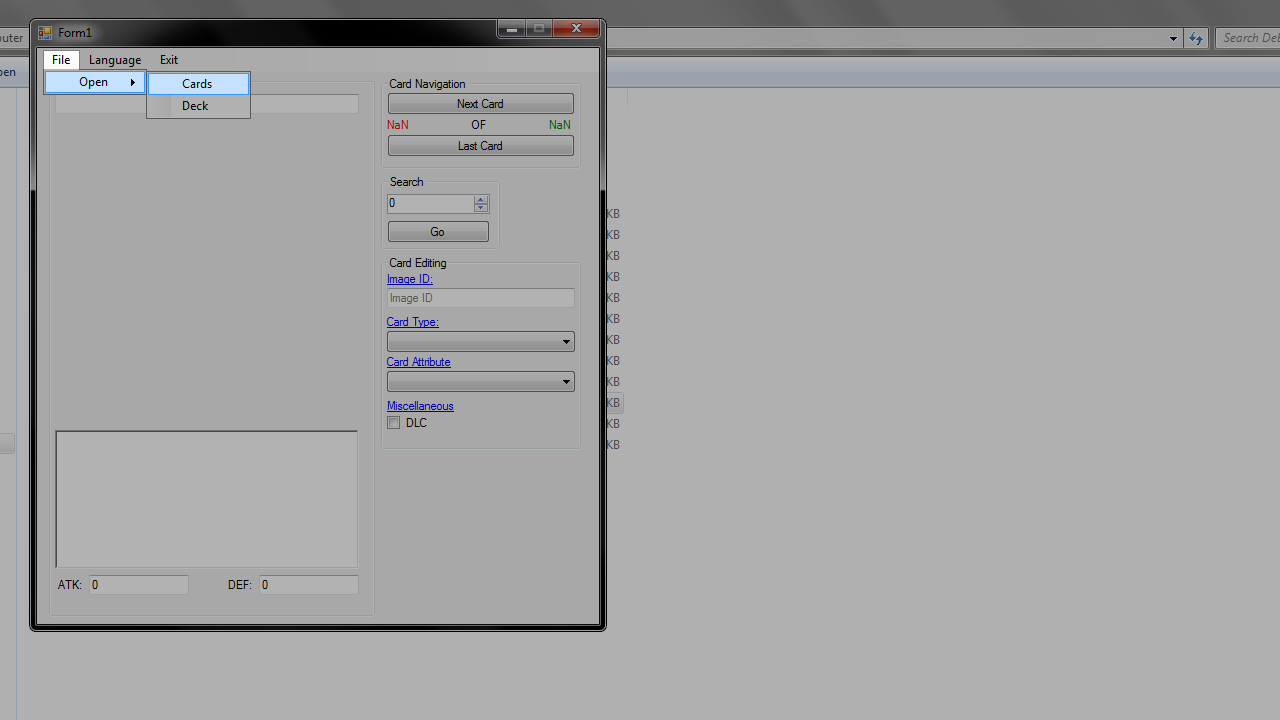
Run Previewer.exe
-
Click File, in the top left, then Open and select Cards.
-
Select the card arts folder that was extracted with Relinquished.exe from a .zib file (it currently doesn't support DLC, so choose the
cardcropHD400folder and not thecardcropHD401one).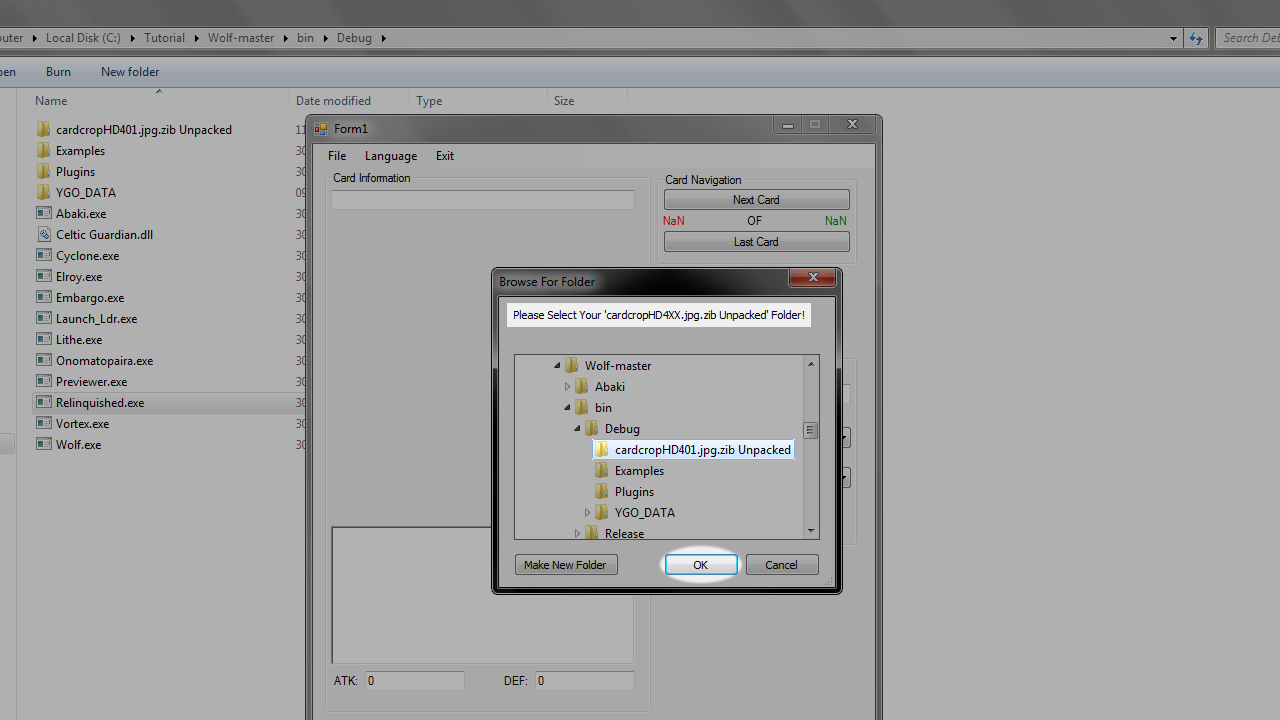
-
Then it will ask you for a specific File Indx file. Navigate to your
\Wolf-master\bin\Debug\YGO_DATA\bin\folder and select the CARD_Indx_#.bin file. # is where your language is set. -
Now you can view all non-DLC cards in the game and their stats.
This will let you interact with all the other programs through a Graphical User Interface (GUI). Work in Progress. This tutorial will not likely update as the program matures as it's interface is striving to be as simple as possible.
A tool to easily customize all card artwork from the game.
-
Press the green "Clone or download" button on this repository and unzip in to a local folder.

-
Download the cards.cdb from the ygopro2 project and save it to another local folder.
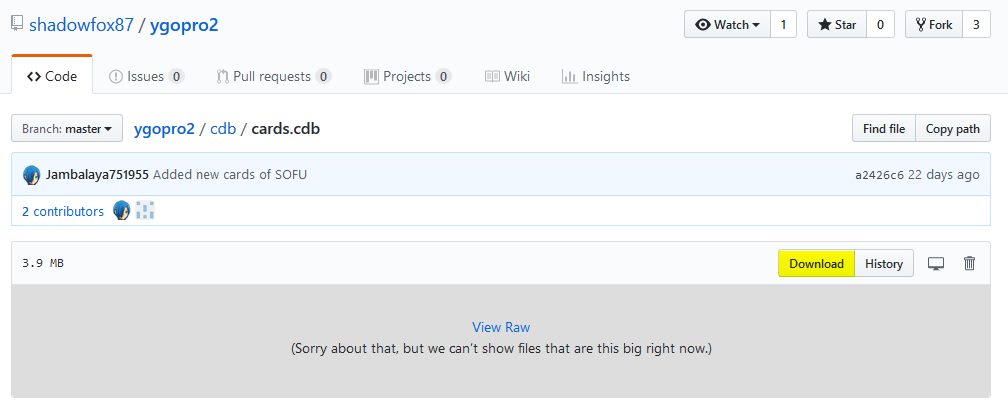
-
Extract the card images from the game with Relinquished
-
Run Blue Eyes White Dragon.exe
-
Select the location of your Yu-Gi-Oh! Legacy of the Duelist folder when prompted.
-
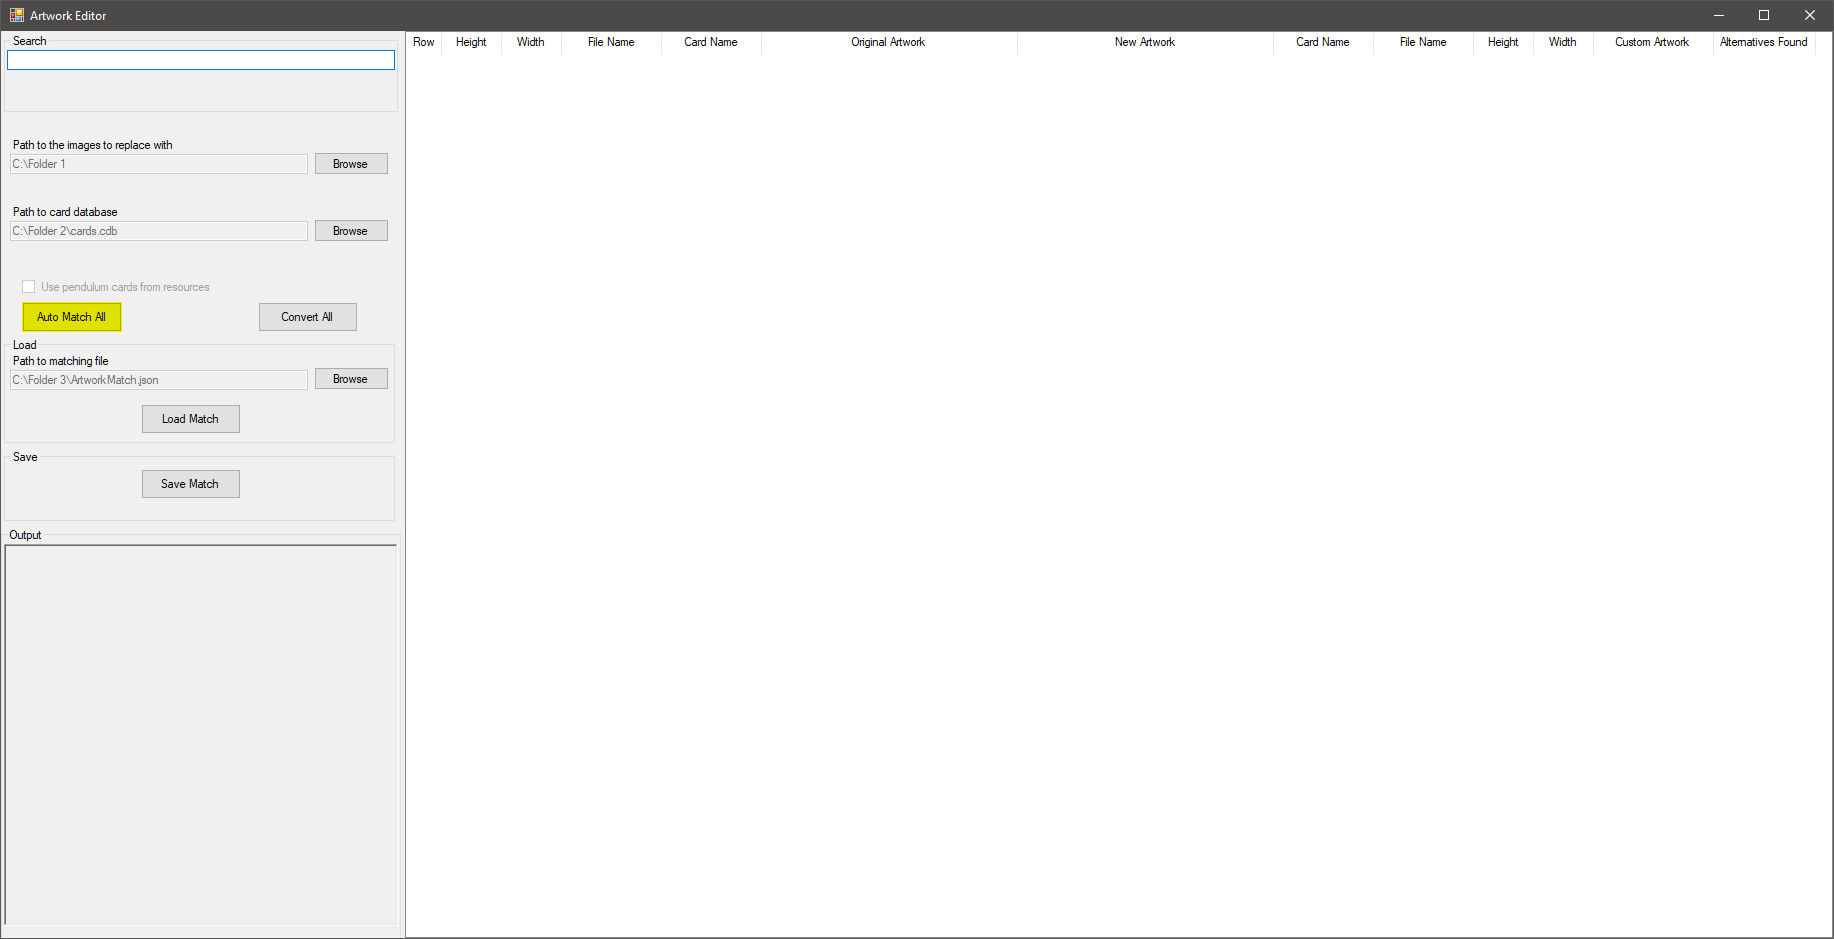
Browse for the 2 folders from step 1 and 2
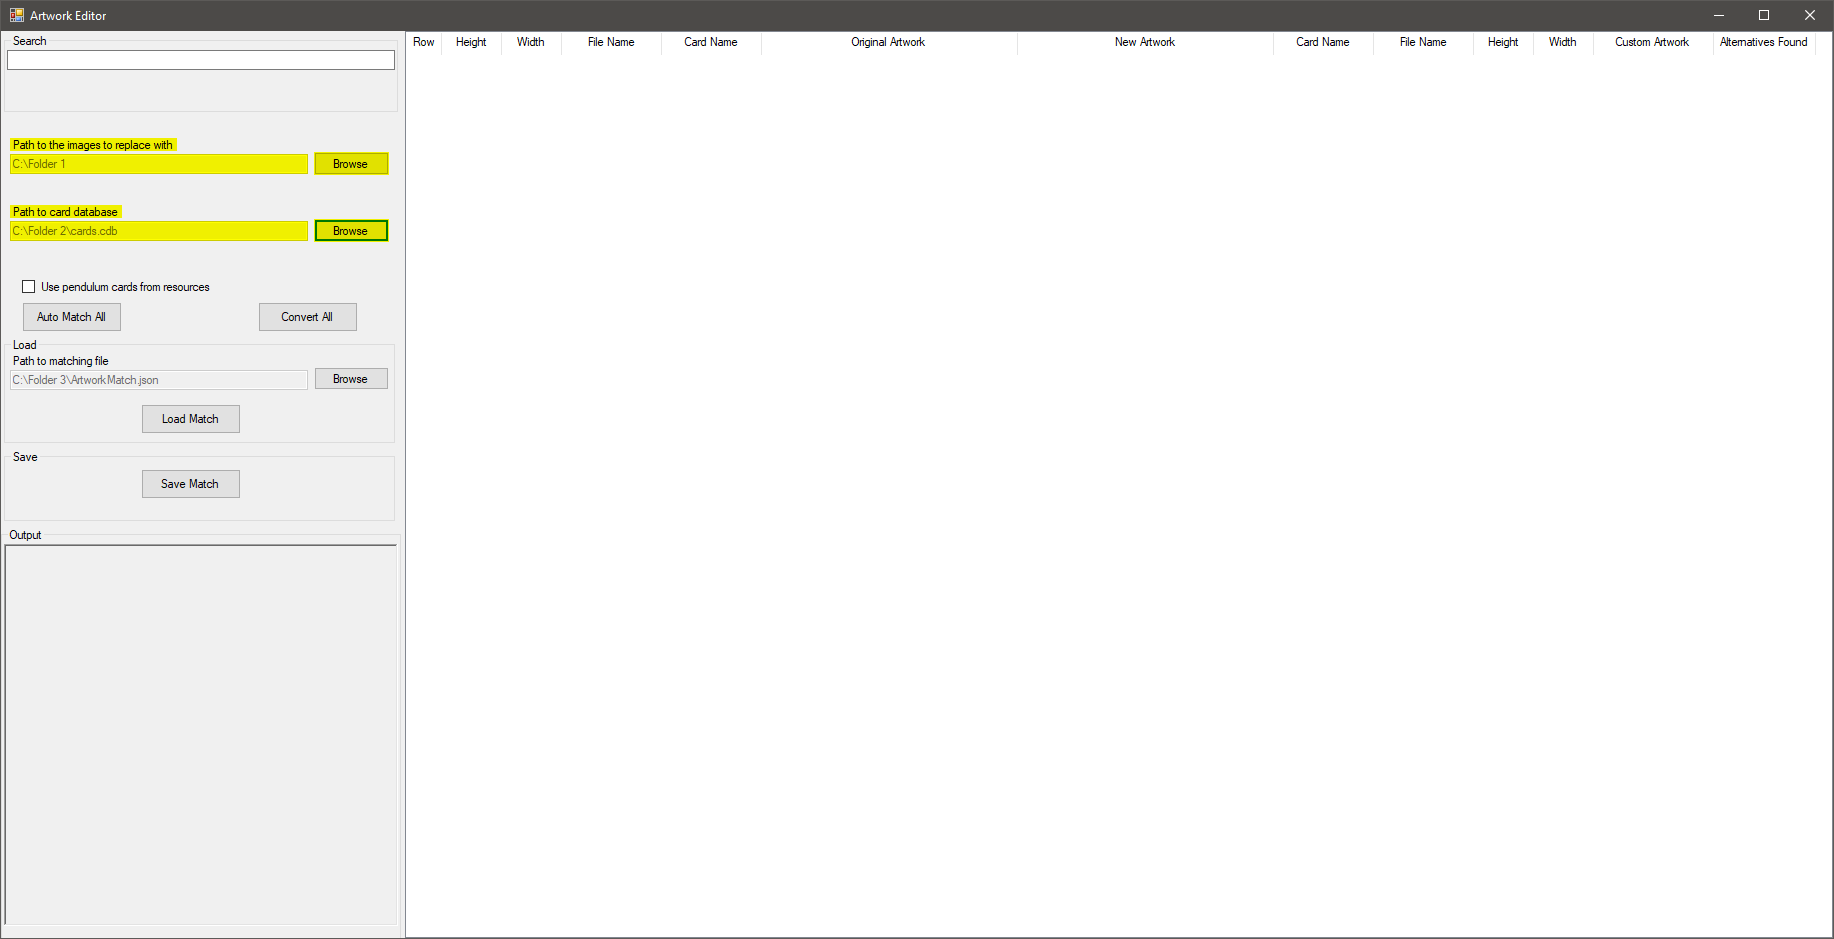
-
Press Auto Match All and let it sit for a while. It will now match every card from the game with its counterpart from the ygopro2 image repository you just downloaded.
It does this based on the name of the card and looks it up in the card database you also downloaded.
The Output window should tell you the current progress of the process.
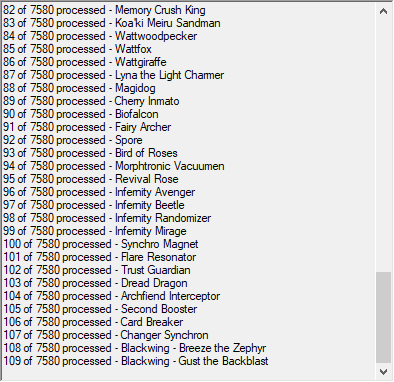
-
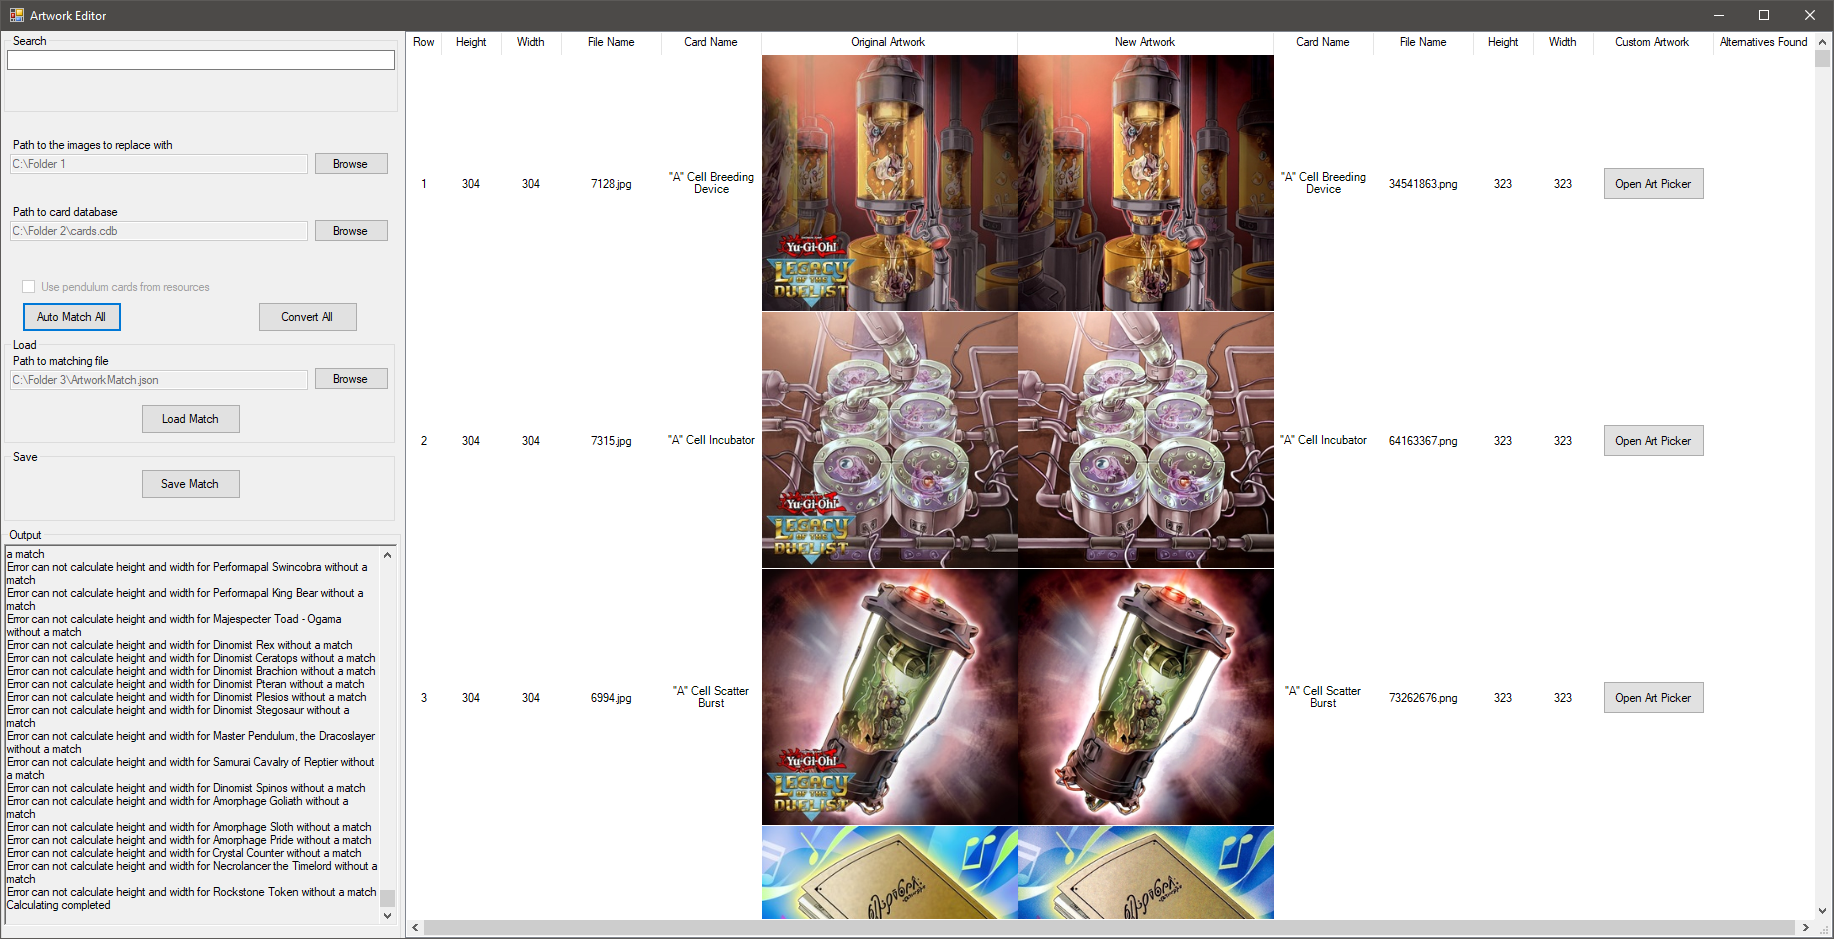
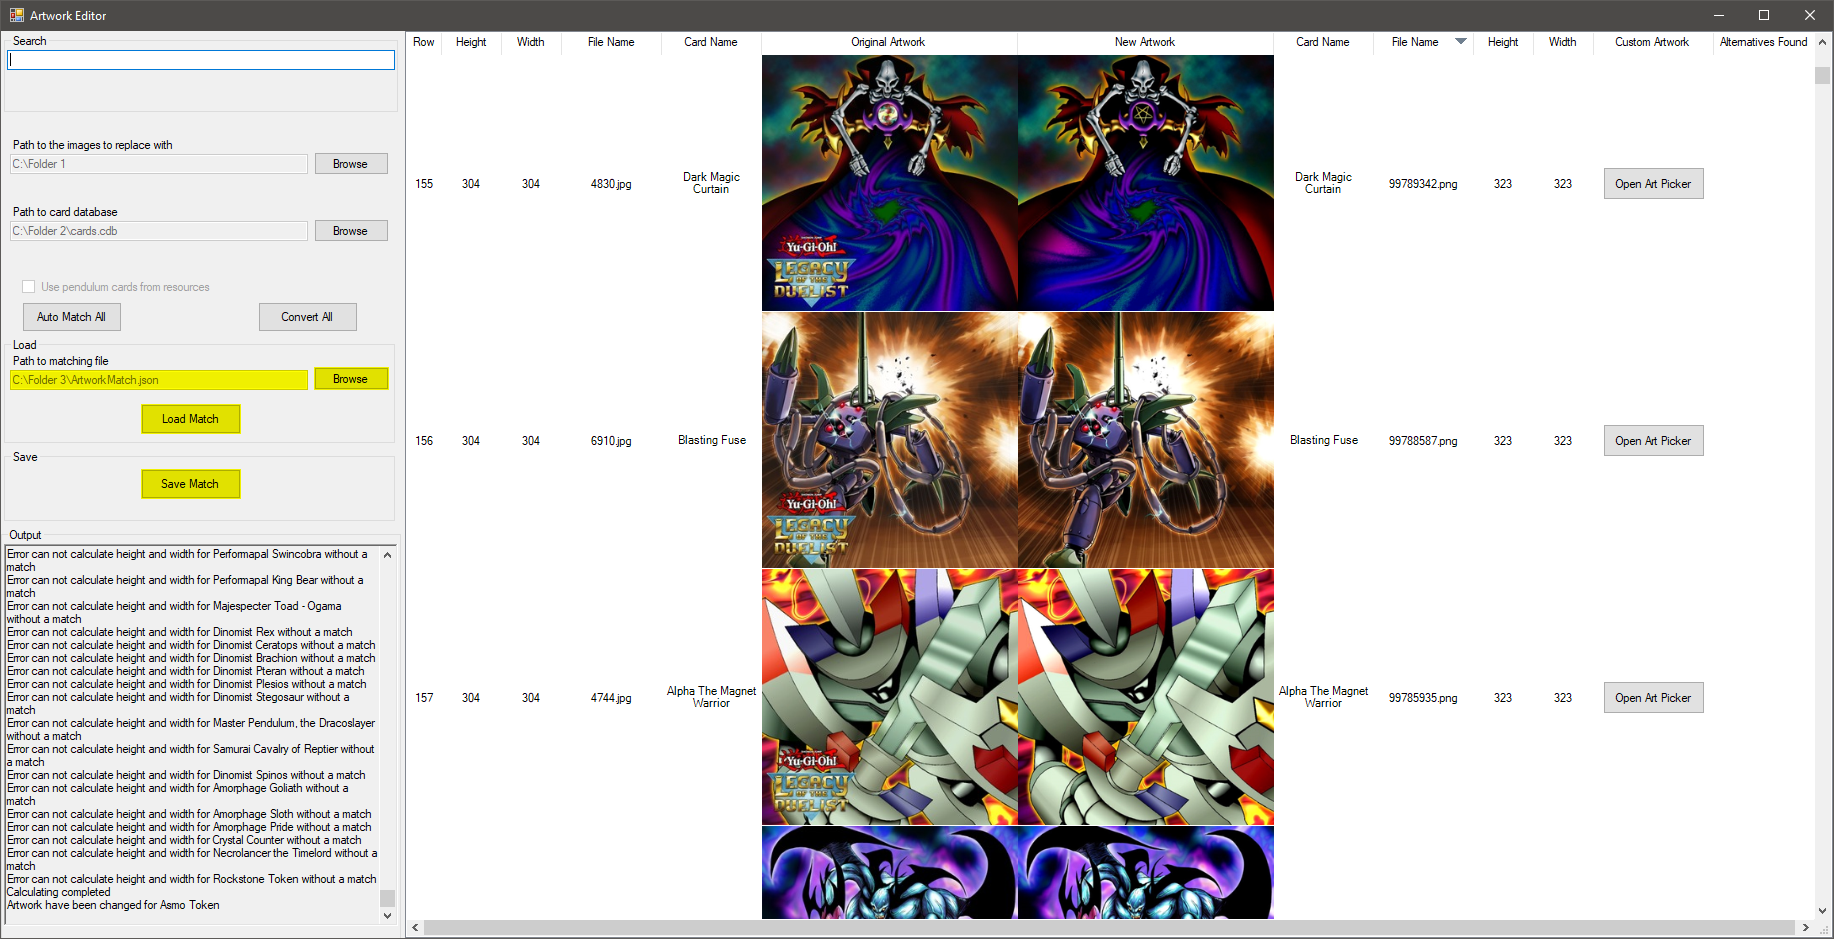
When it is done doing its thing you should end up with something looking like this:
-
You can now scroll through all of the artwork effortlessly and see what the auto match have chosen as the image. If you do not agree with the specific match:
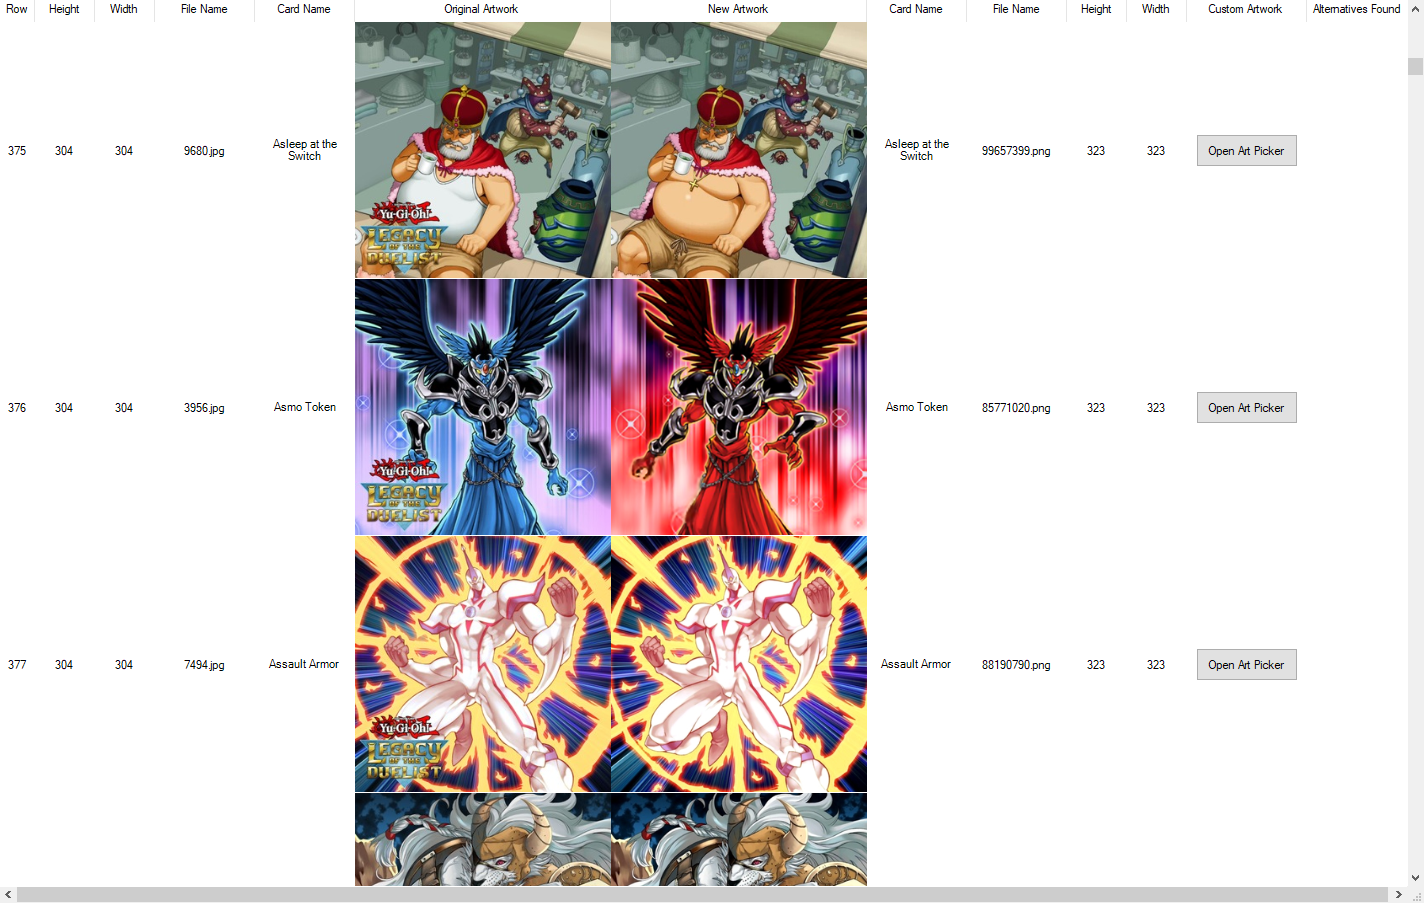
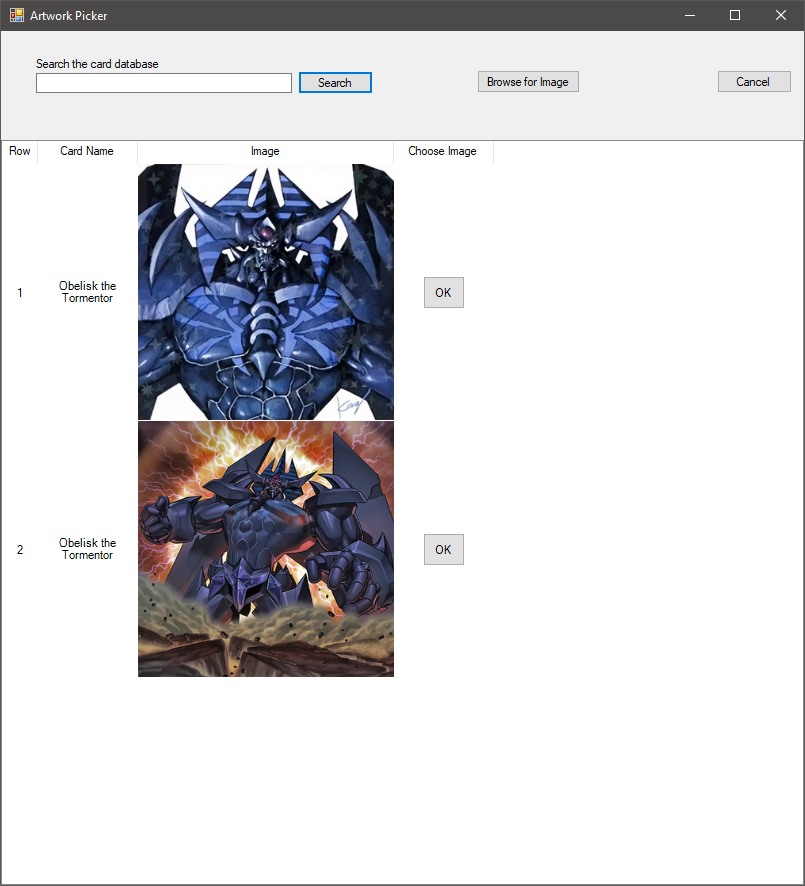
You can press the "Open Art Picker" button for the row
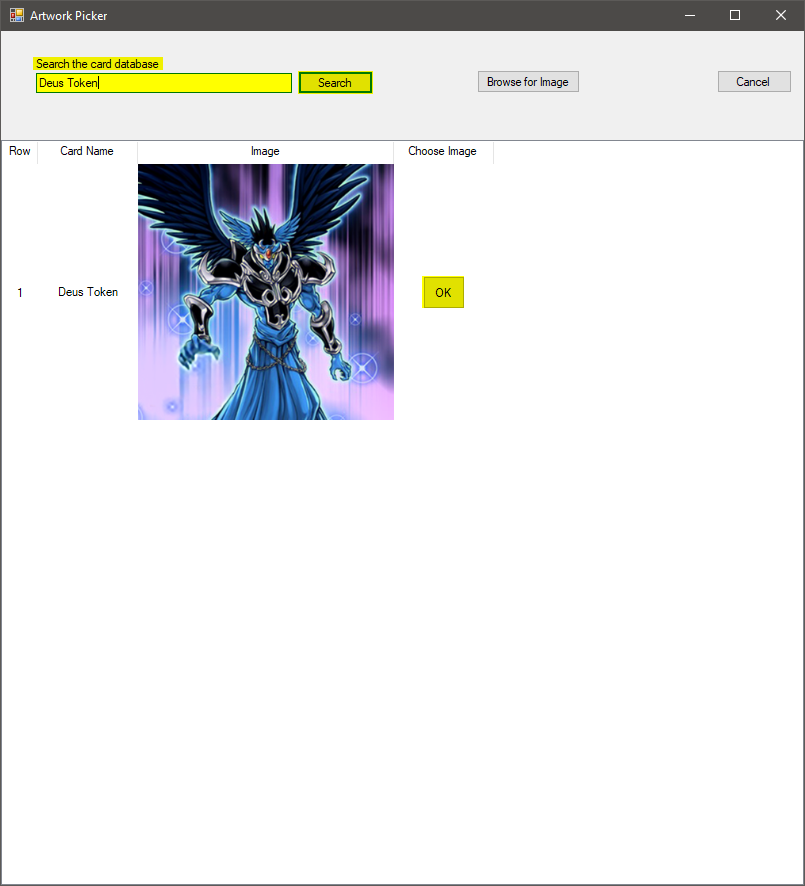
Then search for a card in the card database and press "OK" when you are satisfied.
Alternatively you can browse for an image on your local PC with the "Browse for Image" button.
-
You can sort the columns after Height, Width, File Name, Card Name and Alternatives Found. The Alternatives column marks if other images are available for the specific card in the database.
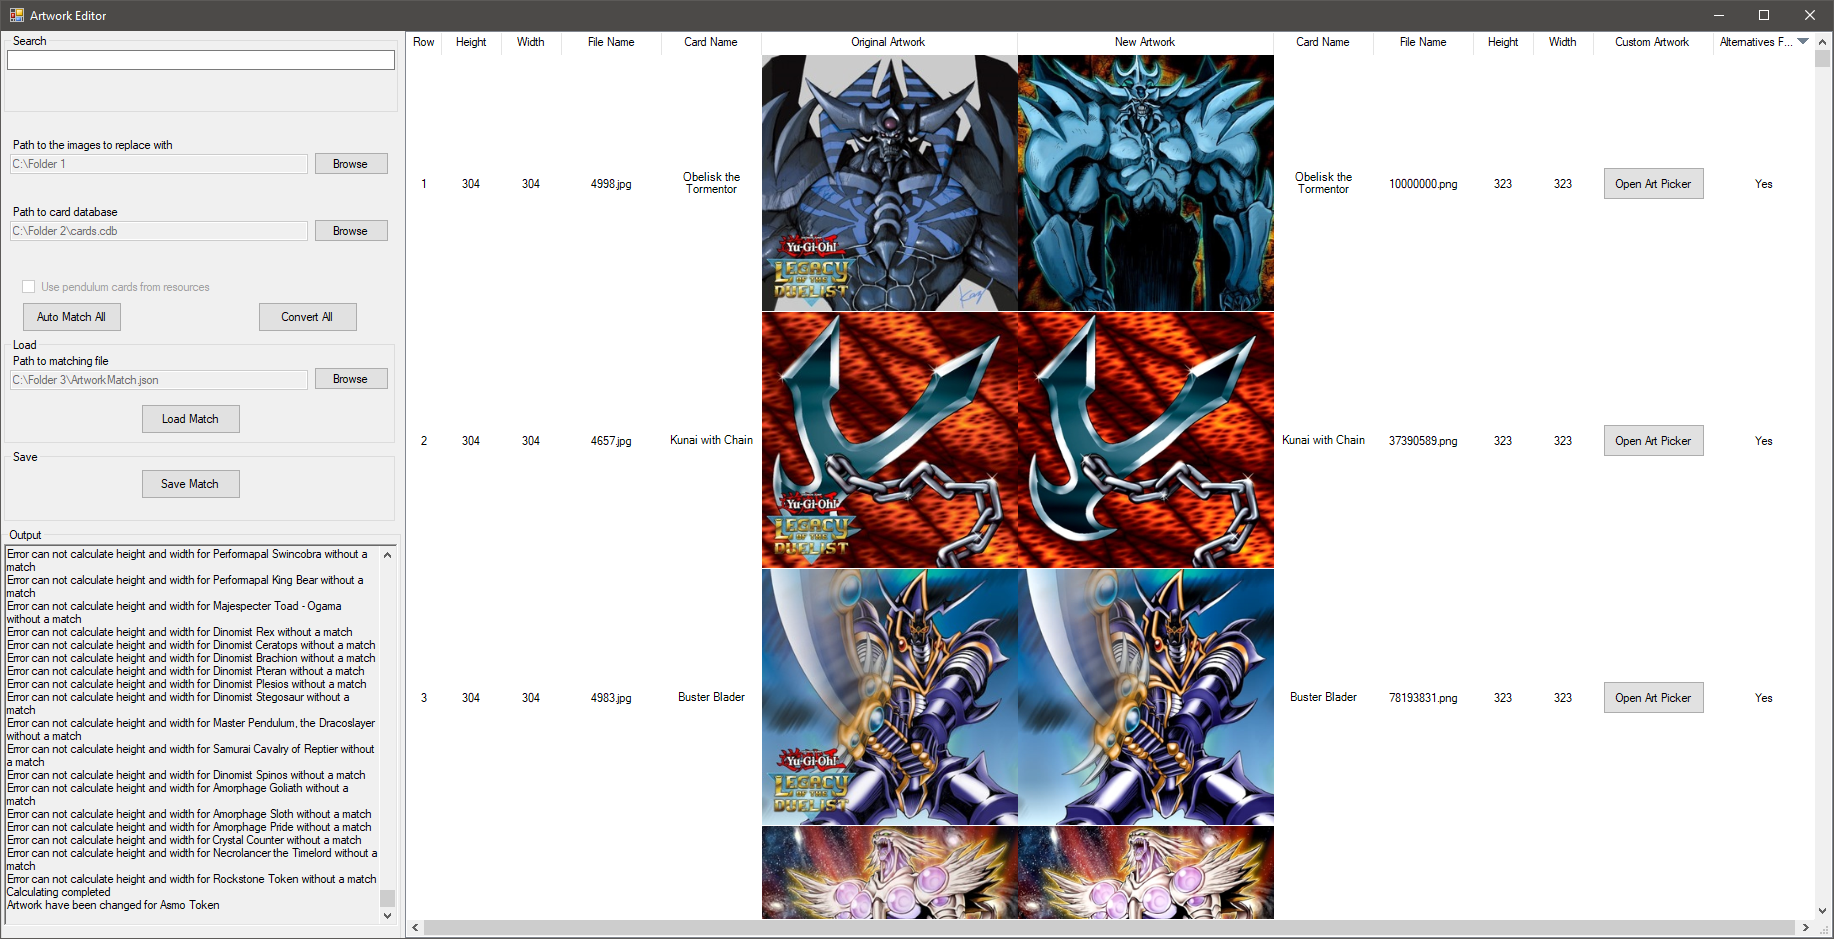
The art picker will then include the found alternatives
-
You can save your work to a file and load it again at another time by pressing the "Save Match" and "Load Match" buttons respectively
-
When you are done just press the "Convert All" button and the tool will convert all the images to the correct jpg format to be used in the game. As of writing the tool supports png and jpg.
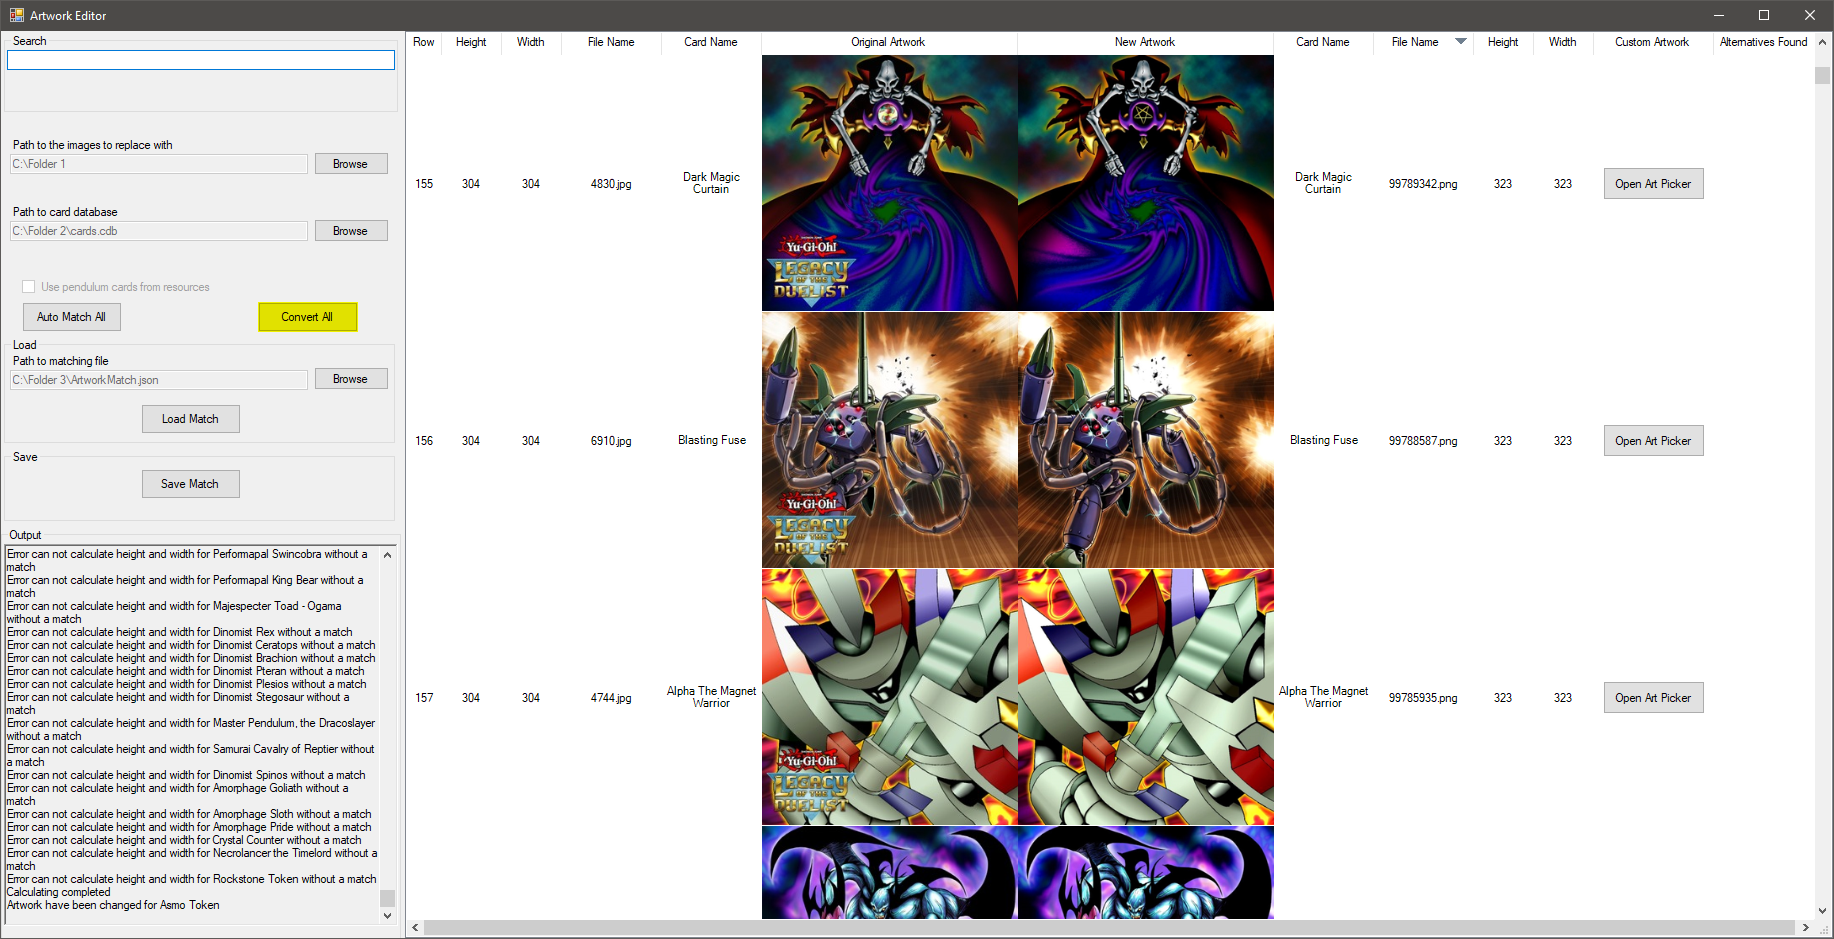
It will take a while so grab a cup of coffee while it converts.
When it is done the folders will be placed in the \Resources\Output\ Directory.
You need to copy the "Index.zib" file from the original folder you unpacked with Relinquished to the new folder before you can put your new images in to the game.
\cardcropHD400.jpg.zib Unpacked\Index.zib -> \Resources\Output\cardcropHD400.jpg.zib Unpacked
\cardcropHD401.jpg.zib Unpacked\Index.zib -> \Resources\Output\cardcropHD401.jpg.zib Unpacked\ -
Use Cyclone to repack the 2 folders in to 2 zib files.
-
Copy the 2 zib files in to your extracted YGO_DATA folder
-
Use Vortex to repack the YGO_DATA folder in to YGO_DATA.dat and YGO_DATA.toc
-
Copy those 2 files in your your game diretory and enjoy your new artwork.
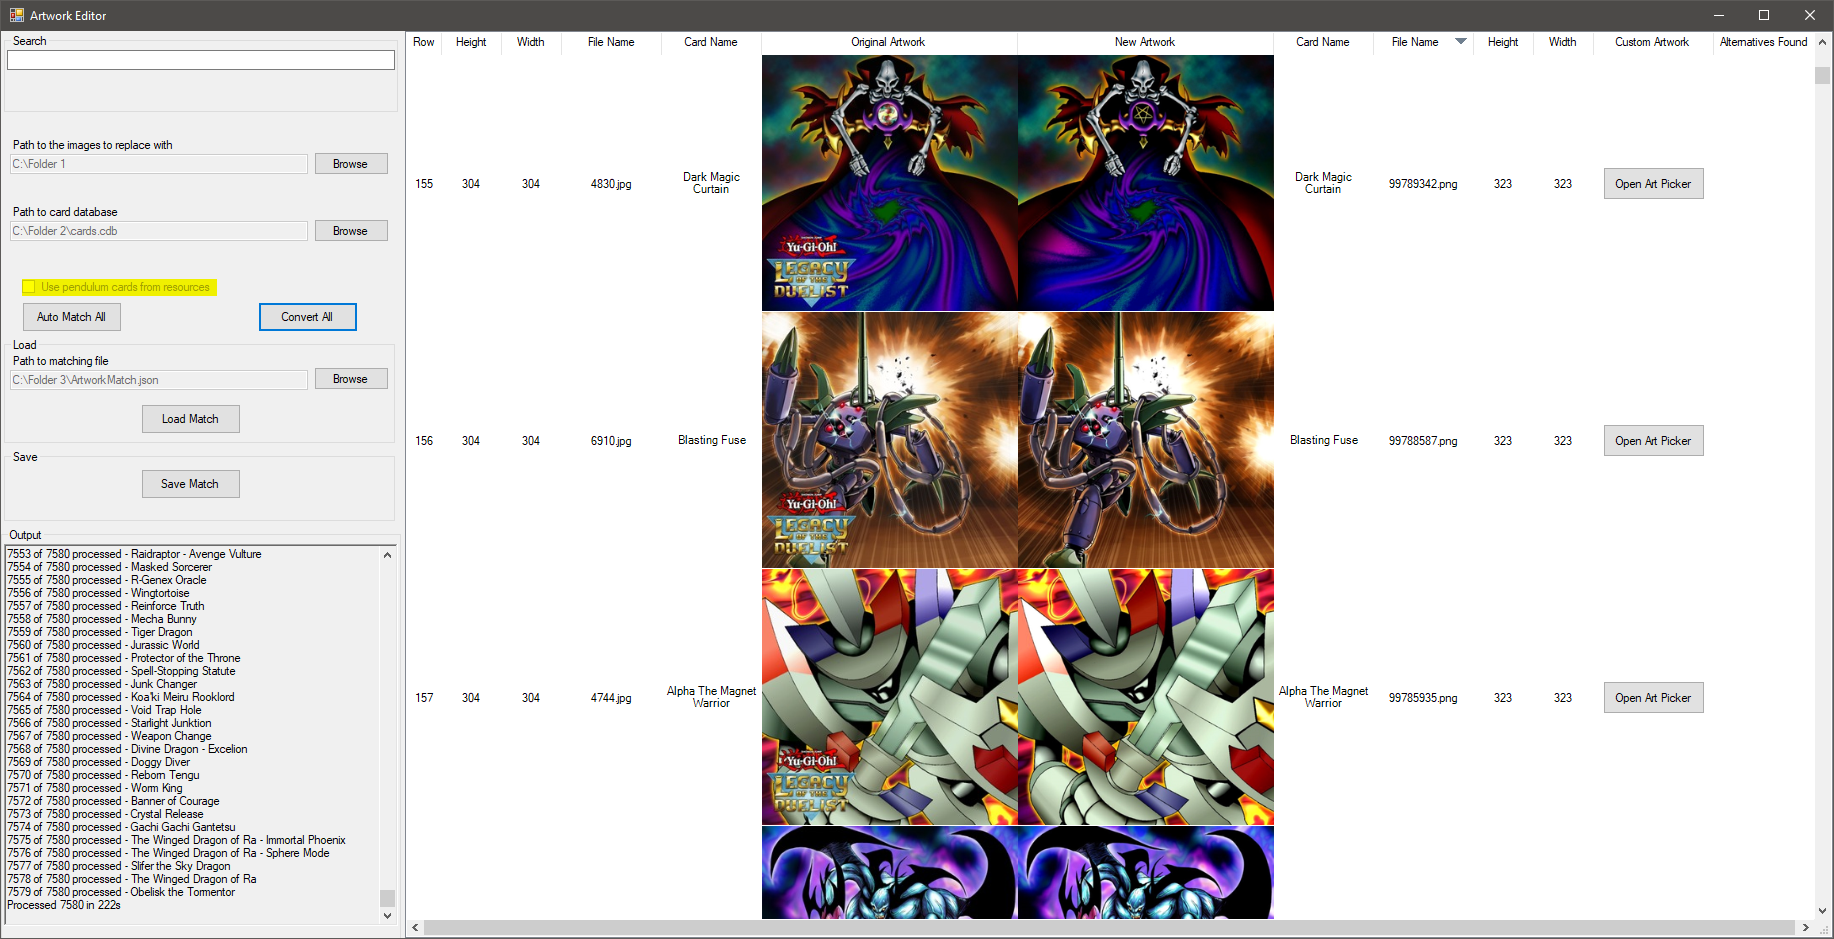
NB: As the artwork for the pendulum card uses a different size than the rest of the artwork there is no central place to download these images. If you have your own collection for these you can place them in \Resources\Pendulums\ and the tool will give you the option to include them in the matching process. The names of the files must match their game file equivalent to work.