


-
If you want a online gym, this is the perfect page. You have some filters and inputs fields in order to find your perfect routine.
Both sign up as gym and user options availables. As user, you can see the gym page, send feedback and rate them. The restaurant user can upload images.
- The private part is the admin's.
- The public part is the gym's and profile's.
-
Users:
- Gym user.
- Admin user.
- Default user.
-
Entities:
- Users.
- Courses.
- Facilities.
- Schedules.
-
Advanced funcionability:
- One user can not be registered in two or more activities at the same time.
- Personalized Recommendations.
-
Technology:
- Can register using Facebook acount.
-
Graphics:
- Dashboard about affluence of users in each activity and courses by category.
-
Authors:
- Carlos Olmo Sahuquillo [@CarlUndert] (https://github.com/CarlUndert)
Contact: [email protected] - Daniel Peña Martinez [@dpemar] (https://github.com/dpemar)
Contact: [email protected] - Iván Pérez Huete [@IvanPerez9] (https://github.com/IvanPerez9)
Contact: [email protected]
- Carlos Olmo Sahuquillo [@CarlUndert] (https://github.com/CarlUndert)
-
Navigation Diagram:

-
Index.html - Main page:


- Description: This is the first page you can see in our application. You have a login section and a sign in section too. If you only want to see some superficial information you have some sections to inspect our services along with our professionals.
-
Facilities.html:

- Description: This section offers images of the different locations that exist in the gym
-
Register.html:

- Description: Here is where you can register as a new member. It consist of a few typical fields, such as "user name" , "password" ...
-
Login.html:

- Description: Similar to the previous page, but in this case, you have to be identified yourself as a member.
-
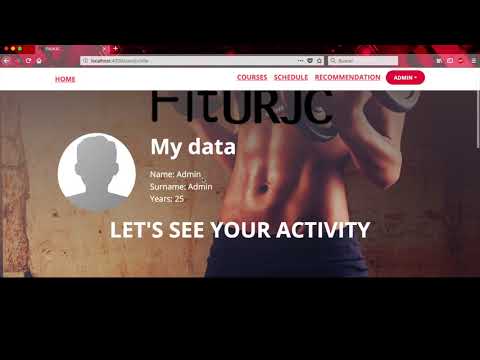
User.html:


- Description: This is the page you can see when you log in. It shows information about your activities, it also shows a record of your past and future activities, and finally some suggestions about group activities you may be interested. This is the client profile. For example you can check your profile section, description, watch registered activities and update your profile.
-
Courses.html:

- Description: This section offers the possibility to sign up the user in any of the courses that are available
-
Profile Settings.html:

- Description: If you are identified like a member, you have the possibility to change your profile pic, password or even set your birthdate.
-
Admin.html:


- Description: The page of an User that has Admin role. He can manage Users (Delete users, Edit users) and Courses (Delete courses, add courses) In a future this page will have a Graphic part where you will see stadistics about the user preferences.
-
Class Diagram:

-
Template Diagram:

-
Data Base Model:

-
Configuration Instructions:
-
Description: Spring Framework provides several data access methods, we use data access via JPA to a MySQL database using Hibernate. First we create the project, modifying the pom.xml file so that it contains the dependencies and configurations for JPA and MySQL.
To indicate to Spring how to access the Database, we need to create the configuration file: application.properties located in src / main / resources.
We have to create a JPA entity, making a relationship with a relational database. Using the CrudRepository interface we can delete, create, edit or search elements in our data set. We add the main class in the MySQL database.
-
-
Preparation of the development enviroment:
-
Description: For installation we must have Node and Npm installed on the computer. Once npm is installed, we execute the following command in the terminal of the equipment:
npm install -g @angular/cliWe will be able to install Angular cli globally in our team. Angular cli is the Angular console tool that will help us in programming. To create a project, we write:
ng new name_appAccess in the terminal to the folder that we just created and execute:
npm installWith this command we install the necessary dependencies in the project. Finally, to run the web application:
ng serve --openBy default, Angular runs on port 4200
-


