Inception is a DevOps project that leverages Docker to create and link containers.
Containerization is a software deployment method that packages an application and its dependencies into a self-contained unit called a container. It isolates the application from the underlying infrastructure, making it portable and consistent across different environments.
Containerization works by bundling an application's code, along with its dependencies and configuration files, into a single executable called a container. Containers are isolated and encapsulated units that can run consistently on any infrastructure.
Overall, containerization simplifies the deployment and management of applications by providing a consistent and isolated environment. It enables faster application delivery, improved scalability, and easier migration between different environments.
A container engine, also known as a container runtime, is a software program that creates and manages containers based on container images. It acts as an intermediary between the containers and the operating system, providing and managing the resources that the application needs to run. Here's a breakdown of container engines based on the search results:
Container Engines and Runtimes: Container engines are responsible for running multiple isolated instances, known as containers, on the same operating system kernel. They provide a controlled and easily manageable environment for running applications and their dependencies. Container engines use container runtimes to perform the containerization process and configure access and security policies for containers[0].
Container Engines: Container runtimes are software components that manage the lifecycle of containers, including configuring their environment, starting, stopping, and managing their execution.
- Docker is a container-based model where containers are used to execute applications on any operating system.
- Docker containers use the same operating system as the host, resulting in high performance and less boot-up time.
- Docker containers are smaller than VMs, making it easier to transfer files and share data.
- Docker containers start with no delay since the OS is already up and running.
- Docker containers are designed to save time in the deployment process of an application.
- Docker containers provide a more flexible and lightweight approach to application deployment.

- Docker Engine is responsible for creating and managing Docker objects like images, containers, networks, and volumes.
- It consists of a server-side daemon process called dockerd, a REST API, and a client-side command-line interface (CLI) called docker.
- The Docker daemon (dockerd) hosts images, containers, networks, and storage volumes, while the CLI (docker) allows users to interact with the Docker daemon through the API.
- Docker Engine is declarative, meaning that administrators can program a specific set of conditions as the desired state, and the engine automatically adjusts the actual settings and conditions to match the desired state.
- Docker Engine can run natively on Linux systems and has been extended to operate on Windows and macOS as well.
In summary, Docker Engine is the core component of Docker that manages containers, images, networks, and volumes. It provides a client-server architecture with a daemon process (dockerd), a REST API, and a command-line interface (docker) for interacting with the Docker daemon.
Dockerd
- Dockerd is responsible for starting and managing the Docker daemon, which is the core component of Docker.
- It is a server or daemon process that runs in the background and listens for Docker API requests from the Docker client.
- Dockerd manages various Docker objects such as images, containers, networks, and volumes.
- It communicates with other daemons to manage Docker services.
- Dockerd can be started with different options and flags, such as --debug for running with debug output and --experimental for enabling experimental features.
- It can be configured using the daemon.json file, where you can specify options like debug mode and experimental features.
Daemon Daemon is a program that runs continuously as a background process in a multitasking operating system. It is not directly controlled by the user and is usually initiated at system startup
- A daemon is a program that runs in the background and wakes up to handle periodic service requests, often from remote processes source.
While Docker and VMs have their own advantages and use cases, they can also be used together. Docker containers can be run on virtual machines, combining the flexibility and lightweight nature of Docker with the security and isolation of VMs. This allows organizations to cover a range of use cases and make their virtual resources as flexible as possible.

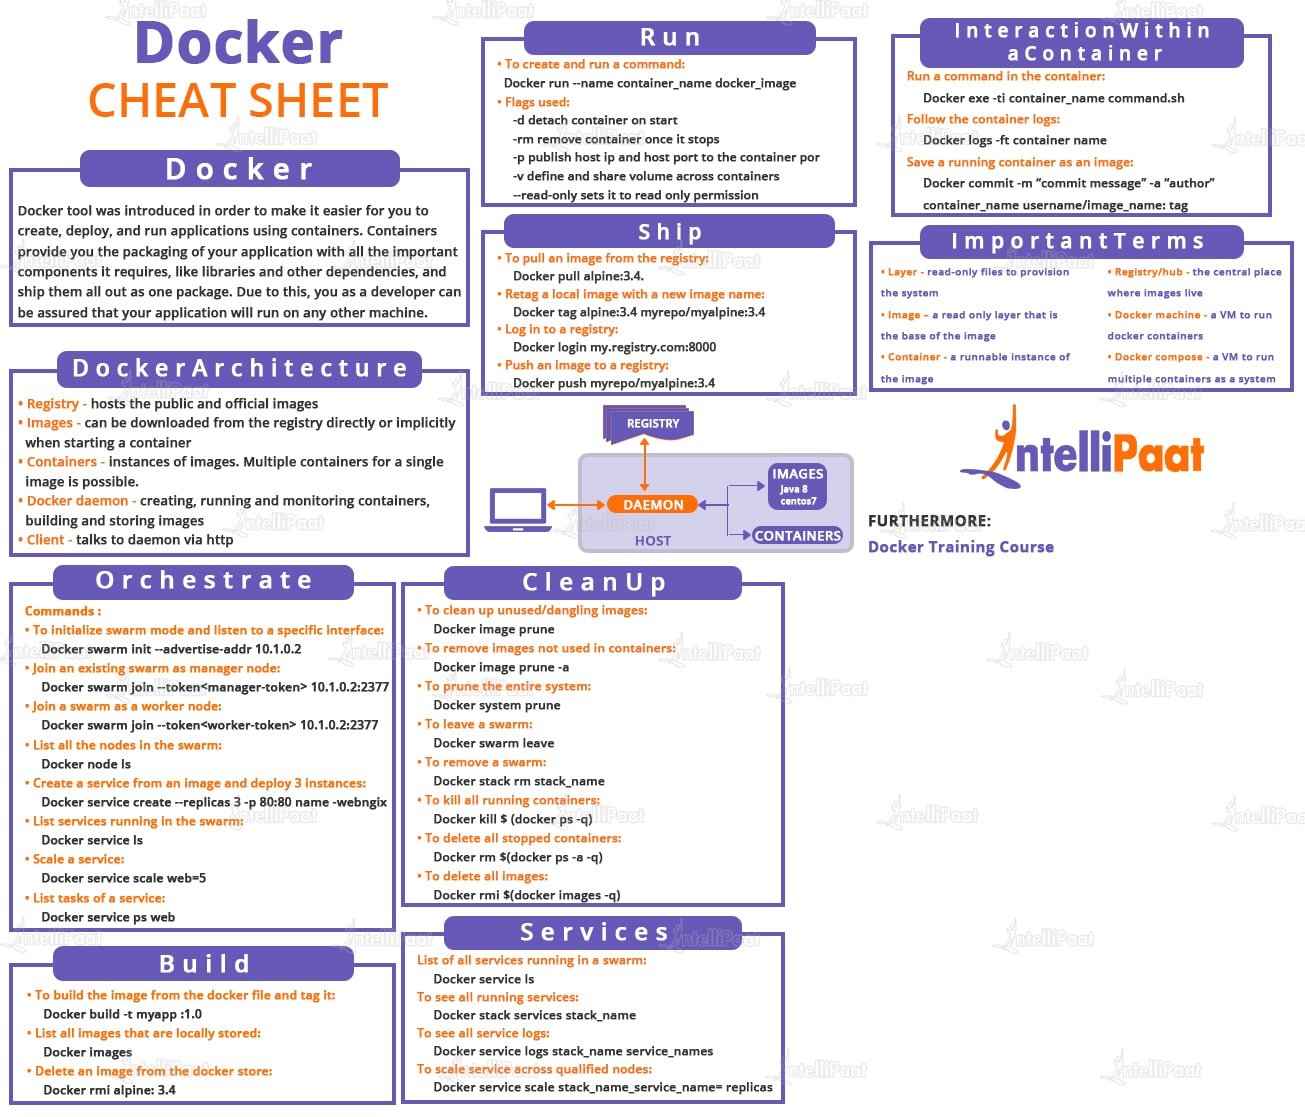
Docker CLI cheat sheet

An image in Docker is a read-only template that contains the instructions for creating a Docker container. It is a snapshot of a Docker container that includes the application code, runtime, system tools, libraries, and settings. Images are used to create containers, and they can be shared and reused across different environments.
A container in Docker is a lightweight, standalone, and executable package of software that includes everything needed to run an application, including the code, runtime, system tools, libraries, and settings. Containers are isolated from each other and from the host system, which makes them portable and easy to deploy across different environments.
When you run a Docker container, it is created from an image. The container is an instance of the image, and it can be started, stopped, and deleted without affecting the image. You can create multiple containers from the same image, and each container will have its own isolated environment.
A Dockerfile is a text document that contains a set of instructions for building a Docker image. It is used to automate the process of creating a Docker image with all the necessary dependencies and configurations. Each instruction in the Dockerfile is a command that is executed in sequence to build the image.
Here is an overview of the components of a Dockerfile:
-
FROM: The FROM instruction specifies the base image for the Docker image. It defines the starting point for the image build process. Typically, you start with an existing image from a registry or another Dockerfile.
-
RUN: The RUN instruction executes a command inside the Docker image during the build process. It is used to install packages, run scripts, or perform any other necessary setup tasks.
-
COPY/ADD: The COPY and ADD instructions copy files and directories from the host machine into the Docker image. They are used to add application code, configuration files, or any other required files to the image.
-
WORKDIR: The WORKDIR instruction sets the working directory for any subsequent instructions in the Dockerfile. It is used to specify the directory where commands will be run inside the image.
-
EXPOSE: The EXPOSE instruction informs Docker that the container will listen on the specified network ports at runtime. It does not publish the ports to the host machine; it is just a documentation for the user.
-
CMD: The CMD instruction specifies the command to run when a container based on the image is started. It provides the default command or process that should be executed inside the container.
These are some of the commonly used instructions in a Dockerfile. There are other instructions available as well, such as ENV for setting environment variables, ENTRYPOINT for configuring the container's main command, and VOLUME for creating a mount point for external volumes.
It's important to note that Dockerfiles are case-sensitive and should be named "Dockerfile" with no file extension. They should be placed in the same directory as the application code or configuration files they reference.
# Use the Alpine Linux base image
FROM alpine:3.18

# Set environment variables for MariaDB
ENV MYSQL_ROOT_PASSWORD=mysecretpassword
ENV MYSQL_DATABASE=mydatabase
ENV MYSQL_USER=myuser
ENV MYSQL_PASSWORD=mypassword

# Install MariaDB and other dependencies
RUN apk update && \
    apk add --no-cache mariadb mariadb-client && \
    rm -rf /var/cache/apk/*

# Copy the custom configuration file to the container
COPY my.cnf /etc/mysql/my.cnf

# Expose the default MariaDB port
EXPOSE 3306

# Start the MariaDB server
CMD ["mariadb"]
- You can build your image using this command:
 # -t Option to specify the image name.
 docker build -t img_name /path/to/dockerfile/
# --env-file to specify the .env file
docker build --env-file .env -t my_image /path/to/dockerfile/Here's a sheet cheat: docker-compose sheet cheat
Docker Compose is a tool for defining and running multi-container Docker applications. It allows you to define your application's services, networks, and volumes in a single YAML file, making it easier to manage and deploy complex applications with multiple interconnected containers. Docker Compose is particularly useful for development, testing, and production scenarios where multiple containers need to work together.
version: '3'  # Specify the Compose file format version

services:  # Define your services here

  # Service 1: Custom Service (Using a Custom Dockerfile)
  custom_service_1:
    build:
      context: ./myapp  # Specify the build context (directory containing the Dockerfile)
      args:
        - VAR_NAME=VALUE  # Define build arguments (if needed)
    image: service1 # if this instruction is after a "build" instruction it's defines the image name, but if it's called before, then a pull request for the image name entered from the docker hub
    container_name: my_custom_container_1  # Assign a custom container name
    depends_on: # Specifies that this service depend on another service, so this will be started after the service it's depends on
      - service_name
    expose:
      - 8080  # Expose port 8080 within the container
    ports:
      - "8081:8080" # maps port 8080 to 8081 on our local machine
    networks:
      - my_custom_network  # Connect to the custom Docker network named "my_custom_network"
    volumes:
      - ./host_data:/container_data:rw  # Mount the host directory into the container with read-write access
      - my_named_volume:/container_volume:ro  # Mount a named volume with read-only access

networks:
  my_custom_network:  # Define a custom Docker network named "my_custom_network"
    driver: bridge  # Specify the network driver as "bridge"

volumes:
  my_named_volume:  # Define a named volume named "my_named_volume" for data persistence
Here are some common Docker Compose commands and their explanations:
- Description: Start containers defined in the
docker-compose.ymlfile. - Usage:
docker-compose up [options] [SERVICE...] - Options:
-d, --detach: Run containers in the background.
- Example:
docker-compose up -dstarts containers in detached mode.
- Description: Stop and remove containers, networks, and volumes defined in the
docker-compose.ymlfile. - Usage:
docker-compose down [options] - Options:
--volumes: Remove named volumes as well.
- Example:
docker-compose down --volumesstops and removes containers and associated volumes.
- Description: List the status of containers in the current Docker Compose project.
- Usage:
docker-compose ps - Example:
docker-compose psdisplays the status of containers.
- Description: View output logs from containers.
- Usage:
docker-compose logs [options] [SERVICE...] - Options:
-f, --follow: Follow log output in real-time.
- Example:
docker-compose logs -fdisplays logs and follows new entries.
- Description: Run a command in a running container.
- Usage:
docker-compose exec [options] SERVICE COMMAND [ARGS...] - Example:
docker-compose exec webserver shstarts a shell session in thewebservercontainer.
- Description: Build or rebuild services defined in the
docker-compose.ymlfile. - Usage:
docker-compose build [options] [SERVICE...] - Options:
--no-cache: Do not use cached images.
- Example:
docker-compose buildbuilds all services.
These are just a few of the many commands and options available in Docker Compose. It's a powerful tool for simplifying the management of multi-container applications and improving the development and deployment process.
Docker provides two essential features for managing data and communication within containers: Docker Networks and Docker Volumes.
Docker Networks enable containers to communicate with each other and with external networks, allowing for isolated or interconnected services.
-
Bridge Network (Default):
- Containers on the same bridge network can communicate by container name.
- Isolated from the host network by default.
- Suitable for applications that require network isolation.
-
Host Network:
- Shares the host's network namespace.
- Useful when performance is a top priority, but offers less isolation.
-
Overlay Network:
- Spans multiple Docker hosts, facilitating communication between containers on different hosts.
- Commonly used in Docker Swarm clusters.
-
Macvlan Network:
- Assigns a MAC address to each container, making it appear as a physical device on the network.
- Useful when containers need to be on the same network as physical devices.
-
Container Creation: When you create a container, you can specify which network it should connect to.
-
Container Communication: Containers on the same network can communicate with each other using container names or IP addresses.
-
External Communication: Containers can access external networks and services by routing traffic through the host's network.
Docker Volumes provide a way to persist and share data between containers and the host system. They are essential for managing data that should survive container restarts and removals.
-
Named Volume:
- Managed by Docker and can be named for easy identification.
- Can be shared between containers.
- Suitable for persisting application data.
-
Host-Mounted Volume:
- Maps a directory from the host machine to a container's filesystem.
- Useful for sharing data between a container and the host.
-
Temporary Volume (Bind Mount):
- Maps a host directory to a container directory.
- Data is not persisted after the container stops.
- Suitable for configuration files or temporary data.
-
Volume Creation: You can create Docker volumes using
docker volume createor have them automatically created when defining them in adocker-compose.ymlfile. -
Volume Attachment: Containers can be configured to use specific volumes by specifying them during container creation.
-
Data Persistence: Data stored in Docker volumes persists even when the associated container is removed or stopped.
-
Data Sharing: Volumes can be shared among multiple containers, enabling data sharing and synchronization.
The driver_opts section in a Docker Compose file is used to specify options for the volume driver that is used to create the volume. In this case, the driver_opts section is being used to specify the type and device options for the local volume driver.
driver_opts:
      o: bind
      type: none
device: /home/yelaissa/data/db- source: about docker-compose volumes
- Docker Networks facilitate communication between containers and external networks, offering isolation and connectivity options.
- Docker Volumes are used for data persistence and sharing, making them crucial for storing application data and configurations.
Let's start by understanding what we'll be using;
NGINX is a popular open-source web server, reverse proxy server, and load balancer. It's designed to efficiently handle concurrent connections, serve static content, reverse proxy to application servers, and perform other critical tasks in modern web architectures.
Learn more about NGINX:
A web server is a software application that accepts and responds to incoming HTTP (Hypertext Transfer Protocol) requests from clients, typically web browsers. Its primary role is to serve web content, which can be static files (HTML, CSS, JavaScript) or dynamic content generated by applications (e.g., PHP, Python, Node.js).
Learn more about web servers:
Here's a simplified overview of how a web server works:
-
Client Request: When you enter a URL in your web browser and hit Enter, it sends an HTTP request to a web server.
-
DNS Resolution: The web browser uses DNS (Domain Name System) to resolve the domain name in the URL to an IP address.
-
Server Handling: The web server receives the HTTP request and processes it. It may involve parsing the request, locating the requested resource, and handling dynamic content generation if necessary.
-
Resource Retrieval: If the requested resource is a static file, the web server retrieves it from disk and sends it back to the client. If it's dynamic content, the web server may communicate with an application server to generate the content.
-
Response to Client: The web server constructs an HTTP response containing the requested content and sends it back to the client's web browser.
-
Rendering: The web browser receives the response and renders the web page for the user to view.
SSL (Secure Sockets Layer) was an early cryptographic protocol designed to provide secure communication over the internet. However, SSL is no longer considered secure due to vulnerabilities.
Learn more about SSL:
TLS (Transport Layer Security) is the successor to SSL and provides secure communication between a client and a server. It ensures data confidentiality and integrity during transmission.
Learn more about TLS:
The main difference is that TLS is a more secure and updated version of SSL. In practice, people often refer to TLS as SSL for simplicity. Here's a real-world example to illustrate the difference:
-
SSL: Think of SSL as an older, less secure lock on your front door. While it might deter some intruders, it has known weaknesses.
-
TLS: TLS is like a modern, robust security system with a high-tech lock, surveillance cameras, and alarms. It's more reliable and resistant to attacks.
Learn more about the difference between SSL and TLS:
SSL (Secure Sockets Layer) and its successor TLS (Transport Layer Security) are crucial for secure web communication. They provide the encryption and authentication mechanisms needed to protect sensitive data transmitted over the internet. Here's why SSL/TLS is vital:
-
Privacy: SSL/TLS encrypts data, keeping it private between users and websites.
-
Integrity: It ensures data isn't tampered with during transmission.
-
Authentication: SSL/TLS verifies website identities, preventing impersonation.
-
Phishing Protection: Users trust secure sites, reducing phishing risks.
SSL/TLS uses a combination of symmetric and asymmetric cryptography to secure data transmission. Here's a simplified step-by-step process of how it works:
-
Handshake: When a user accesses a secure website (e.g., https://example.com), the web server and browser initiate a handshake. During this process, they agree on encryption parameters and exchange cryptographic keys.
-
Key Exchange: The server sends its public key to the browser. The public key is used for encryption. The browser generates a random symmetric encryption key and encrypts it with the server's public key. This ensures that only the server can decrypt the key.
-
Secure Data Exchange: Once the handshake is complete, the server and browser use the shared symmetric key for data encryption and decryption. This key is known only to them, ensuring secure communication.
-
Data Integrity: SSL/TLS also uses message authentication codes (MACs) to check data integrity. This ensures that data is not tampered with during transit.
-
Certificate Validation: The browser validates the server's SSL/TLS certificate to verify the website's authenticity. If the certificate is valid, the browser displays a padlock icon or "https://" in the address bar.
When you shop online, SSL/TLS secures your credit card info, preventing snooping. It's like a secret code between you and the website, ensuring your data's safety.
In summary, NGINX is a versatile web server and reverse proxy, a web server serves web content to clients, and TLS is the updated and more secure version of SSL used for securing data transmission over the internet. The difference between SSL and TLS is similar to using an old lock (SSL) versus a state-of-the-art security system (TLS) to protect your home.
According to the assignment, we need to install a self-signed SSL certificate and work on port 443, and also change our domain name to username.42.fr. Let's start with a self-signed certificate.
You can create a self-signed key and certificate pair with OpenSSL in a single command by typing:
openssl req -x509 -nodes -days 365 -newkey rsa:2048
    -keyout /etc/nginx/ssl/yelaissa.key
    -out /etc/nginx/ssl/yelaissa.crt
-subj "/C=XX/ST=StateName/L=CityName/O=CompanyName/OU=CompanySectionName/CN=CommonNameOrHostname"- openssl: This is the basic command line tool for creating and managing OpenSSL certificates, keys, and other files.
- req: This subcommand specifies that you want to use X.509 certificate signing request (CSR) management. The “X.509” is a public key infrastructure standard that SSL and TLS adheres to for its key and certificate management. You want to create a new X.509 cert, so you are using this subcommand.
- x509: This further modifies the previous subcommand by telling the utility that you want to make a self-signed certificate instead of generating a certificate signing request, as would normally happen.
- nodes: This tells OpenSSL to skip the option to secure your certificate with a passphrase. You need Nginx to be able to read the file, without user intervention, when the server starts up. A passphrase would prevent this from happening because you would have to enter it after every restart.
- days 365: This option sets the length of time that the certificate will be considered valid. You set it for one year here.
- newkey rsa:2048: This specifies that you want to generate a new certificate and a new key at the same time. You did not create the key that is required to sign the certificate in a previous step, so you need to create it along with the certificate. The rsa:2048 portion tells it to make an RSA key that is 2048 bits long.
- keyout: This line tells OpenSSL where to place the generated private key file that you are creating.
- out: This tells OpenSSL where to place the certificate that you are creating.
- subj: The -subj option is used to specify the subject of the certificate. The subject is a string that contains information about the entity that the certificate represents,
- C: Country
- ST: State or Province
- L: Locality or City
- O: Organization
- OU: Organizational Unit
- CN: Common Name or Hostname
Figure out how to generate the certification inside the container
Next, we need to change the alias of our local domain (127.0.0.1) to the desired login.42.fr. Open the /etc/hosts file:
sudo vim /etc/hosts
And add to localhost our nickname.42.fr, in my case it’s yelaissa.42.fr(order doesn't matter):
##
# Host Database
#
# localhost is used to configure the loopback interface
# when the system is booting.  Do not change this entry.
##
127.0.0.1       yelaissa.42.fr localhost
255.255.255.255 broadcasthost
::1             localhost
You should run nginx using this command:
CMD ["nginx", "-g", "daemon off;"]This way we run nginx directly and not in daemon mode. Daemon mode is a launch mode in which the application starts in the background or, in Windows parlance, as a service. For ease of debugging, we disable this mode and receive all nginx logs directly into the tty of the container.
Create the nginx.conf
# NGINX Configuration Cheat Sheet

# EVENTS BLOCK: Global settings related to connections
events {
    worker_connections 1024;  # Maximum number of connections per worker process
}

# HTTP BLOCK: HTTP-related settings and server blocks
http {
    # SERVER BLOCK: Configuration for a specific website
    server {
        listen 80;  # Port to listen on (HTTP)
        listen [::]:80; # Accept all ipv6 addresses

        server_name example.com;  # Domain name for this server block

        # LOCATION BLOCK: How to handle requests for specific URLs
        location / {
            root /var/www/html;  # Root directory for static files
            index index.html;     # Default file to serve if URL ends with '/'
             # Try to find the requested file, or fallback to index.php or index.html
            try_files $uri /index.php?$args /index.html =404;
        }

        # LOCATION BLOCK: Proxy requests to a backend server
        location /api/ {
            proxy_pass http://backend-server;  # Proxy requests to another server
        }

        # SSL/TLS CONFIGURATION: Enable HTTPS and specify certificates
        listen 443 ssl;  # Port to listen on (HTTPS) with SSL/TLS
        ssl_certificate /etc/nginx/ssl/server.crt;       # SSL certificate
        ssl_certificate_key /etc/nginx/ssl/server.key;   # Private key

        # REDIRECT HTTP TO HTTPS: Force HTTPS
        if ($scheme != "https") {
            rewrite ^ https://$host$request_uri permanent;
        }
    }

    # ADDITIONAL SETTINGS
    include /etc/nginx/conf.d/*.conf;  # Include additional config files

    # ERROR PAGES
    error_page 404 /404.html;           # Custom 404 error page
    error_page 500 502 503 504 /50x.html;  # Custom 50x error page
}
Now let's explain nginx conf syntax:
This is called a directive
error_page 404 /404.htmlThis is called a context
events {
  worker_connections 1024;
}
# Example
server {

}Docker-compose is a system for launching Docker containers; one might say, it is a kind of add-on to Docker. If in docker files we specified what software to install inside one container environment, then with docker-compose we can control the launch of many similar containers at once, launching them with one command.
First we register the version. The latest version is the third.
version: '3'The first on the list of our services will be nginx.
services:
  nginx:
Next, we tell the docker where our Dockerfile is:
version: '3'

services:
  nginx:
    build:
      context: .
      dockerfile: requirements/nginx/Dockerfile
We set a name for our container, and also forward the required port (in this task we can only use ssl).
version: '3'

services:
  nginx:
    build: ./requirements/nginx
    container_name: nginx
    ports:
      - "443:443"
We add sections so that the container sees our config and our keys, and we also make sure to mount our /var/www - the same folder from the old configuration that we will need for a test run of nginx. Later we will delete it and take files from the WordPress directory.
version: '3'

services:
  nginx:
    build: ./requirements/nginx
    container_name: nginx
    ports:
      - "443:443"
    volumes:
      - ./requirements/nginx/tools/html:/var/www/html
Next we specify the type of restart. In combat projects, I personally use the restart type: unless-stopped (always restart, except for the stop command), but the subject prohibits it, so we set it to allowed:
restart: always...which means always to restart containers in case of failure.
MariaDB is a powerful, open-source relational database management system (RDBMS) that serves as a reliable and freely available solution for storing, managing, and retrieving structured data. It is known for its compatibility with MySQL and offers performance improvements, robust security features, and high availability options, making it suitable for a diverse range of applications across different industries.
Here is a list of what we need to set up the container:
- Installed mariadb + mariadb-client
- Mariadb configuration change.
- Script to setup the db
Install mariadb
RUN apk update && apk add --no-cache mariadb mariadb-clientMariadb configuration
RUN mkdir -p /run/mysqld; chmod 777 /run/mysqld- We must create the directory
/mysqld, This directory is used by the MySQL daemon tostore its socket file - The directory
/runis used for storingtemporary filesthat are created by running processes. The directory/run/mysqldis created to store theMySQL daemon's socket file. The socket file is used by clients to connect to the MySQL server. By creating the directory in/run, the socket file can be accessed quickly and efficiently by the clients. Additionally, the/rundirectory is usually mounted as atmpfs filesystem, which means that it is storedin memoryand not on disk. This makes it faster to access and reduces wear on the disk. - A socket file is a special type of file used for inter-process communication (IPC) between processes on the same machine. It allows processes to communicate with each other by sending and receiving data through the file. In the context of MySQL, the socket file is used by clients to connect to the MySQL server. When a client connects to the server, it sends a request to the socket file, which is then handled by the MySQL daemon. The daemon then sends a response back to the client through the same socket file.
RUN sed -i "s|skip-networking|#skip-networking|g" /etc/my.cnf.d/mariadb-server.cnf; \
sed -i "s|#bind-address|bind-address|g" /etc/my.cnf.d/mariadb-server.cnf- We need to comment the
skip-networkto disable it, To enable networking so we can connect to mariadb outside the container - We also enable the
bind-address=0.0.0.0so we can connect from any interface
source: Official docs
RUN mariadb-install-db --user=mysql --datadir=/var/lib/mysql --skip-test-db- You can use
mysql_install_db(with older MySQL versions) ormariadb-install-db - mariadb-install-db
initializesthe MariaDBdata directoryand creates thesystem tablesin themysql database, if they do not exist. MariaDB uses these tables to manageprivileges,roles, andplugins. The--useroption specifies the user account under which the script should be executed, which in this case is mysql. The--datadiroption specifies the directory where the database files will be stored, which in this case is/var/lib/mysql. The--skip-test-dboption tells the script not to create a test database.
mariadb-install-db works by starting MariaDB Server's mysqld process in --bootstrap mode and sending commands to create the system tables and their content.
source: about mariadb-install-db
EXPOSE 3306

COPY ./conf/config.sh .

ENTRYPOINT ["sh", "config.sh"]- Finally, we expose the port 3306 which is the default port for mysql, and then we copy the config.sh file and run it using ENTRYPOINT
- In a Dockerfile,
ENTRYPOINTis used to specify the command that should be run when a container is started from the image. TheENTRYPOINTinstruction sets the command and parameters that will be executed first when a container is started.
The script
- The script first checks if the directory
/var/lib/mysql/wordpressexists. If it does not exist, it creates a SQL script/tmp/db.sqlthat sets up the MySQL database and user. The script then runs themariadbdcommand with the--bootstrapoption to execute the SQL script and initialize the database. Finally, it removes the SQL script and starts themariadbdcommand with the--useroption to run the MySQL daemon as the mysql user.
  mariadb:
    build: ./requirements/mariadb
    environment:
      DB_USER : ${DB_USER}
      DB_PASSWD : ${DB_PASSWD}
      DB_ROOT_PASSWD : ${DB_ROOT_PASSWD}
    container_name: mariadb
    ports:
      - "6969:3306"
    volumes:
      - db_data:/var/lib/mysql
    restart: always
    networks:
- InceptionNetwork- This code defines the service for our
MariaDBdatabase. - The
buildkeyword specifies the path to the directory containing the Dockerfile for building theMariaDBimage. - The
environmentkeyword sets environment variables for the container, including the databaseuser,password, androot password. These values are set using the ${} syntax, which allows them to be replaced with values from.envfile. - The
container_namekeyword sets the name of the container tomariadb. The ports keyword maps port6969on the host to port3306in the container, which is the default port forMariaDB. - The
volumeskeyword mount the volume calleddb_datato the/var/lib/mysqldirectory in the container. This allows the database files to persist even if the container is deleted or recreated. - The
restartkeyword specifies that the container should always be restarted if it stops for any reason. - The
networkskeyword specifies that the container should be connected to a network calledInceptionNetwork, which is defined elsewhere in the Docker Compose file.
Here's how to define the volumes and networks
networks:
  InceptionNetwork:
driver: bridge- The
networkskeyword is used to define a list of networks that the containers in the Docker Compose file can connect to. - The
driveroption specifies the driver that should be used for the network. In this case, thebridgedriver is used (which is the default), which creates anetwork bridgeon the host machine that allows containers to communicate with each other.
volumes:
  db_data:
    driver_opts:
      type: none
      device: /home/yelaissa/db
      o: bind
  wp_data:
    driver_opts:
      type: none
      device: /home/yelaissa/wp
o: bind- The
volumeskeyword is used to define a list of volumes that the containers in the Docker Compose file can use to store data. - Each volume has a
driver_optssection that specifies the options for the driver that should be used for the volume. In this case,- The
typeoption is set to none, which means that no specific driver is used. - The
deviceoption specifies the path on the host machine where the data should be stored. - The
ooption specifies the mount options for the volume.bindis amount optionthat allows a directory or file on the host machine to be mounted into a container as a volume. When a volume is mounted with the bind option, the container can read and write to the files in the directory on the host machine, and changes made in the container will be reflected on the host machine.
- The
WordPress is a popular open-source content management system (CMS) used for creating websites and blogs. It allows users to easily manage and publish content without extensive technical knowledge. WordPress is highly customizable and offers a wide range of themes and plugins to extend its functionality.
Resource: WordPress.org
To run WordPress in a container, you need the following components:
-
Web Server: A web server like Nginx or Apache to handle HTTP requests and serve web pages.
-
PHP: A server-side scripting language like PHP to execute WordPress code.
-
Database: A database system like MySQL or MariaDB to store content and settings.
-
WordPress: The WordPress application files.
These components are often packaged in separate containers to create a microservices architecture.
To host WordPress using Nginx, you'll need an Nginx configuration that includes:
-
A
locationblock to handle PHP requests, typically usingfastcgi_passto send PHP requests to a PHP-FPM backend.location ~ \.php$ { fastcgi_pass php-fpm-wordpress-container:9000; # Other FastCGI settings... }
-
Server blocks (virtual hosts) to define how Nginx should handle different domains or subdomains.
server {
    server_name example.com;
    # Other server settings...
}
-
Configuration for SSL/TLS if you want to enable secure HTTPS connections.
server {
    listen 443 ssl;
    server_name example.com;
    ssl_certificate /etc/nginx/ssl/server.crt;
    ssl_certificate_key /etc/nginx/ssl/server.key;
    # Other SSL settings...
}
Resource: How to configure nginx with wordpress
PHP-FPM (PHP FastCGI Process Manager) is a PHP FastCGI implementation that handles PHP requests from a web server. It manages PHP processes, making PHP execution more efficient and scalable. PHP-FPM can be used with web servers like Nginx or Apache to serve PHP web applications.
Resource: PHP-FPM Documentation
FastCGI (Fast Common Gateway Interface) is a protocol that enables web servers to communicate with external processes like PHP-FPM to execute dynamic content. It offers better performance and scalability compared to traditional CGI. FastCGI processes can be reused for multiple requests, reducing overhead.
Resource: FastCGI Specification
-
When a user accesses a WordPress page, Nginx receives the request.
-
Nginx checks its configuration and routes PHP requests to the specified
locationblock. -
In the PHP
locationblock,fastcgi_passsends the PHP request to PHP-FPM, a separate process. -
PHP-FPM processes the PHP script, generates dynamic content, and sends the response back to Nginx.
-
Nginx then sends the response to the user's web browser.
This process allows Nginx and PHP-FPM to work together efficiently to serve dynamic web pages generated by WordPress.
By combining these technologies, you can create a high-performance and scalable environment for hosting WordPress websites within containers.
Resources for Further Learning:
- Why do you need php-fpm
- Installing wordpress cli (wp-cli)
helps to configure and install wp - Simple wordpress configuration using wp-cli
We need to configure the wp-config.php so that the wordpress container will be started and configured already