the Virtualization and containerization are two seperate methods and technologies even if they look the same as shoween in the illustrrations.

for more infomation and understanding please check this video
Docker can be used with two Method
- Docker cli
- Docker desktop
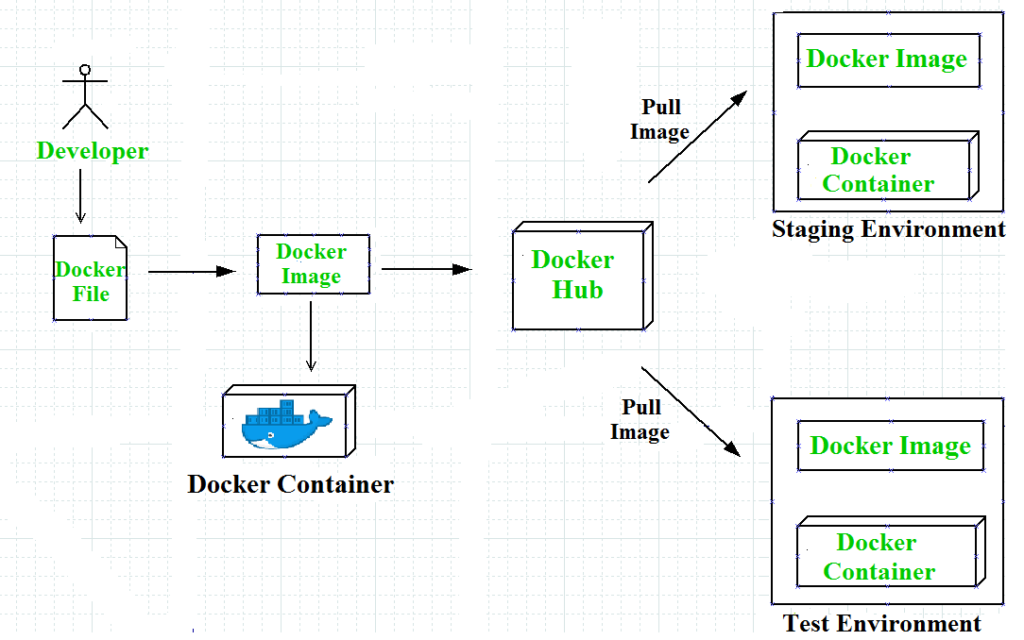
docker is required for this chapter
let's take postgreSQL as an example in this chapter
first of all lets pull the official docker image from DockerHUB
docker pull postgres:latest ||
docker pull <image-name>:tag
after the image is pulled we should run it using docker run -d -p 5432:5432 --name postgres postgres || docker run -d -p 5432:5432 --name <container-name> <image-name>.
BINGO, the container is created
let suppose you want to get the access or go through the container folder, for that you should use: docker exec -it postgres bash || docker exec -it <container-name> bash .
in general, you can use whatever service you want, in condition that the service is alive in the conatiner.for example let's suppose that you want to execute psql service, we can use the following command: docker exec -it postgres psql -U aymane myDB || docker exec -it postgres psql -U <db-user> <db-name> .
for cleaning in docker we should pay attention to three terms:
- volumes
- containers
- images
so when we talk about cleaning/removing we should specify wish of those three should be in consideration.
volumes are a storage for conatiner. each container have a specific volumes that holds the data of the container(files, db data...), for that you can use docker volume prune or docker volume rm <volume-name1> <volume-name2>....
you can use docker volumes help for more commands.
to remove a container is like the previous step you going to use this command docker container rm <container-name|container-id>1 <container-name|container-id>2 .
you can use docker conatiner help for more commands.
to remove an image you are going to use the following command docker image rm <image-id1> <image-id2> .
you can use docker image help for more commands.
for a quick overview i highly recommand the following video.
Dockerfile is a manifest file in YAML that contain the necessary steps to build/configuer a container for your work.
in general the Dockerfile have a syntax as the following:
FROM image:tag

WORKDIR directory

ENV var=value
.
.
.

COPY local_destination container_destination
.
.
.

RUN bash_command
.
.
.

EXEC ['final', 'command', 'to', 'be', 'executed']
FORMused to pull the hosted image in docker hub with it's tag.WORKDIR: specifiy the directory that container the files for our projectENV: define a environement variableCOPY: copy file, folder from your local disque to the conatiner volumeRUN: used to run non-blocking bash commandEXEC: in general is used to execute a command when the container is started, it only accept one command.
we can use/execute all the previous command to run, pull our conatiner using Dockerfile.
let's take the following Dockerfile as example.
to run this file you qre doing the following
docker build -t postgres .
-t is used to give a tag/name for the image in build
the next step after building the container, is to run it for that you are going to run the following:
docker run -d --name postgres -p 5432:5432 postgres
and that's it the container is alive!

the lifecycle of a container can be divided into 3 main parts:
- start
- pause
- restart
- delete
after we run the container for the first time the container is started by default.but sometimes when ew restart or server/personal laptop... the container is stopped and restarted we use docker start <container-name>
docker give us the possiblity to pause/unpause our container using
docker pause|unpause <container-name>
we can also restart our container, in some cases restarting your conatiner is required when one conatiner depends on another and for that to keep everything sync we should restarted. ```docker restart ``
you can delete your container by typing docker start <conatiner-name>
Docker compose is a tool that help us to manage multiple container at once using YAML file. by default the the main configuration file that is known by Docker Compose is docker-compose.[yaml/yaml].
N.B:the extension of the yaml file can by .yaml or .yml but is better to use .yaml
version: 'docker compose file version'
//defining the services
service:
 service_name:
  //giving a name for the container
  container_name: "container-name"
  //name of the image in docker hub
  image: 'conatiner-image'
  //defining the environment in the container
  environment:
      - var: "value"
      ...
  ports:
      - "port_in_your_computer:port_in_the_container"
  volumes:
      - from:to
above we introduced the syntax of the docker-compose file and the necessary keys that docker compose require in order to be executed.
sometimes we have we had to containers that need a communcation between them (for example). and for that we should provide each container with the address of the other one for example A had the the following address 1.2.3.4 in the other hand B had as ip address 1.2.3.5. unfortunally we can provide each container by the reauired address only manually. for that docker givge use the opportunaity to create a container to groupe the containers and use the container_name as the ip address for this scenario.
> docker network create mynetwork
//attach container to network
> docker run -d --name=container --network=mynetwork image
//attach running containe to network
> docker network connect mynetwork container1
> docker network connect mynetwork container2
version : '3'
services:
    container1:
        networks:
         - mynetwork
    container2:
        networks:
         - mynetwork
networks:
    mynetwork