
This is a project based on various other softwares and tools, it is likely effective in an internal environment as well as most SOC's as it provides a good level of capability in sandboxing malware, you can at your own discretion add further tools into the VM you wish to use for analysis, such as dissassemblers or dynamic analysis tools to further investigate.
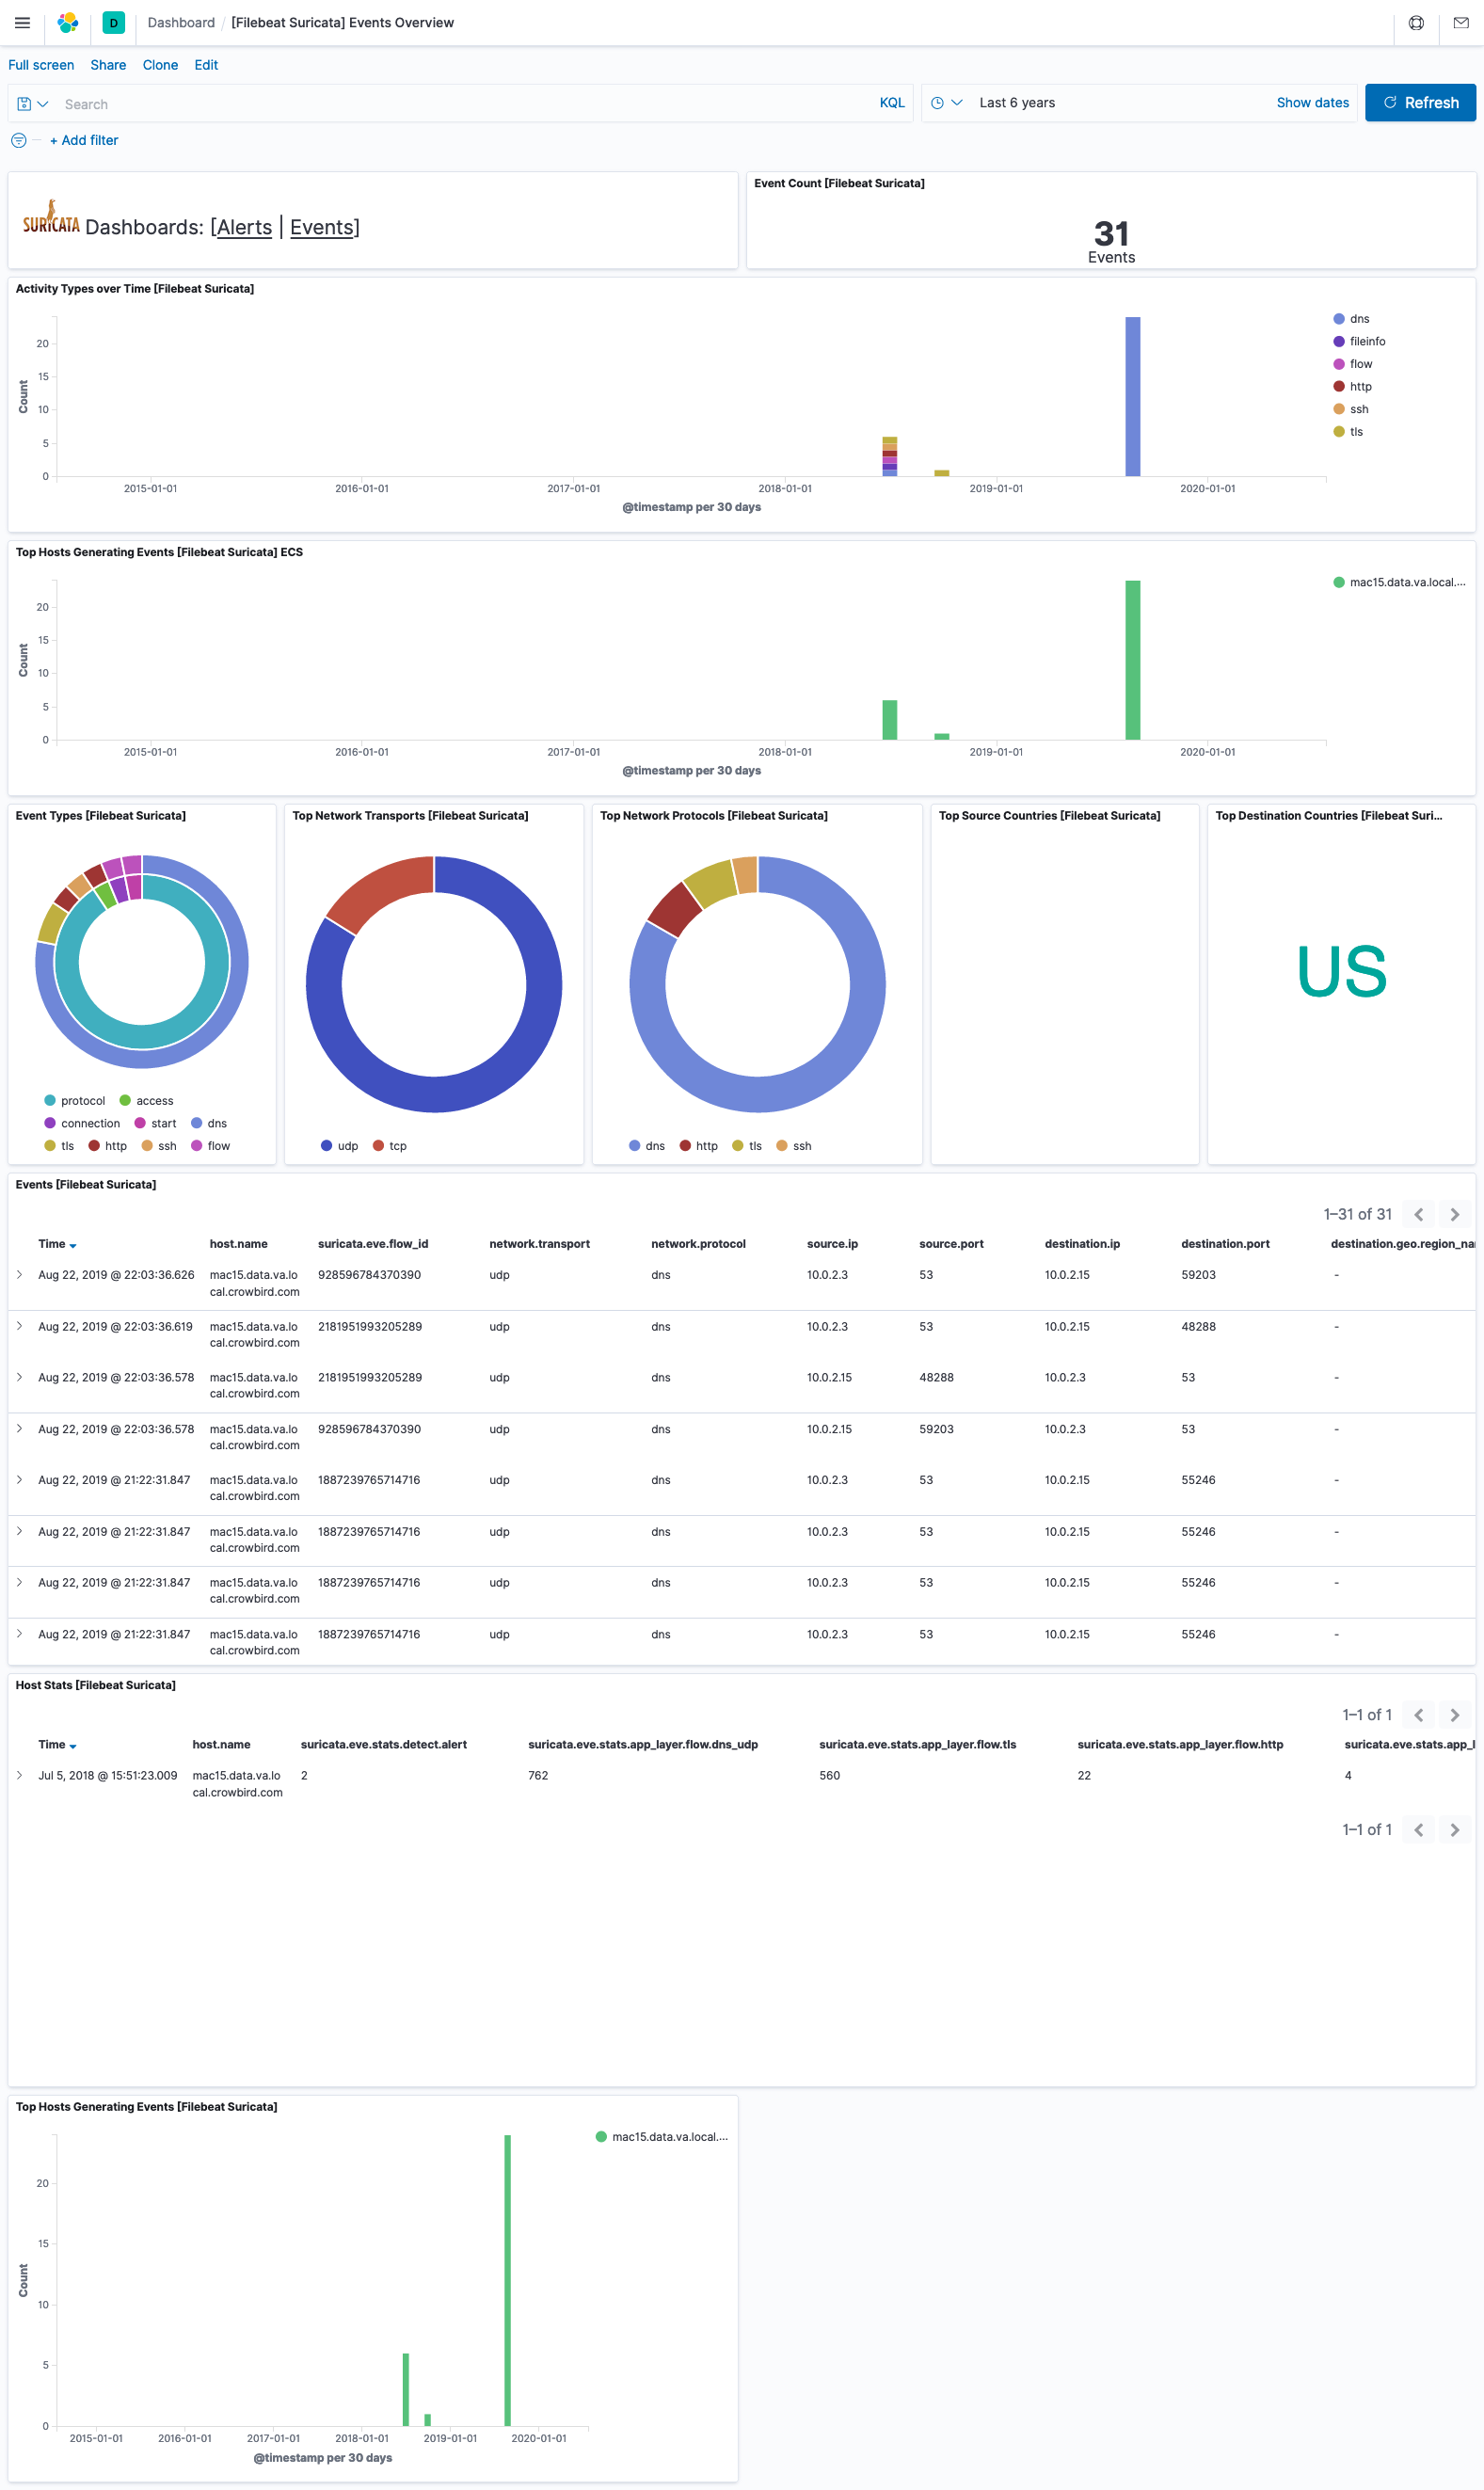
Elastic Kibana Suricata ECS Events:
Please feel free to add to the project by adding in regmon/ fim/ sysmon. These additions will be coming however we are working on polishing off the first edition prior to bringing further ingredients to the mix.
If you decide to proceed in following this tutorial, you accept that:
Software used in the making of this behemoth is not owned by the repository owner, it is the proprietary software of their respective owners unless its licensing states otherwise.
If you fail to isolate your environments, I take no responsibility in this as I have not and will not audit individual environments, if you are not sure if you are able to isolate effectively or you think that my precautions are not enough, either a). stop right here or b). add more security precautions and carry on.
There is currently not a completed version of the installation script available for download however this will be coming in the near future, so if you'd prefer to wait then do that as I will need infrastructure to develop this on. (If you can provide this please contact me - thank you!).
- Windows 10 VM spun up, eval edition can be found here: https://www.microsoft.com/en-gb/evalcenter/evaluate-windows-10-enterprise - this lasts 90 days. If not you can use CMD to reset:
slmgr -rearm
-
Install Filebeat on Win 10 VM; configure filebeat to pull logs from c:\program files\suricata\log\eve.json and then configure it to send the logs to your Security Onion instance when it is configured (e.g. http://192.168.0.1:9200), authentication is really only necessary externally.
-
On your physical host, configure autorevert, this can vary depending on your architecture. This step is optional, it is only really NECESSARY if dealing with serious malware and may actually function as a red herring to apppear as though the PC is used frequently to adversaries.
-
Configure TightVNC, to forward connections to from a websocket you will set up in the next step: TightVNC acts as a VNC server. In this set-up, websockify (a websocket-to-TCP-bridge) is to proxy a port from the web, to the VNC client, and NoVNC's purpose is to purely be the web-interface.
-
Configure Nginx, NoVNC and Websockify: these are all together for a reason:
a). Install NPM.
b). Test installation is working:
npm -vc). Install Websockify (websocket):
npm install --save node-websockifyd). Start nginx, go to the /NoVNC/Nginx/ directory within CMD and type:
start Nginxe). Test this is all working by going to localhost/vnc.html (if you see NOVNC in large green/yellow letters - it is!).
f). Within the NoVNC page you have open now in your browser, go to settings -> advanced -> websocket the host should stay 'localhost' for now, on another PC you will have to type this small bit again with its actual IP address (ipconfig), the port is 8080 (as used in my example) and the path should stay websockify.
Once you have typed the config settings in websocket, it will work for that PC. You will need to do this small part on all PC's you plan to use it on. Externally of it luckily it will have the same IP address. If you follow until the end and configure a seperate nginx-hub to host multiple, this will become further seamless.
-
Download something like Git Bash to allow yourself to run a shell to then run websockify, you cant just do it via Node / Forever, I tried it. Bash will allow you to create a shell to run it, if you configure that properly via NSSM as well, you'll get websockify.js ran via Node.js Forever.js and then you're laughing because step 8/9 are savage.
a). Run git bash found in this repository.
b). Edit the script found in /Executables/run-websockify.js to the path in which websockify is stored on your host.
c). Use NPM to download forever.
npm i [email protected]
Download the SecurityOnion .iso from: https://securityonion.net/ and then spin that up on a seperate host. As it is ELK in one I would recommend at bare minimum 16G/4cores/500G but you could probably pull it off with 8G/2 cores/250G.
The installation process for this is
1). Load the .iso into a VM as you would Ubuntu/ Windows
2). Boot into the .iso
3). Follow the set up guide by pressing 'YES', 'NEXT' etc you get the gist.
4). Pick between Suricata and Bro when the time comes. This is purely down to preference.
-
You can create a secondary Nginx server to host multiple sandboxes. There are HTML placeholders in /anhur/html
-
iFrames! You can pull these out of Kibana to put them where I've put placeholders in the HTML by going to the top left of your visualization, Share, Embed Code, Saved Object, Copy iFrame code.