The code can be seen live on CodePen here.
Creating a visualiser like this is easy and fun when you have the framework, below is a tutorial for the all the essentials to make one for yourself.
It's made of three parts, WebAudioAPI, ThreeJS and dat.GUI.
Some javascript libaries that you will need for this project are as follows. Include these in your <head></head>.
<script src="https://cdnjs.cloudflare.com/ajax/libs/three.js/89/three.min.js"></script>
<script src="https://cdnjs.cloudflare.com/ajax/libs/dat-gui/0.7.2/dat.gui.min.js"></script>
<script src="https://cdn.jsdelivr.net/npm/[email protected]/OrbitControls.min.js"></script>

<!-- OPTIONAL - Alternative THREE.OrbitControls script to fix a small conflict with selecting a preset in dat.GUI -->
<script src="https://codepen.io/jhancock532/pen/VdLmvN"></script>
<!-- (I commented out line 661, which is event.PreventDefault(); in the onMouseDown function, that's the only change). -->
WebAudioAPI makes everything audio related easy, here we are going to use it to analyse a sound file in real time.
let context = new (window.AudioContext || window.webkitAudioContext)();
let analyser = context.createAnalyser();
let soundDataArray;
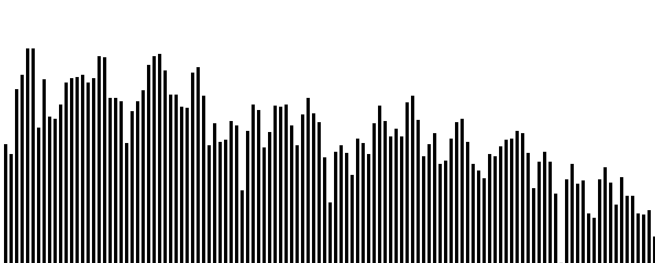
const MAX_SOUND_VALUE = 256;The soundDataArray is going to be where we store the music waveform data. The context and analyser will do all the processing of the audio for us. soundDataArray will contain the frequency spectrum data for the music, that looks like the heights of the bars in the below music visualiser snapshot. Each element in soundDataArray has a max value of 256.
Here is the HTML we will need to load and play the audio file.
<input type="file" id="audioInput"/>
<label for="audioInput" id="audioInputLabel">Choose a sound file.</label>
<audio id="sound"></audio>
The user inputs a sound file of their choice through the input element above. We then use the following JavaScript to load the selected file, and start playing it.
audioInput.onchange = function() {
  let sound = document.getElementById("sound");    //What element we want to play the audio.
  let reader = new FileReader();                   //How we load the file.
  reader.onload = function(e) {                    //What we do when we load a file.
    sound.src = this.result;                       //Setting the source for the sound element.
    sound.controls = true;                         //User can pause and play audio.
    sound.play();                                  //Start playing the tunes!
  };
  reader.readAsDataURL(this.files[0]);             //This will call the reader.onload function when it finishes loading the file.
  createAudioObjects();
};
You should now be able to hear the audio playing, to get our context and analyser to interact with it we call createAudioObjects();
//Connects the audio source to the analyser and creating a suitably sized array to hold the frequency data.
function createAudioObjects() {
  source = context.createMediaElementSource(document.getElementById("sound"));
  source.connect(analyser);
  analyser.connect(context.destination);
  analyser.fftSize = 1024; //128, 256, 512, 1024 and 2048 are valid values.
  soundDataArray = new Uint8Array(analyser.frequencyBinCount);
}
We declare the source (where music is coming from), connect the source to the analyser and then connect the analyser to the context.destination. If you didn't do this last step, you wouldn't hear anything. You are diverting the audio data through a analyser bypass, and you reconnect it to where it would originally output. The developer's explanation can be found here in the offical docs.
The larger analyser.fftSize is, the the larger your soundDataArray will be (and the more detail of the sound you will have). analyser.frequencyBinCount is half the value of analyser.fftSize and will be the length of soundDataArray. Details about fftSize can be found here, and frequencyBinCount here, but aren't vital to know past this point.
The soundDataArray is updated when the animate function loops and we have loaded a audio file to analyse.
function animate() {
  requestAnimationFrame(animate);

  //Update the soundDataArray with the new sound data.
  if((soundDataArray === undefined) == false){
    analyser.getByteFrequencyData(soundDataArray);
  }

  //controls.update();              //Not audio related. See part 2, Three JS!
  //updateMeshes();                 //Not audio related.
  //renderer.render(scene, camera); //Not audio related.
}
animate();
The audio analyser does all the complex work for us with analyser.getByteFrequencyData();. Note how the code doesn't try to write to soundDataArray if it is undefined, as this means we haven't loaded a file. For every frame that we are animating, we are refreshing the soundDataArray with the current audio data. The updateMeshes(); function can then access soundDataArray and edit objects to make them dance to the music.
Part One Complete! You should be able to load an audio file and hear it playing. You should be able to console.log the contents of soundDataArray as not being undefined within the animate function, and as containing values from 0-255.
This library handles all the complexity of creating and rendering 3D scenes. For the source code, I animated a collection of line objects to make springs, and a collection of circle meshes are segments put together to make one circle. For this tutorial, we shall just focus on the circle segments, with the aim of creating a radial visualiser we can track the camera around in three dimensions.
To get set up, we'll need
let scene = new THREE.Scene();                                                                    //The stage which contains everything.
let camera = new THREE.PerspectiveCamera(75, window.innerWidth / window.innerHeight, 0.1, 1000);  //How we see the scene.
let controls = new THREE.OrbitControls(camera);                                                   //Determines how the user controls the camera.
Let's tweak the controls parameters to make the camerawork smooth and tidy.
controls.target = new THREE.Vector3(0,10,0);       //Slightly above (0,0,0) to frame the visual better.
controls.enableDamping = true;                     //Makes for a smoother camera experience.
controls.dampingFactor = 0.1;
controls.rotateSpeed = 0.005;
controls.enableKeys = false;
controls.enablePan = false;
controls.maxDistance = 400;                        //Determines how far the user can move the camera out by scrolling.
Finally, create a renderer to take in the scene and convert it to an image for our screen.
let renderer = new THREE.WebGLRenderer();
renderer.setSize( window.innerWidth, window.innerHeight );
document.body.appendChild( renderer.domElement );             //Adds the display canvas to the web page.

camera.position.z = 0;
camera.position.y = 60;
controls.update();                                            //Controls need to be updated after every camera position change.
We set the camera position to look down onto the scene, and update the controls object to let it know where the camera is. To make the canvas look pretty, touch it up with some CSS.
html, body {
  overflow: hidden; /*Removes the scrollbars from the webpage*/
}

canvas {
  display: block;
  position: absolute;
  top: 0;
  left: 0;
  border: none;
  margin: 0;
  z-index: -1;
}
We've created a scene, so it's time to add stuff into it. To stop the scene being entirely black, we add a grey skybox encapsulating the camera in it. The grey skybox is a sphere geometry with a grey material applied to it, combined together to create a mesh.
function createSkybox(){
  let sphereBox = new THREE.SphereGeometry( 500, 32, 32 );                           //Creating the sphere geometry.
  let sphereMaterial = new THREE.MeshBasicMaterial( {color: 0x111111, side: 2} );    //Creating a material for the sphere.
  let sphere = new THREE.Mesh( sphereBox, sphereMaterial );                          //Combining geometry and material.
  scene.add(sphere);                                                                 //Add the result to the scene.
}
You can experiement with the size and colour of this sphere, tweak 500 to 10 to see it from the outside, and 0x111111 to 0xff0000 to make it red. More information about SphereGeometry can be found here, and MeshBasicMaterial here.
We now create a global array of meshes which get updated according to soundArrayData. To create this array and fill it, declare some global arrays and use a helper function to fill them. First, declare these constants towards the top of your JavaScript code.
const numSamples = 60;           //The number of segments in the circle.
const segBaseRadius = 40;
const segBrightness = 50;
These will determine how our visualiser looks. Continuing on to the main event,
let segmentGeometryArray = [];   //Globally accessible arrays.
let segmentMaterialArray = [];   //Perhaps could be stored together in an object.
let segmentsArray = [];

setUpAllArrays();

function setUpAllArrays() {
  for (let i = 0; i < numSamples; i++){
    segmentGeometryArray.push( new THREE.CircleGeometry(segBaseRadius, 64, i*2*Math.PI/numSamples, 2*Math.PI/numSamples) );

    segmentMaterialArray.push(new THREE.MeshBasicMaterial( {
      color: new THREE.Color("hsl("+(i*359)/numSamples+", 100%, "+String(Math.floor(segBrightness))+"%)"),
      side: 2
    }));

    segmentsArray.push(new THREE.Mesh(segmentGeometryArray[i], segmentMaterialArray[i]));
    segmentsArray[i].rotateX( Math.PI / 2 ); //The circle is initally created in the x-y plane, so we rotate it here flat onto x-z.

    scene.add(segmentsArray[i]);             //Add the segment (circle mesh) to the scene.
  }
}
I am creating segments of a circle (like slices of a pie) iteratively through i*2*Math.PI/numSamples, 2*Math.PI/numSamples in the CircleGeometry constructor. For intuition, the code is adding segments together one by one to make a circle. To learn more about the constructor for THREE.CircleGeometry go here.
We have an array of meshes added to the scene, ready and waiting for animation. Back to the animate function
function animate() {
  requestAnimationFrame(animate);

  //Update the soundDataArray with the new sound data.
  if((soundDataArray === undefined) == false){
    analyser.getByteFrequencyData(soundDataArray);
  }

  controls.update();               //Updates the internal camera controls (as you have probably moved it)
  updateMeshes();                  //Updates the mesh array.
  renderer.render(scene, camera);  //Render a new frame of the scene.
}
Updating the meshes is quite simple, being a scale effect on the mesh and a rotation to make the visualisation more interesting.
function updateMeshes(){
  for (let i = 0; i < numSamples; i++){

    let sampleLevel = 1; //Fallback value if soundDataArray doesn't exist.
    if ((soundDataArray === undefined) == false) {
      sampleLevel = getSampleOfSoundData(i, numSamples, soundDataArray);
    }

    segmentsArray[i].scale.set(0.01+sampleLevel,0.01+sampleLevel,1);  //Scale the mesh on x,y,z planes. z value doens't matter.
    segmentsArray[i].rotateZ(0.003);                                  //Rotate the mesh around the z axis.
  }
}
The function getSampleOfSoundData() is provided below.
//Returns the average of a small sample of the array. Index declares which sample you want from a noSampleSections, ideal for iteration.
function getSampleOfSoundData(index, noSampleSections, soundDataArray){
  let sampleSize = Math.floor((soundDataArray.length/2) / noSampleSections);

  let minBound = index * sampleSize;
  let maxBound = (index + 1) * sampleSize;
  let sum = 0;

  for (let i = minBound; i < maxBound; i++){
    sum += soundDataArray[i];
  }
  let average = sum / sampleSize;

  return average / MAX_SOUND_VALUE;
}
Part Two Complete! At this stage we have implemented all the basics of our Three JS scene. View the current project in action here and check your code against my current code here.
It's nice to be able to directly edit parameters of what you are working on while you are interacting with it, the GUI to do this is what dat.GUI offers. To specify what parameters we want to edit, we first have to create an object to store them.
let segments = {
  numSegments: 60,
  brightness: 34,
  baseRadius: 40,
  rotationSpeedMultiplier: 2
}
This object is going to replace the contstants we defined previously. That is, wherever you have numSamples in your code, you will need to replace it with segments.numSegments and the same for segBrightness (segments.brightness) and segBaseRadius (segments.baseRadius). I updated the updateMeshes() function so now it looks like the following:
function updateMeshes(){
  for (let i = 0; i < segments.numSegments; i++){
    let sampleLevel = 1;

    if ((soundDataArray === undefined) == false) {
      sampleLevel = getSampleOfSoundData(i, segments.numSegments, soundDataArray);
    }

    segmentsArray[i].scale.set(0.01+sampleLevel,0.01+sampleLevel,1);
    segmentsArray[i].rotateZ(0.003*segments.rotationSpeedMultiplier); //note the new speed multiplier variable which the user can control.
  }
}
If your code has been successfully updated with new variables, it's time to work with dat.GUI.
let gui = new dat.GUI();

//Create a folder to neatly contain the parameters to be edited.
let folder = gui.addFolder('Segments');

//Add the parameters into the folder.
let segmentNumberController = folder.add(segments,'numSegments',1,255).name("No. of Segments");
let segmentBrightnessController = folder.add(segments,'brightness',0,100).name("Brightness");
let segmentBaseRadiusController = folder.add(segments,'baseRadius',0,100).name("Radius");
folder.add(segments,'rotationSpeedMultiplier',0,10).name("Speed");

folder.open(); //Displays the folder contents.
.name() changes how the variable name is displayed. .add(segments,'numSegments',1,255) adds the variable numSegments from the object segments into the GUI, where the user can edit the value in the range from 1 to 255.
For the first three additions, we assign the results of folder.add to controller objects. These handle the events which get triggered whenever the user changes a value. For the first three variables, editing them will require a reset of the scene and mesh arrays, so we call a resetScene(); function when they change.
segmentNumberController.onChange(function(val) {
  resetArrays();
});
segmentBrightnessController.onChange(function(val) {
  resetArrays();
});
segmentBaseRadiusController.onChange(function(val) {
  resetArrays();
});
resetArrays(); emptys all the arrays, running code to remove all the objects from the scene, and then creates a skybox and repopulates the arrays (with a new number of segments or new material color perhaps).
function resetArrays() {
  segmentGeometryArray = [];
  segmentMaterialArray = [];
  segmentsArray = [];

  //Code to remove all objects from a scene.
  for(var i = scene.children.length - 1; i >= 0; i--){
     obj = scene.children[i];
     scene.remove(obj);
  }

  createSkybox();
  setUpAllArrays();
}
Optional Extra - To load and save presets of your parameters, you will need to use a tweaked THREE.OrbitControls class due to a conflict between how the camera controller handles mouseDown events and how a <select> HTML element works. The edited class can be found here. I commented out line 661 in the onMouseDown function, which is event.PreventDefault();.
Here I edit the dat.GUI initalization to include an example of remembering and preset data in JSON.
let presetJSON = {
  "preset": "Default",
  "closed": false,
  "remembered": {
    "Default": {
      "0": {
        "numSegments": 60,
        "brightness": 34,
        "baseRadius": 40,
        "rotationSpeedMultiplier": 2
      }
    },
    "High Detail": {
      "0": {
        "numSegments": 255,
        "brightness": 45.947859589587225,
        "baseRadius": 34.946758740903064,
        "rotationSpeedMultiplier": 3.384664865603464
      }
    }
  },
  "folders": {
    "Segments": {
      "preset": "Default",
      "closed": false,
      "folders": {}
    }
  }
}

let gui = new dat.GUI({
  load: presetJSON,
  preset: 'Default'
});

gui.remember(segments);
The definitive guide to how to use dat.GUI can be found here which explains in greater detail how to work with presets (You don't have to type out all that JSON, the settings button generates it for you!).
Part Three Complete! You can now edit how the visualiser looks and functions live while visualising music. From here, I developed the project further by adding springs on top of the circle. There is a lot of different possiblities for development with Three JS, I'm quite inspired by the amazing range of examples or the high quality professional projects.
My code for part two looks like this. Don't hesitate to leave any questions or suggestions, I'm sure there are improvements to be made to this tutorial. Thanks for reading.