Arduino code and steps on how to build a Wireless Firework Igniter with an ESP8266
Ok, so if you have come here to search for a way not to hurt yourself or have nothing to do with flames while igniting a firework or a firecracker, you found the right page.
With just around 30€ of Hardware you can too safely ignite firework from a safe distance. The project is simple, we will just setup an Access Point from the ESP8266 where we will connect to a webpage where we can turn on a relay remotely and heat up a nichrome wire with a 9 Volt battery. Easy right?1

- Nichrome Wire (preferably as thin as possible)
- 9 Volt battery
- 3/4 Alligator clamps
- Breadboard
- Small Relay (The one i used was made for arduino)
- ESP8266 (The one i used is a NodeMcu V3)
- Some small breadboard cables
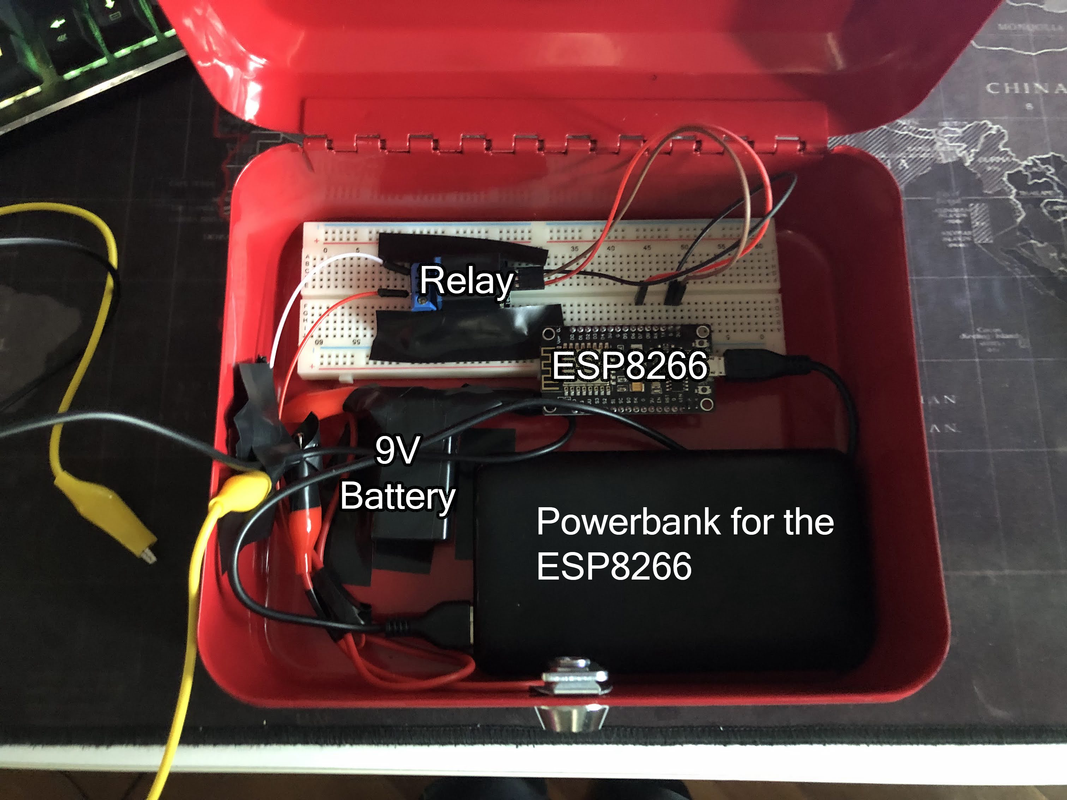
- Powerbank (To power the ESP when not connected to the PC)
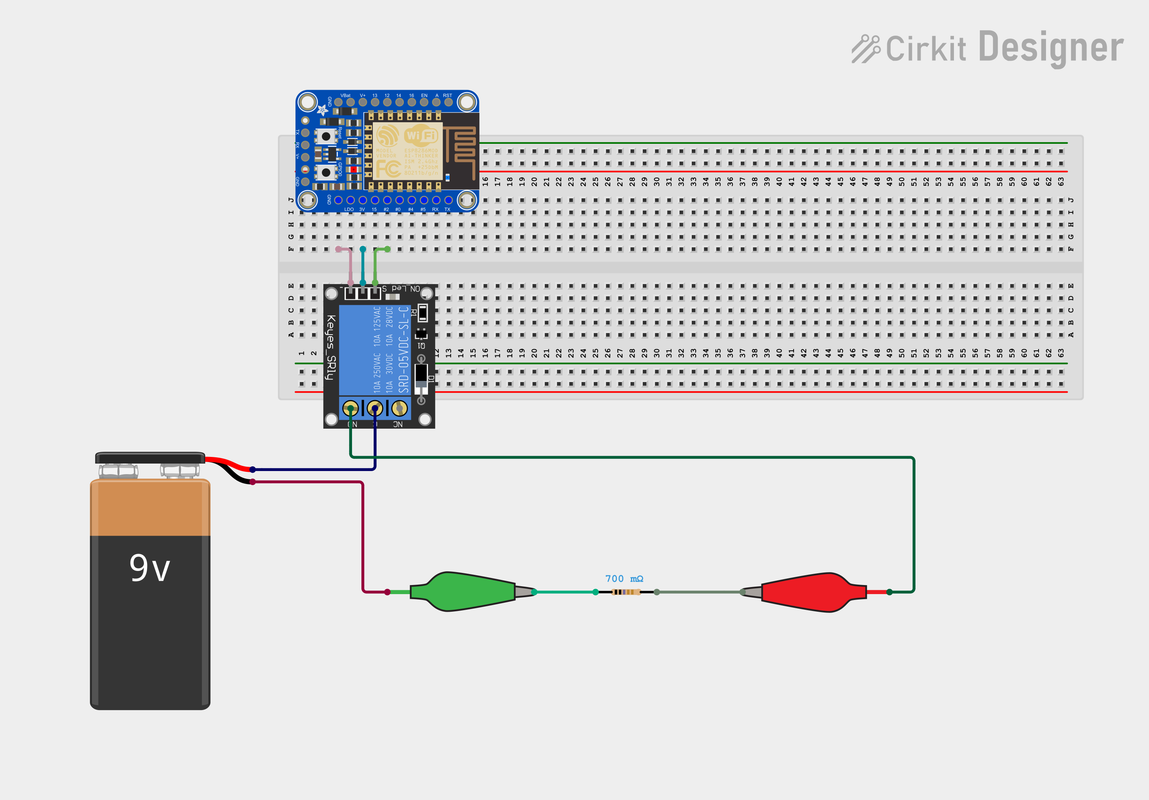
- Connect the ESP8266 on the breadboard, make it fit so you can connect the 3 V volt port.
- Use the breadboard cables to connect the 3V and the Ground pins to the correspective pins on the Relay.
- Connect you output pin from the EPS8266 (In my case i connected the D7) from the breadboard to the Relay signal pin.

- Then on the Relay connect 2 breadboard cables, one in the center one on the NO gate, as shown in the diagram.
- Next, get three Alligator clamps:
- One goes from the battery positive to the cable in the middle of the relay.
- One goes on the other cable of the relay.
- the last one goes on the negative of the battery.
- Use the electrical tape to secure the cables, and the Alligator clamps on the battery (Make sure they don't touch each other!)
- Connect a tiny bit of nichrome wire 5/10 cm to the negative alligator clamp and the other side to the positive coming from the relay.
Worry not, if you have already compiled and wrote the code in the ESP8266 now you will just have to:
- Plug it to your powerbank.
- Check for the WiFirework connection on your phone or laptop, connect to it and insert the password: "ILoveFireworks".
- Go to your browser while connected to the wifi and search for this ip: "192.168.4.1".
- Now you can activate it (and wait for it to heat up) and then turn it off whenever you want.
- You can always make sure that there is no current passing through the nicromium wire with a led or test it with a piece of paper, if it burns, you did something wrong!
- After activating it, you should always wait at least a pair of minutes for the wire to cool off, you don't want it to set off your firework while you are setting it up (If you are still unsure you can always change the wire).
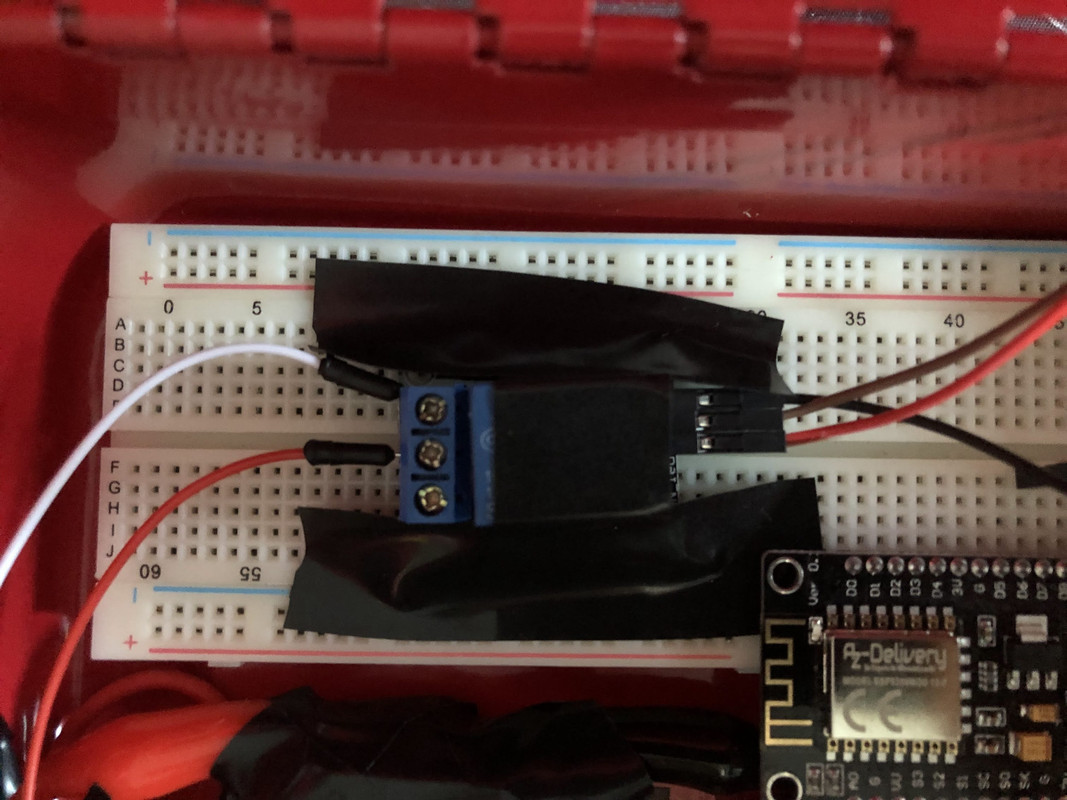
- If you also do worry about your cables and circuit you can also buy a little box like mine to protect everything from explosions or sparks.
- Always test everything outside, we don't want to burn down our house
right?. - Remember to always have a spare 9V battery just in case.
Footnotes
-
Just remember to use a firework that is legal in your Region/State. ↩