Camera Profiles
Here you can configure and fine-tune your camera. Octolapse allows you to control the camera settings (if supported by your camera and streamer) before each print, giving you complete control of how your snapshots look.
click to see the tab
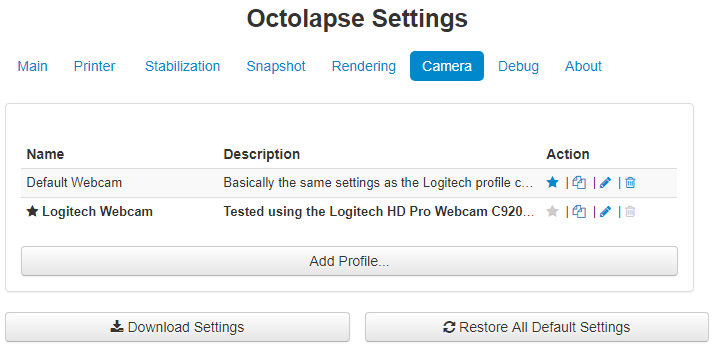
You can get to the camera profiles by opening the Octolapse settings and clicking on the 'Camera' tab.
click to see the profile
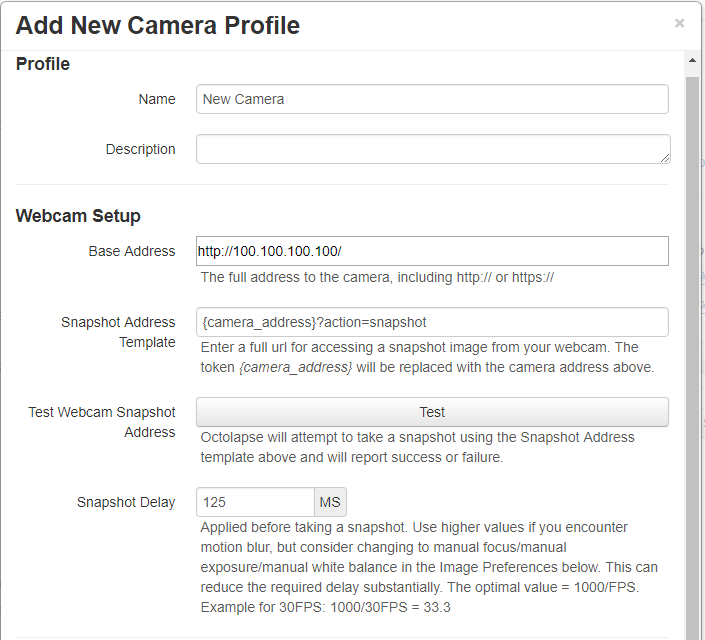
This is the full path to the web camera. This address can be used in the Snapshot Address Template and the Camera Settings Request Templates by using the {camera_address} replacement token.
The initial setting (after install or after you restore the default settings) is based on the OctoPrint settings within the 'Webcam & Timelapse' screen. The OctoPrint default is (I believe) http://127.0.0.1:8080/
You can either enter the full path for your webcam's snapshot page, or you can use the {camera_address} template.
The default value is {camera_address}?action=snapshot.
The default full url would be http://127.0.0.1:8080/webcam/?action=snapshot
Click this button to make sure a snapshot can be downloaded from the provided Snapshot Address Template. Octolapse also performs this test at the beginning of a print to make sure the webcam is working. If it fails the test, the print will be cancelled and you'll receive an appropriate error message.
This value is in milliseconds, where 1000 milliseconds = 1 second. The delay will be applied after Octolapse moves the bed and extruder into position, but before a snapshot is taken. This can be used to give the camera enough time to adjust, keeping your images clear. If you set this value too high, you're prints will take longer and you may have stringing/quality issues. The default value is 125, but I've gotten good results with significantly lower values. Some users have reported needing to double this setting or more.
In general if your delay needs to be very high in order to get a clear image, there may be a few other things going on:
- Autofocus is enabled - It takes some time to autofocus. You will be able to lower your delay by manually focusing your camera.
- Other automatic settings - some of these may also impact the delay, but this is unknown.
- Low light conditions - some cameras require more light than others, and some cameras automatically adjust the exposure. Increasing the lighting and reducing the exposure time can lower the required delay and improve the output video quality significantly.
- SECURE YOUR CAMERA! A loose or wobbly camera will affect your timelapse. There is no way to get a smooth timelapse if the camera is bouncing around or sliding.
- Consider adding vibration dampening to your camera/printer, or move your camera to another structure.
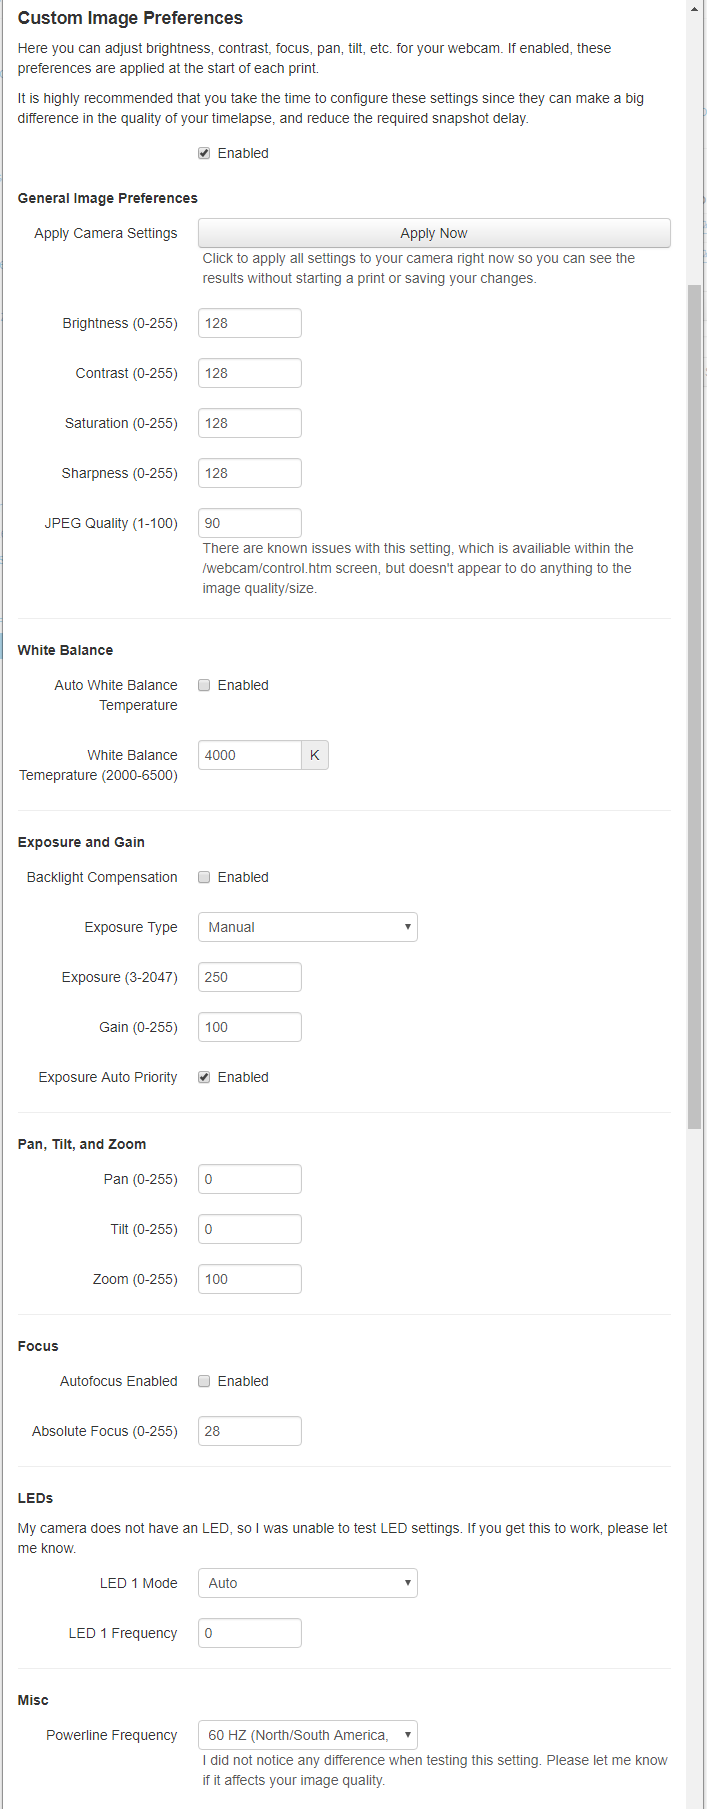
When enabled, Octolapse will attempt to apply your custom settings to the camera before every print. Not all cameras are capable of using all of the settings, sorry.
You can test your settings by clicking the 'Apply Now' button and looking at your camera's web stream. It may take a few seconds for the settings to be applied, so be patient. I recommend using two browser windows, one for the Octolapse settings, and another showing your webcam. Octolapse does not currently have an image preview, but this is coming.
128 is the default (50%) for each setting.
In theory this should control the quality of the final jpeg image in percent (1-100), but currently I can't tell if it's doing anything at all. This will be investigated at some point.
When enabled the white balance will be adjusted automatically. This could affect your snapshot delay.
This setting is available when Auto White Balance Temperature is disabled. Here you can color correct your images based on the temperature of your light source in kelvin. A higher value will give you a more yellow image, while a lower value will give you a bluer image. This is backwards from how the color temperature is labeled on a light bulb, so make a note of the difference.
Supposedly improved the image if the target is illuminated from behind.
There are four settings here, but I only understand two of them. It's possible my camera only supports two of the options, which are:
- Manual
- Auto - Aperture Priority Mode
If manual exposure is selected, you'll have access to some additional settings
Higher values will give you longer exposures. The higher the exposure value the longer the image will take to capture, but the image will be brighter.
Increase the brightness without increasing the exposure. You can somewhat compensate for lower light levels, but you may notice that some colors tend to wash out if your gain is too high.
Not sure what this setting does. If someone knows, please let me know!
Control the pan, tilt and Zoom! Some cameras have software pan, tilt and zoom, so you might want to try these settings out, even if you don't have a motorized camera with a zoom lens!
Autofocus takes time, and it may result in a blurry timelapse if your camera is off or if it focuses on the wrong thing. A much better option is to manually set your focus.
If Autofocus is NOT enabled, you can manually set the focus here. I recommend starting by increasing the focus by units of 5 at first, then reversing direction when the image becomes worse, moving by 1 unit at a time until you either find the best value, or you can't tell a difference anymore. It helps to put book or something else with printed text EXACTLY where your print will be. It is much easier to adjust the focus when there is sharp text at the focal point.
In theory these settings control your camera LED. I've not noticed any effect. Will try to debug as soon as I get some different cameras to test.
Can be Auto, On, Off or Blink. Not sure if this works (no light on my camera).
I'm guessing this is either the blinking frequency or effectively the LED brightness. It could be both. If anyone knows, please let me know
Supposedly this eliminates flicker according to the frequency of your mains power, but I haven't noticed any effect. Someone let me know if they notice any effect here.
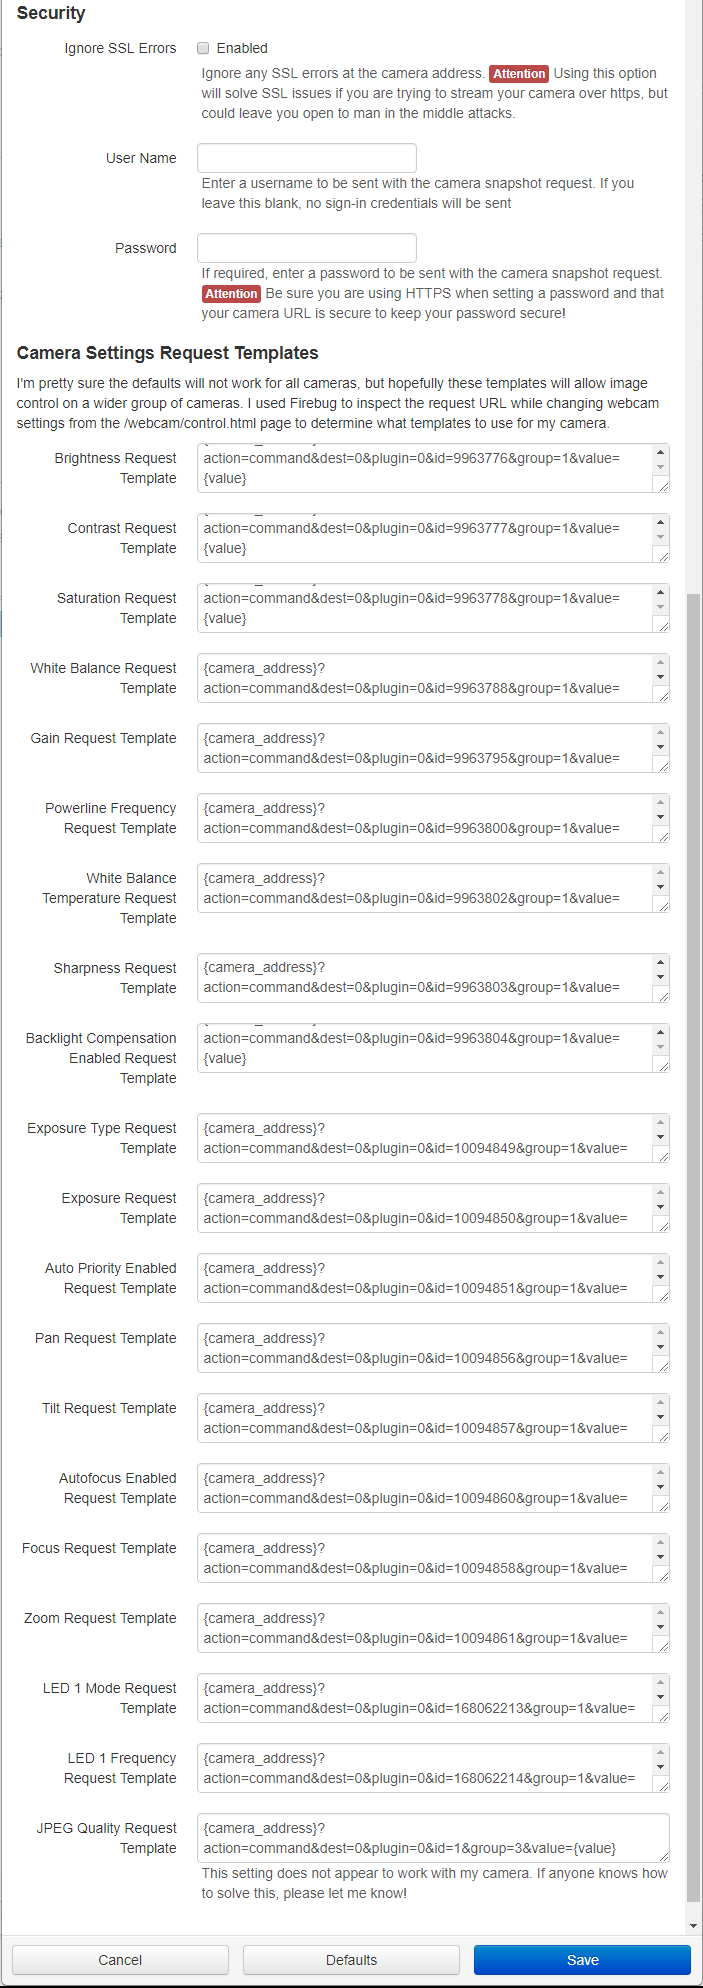
These are advanced settings that impact the security of Octolapse and Octoprint. Do NOT use them unless you are sure you need to.
If you are using a remote webcam you may want to communicate with it over HTTPS. Normally a valid SSL certificate is required, but many people are using a self-signed certificate. You may still see ssl warnings in the log file (plugin_octolapse.log) depending on your debug settings.
Warning: This option could leave you open to certain kinds of attacks. If you use this option make sure your local network is secure.
If your camera requires authentication you can provide it here. WARNING: Your username is stored in plain text within the settings.json file. Additionally if you enable certain diagnostic logging (log settings save, log settings load), your username will appear within the log file! Finally, if you are using a remote webcam without SSL your username will be sent in PLAIN TEXT over the network!
If you leave the username field blank, no sign-in credentials will be sent.
If your camera requires a password for basic authentication you can provide it here. WARNING: Your password is stored in plain text within the settings.json file. Additionally if you enable certain diagnostic logging (log settings save, log settings load), your password will appear within the log file! Finally, if you are using a remote webcam without SSL your password will be sent in PLAIN TEXT over the network! Please be careful with your passwords and NEVER reuse your webcam password anywhere else! If you are not using authentication (no user name entered) please erase any password entered here and save over your existing profile.
I discovered these URLs by watching requests sent to mjpegstreamer when I made changes within the default settings page. I"m not sure if they are standard, of if they change from camera to camera, so I created templates for each setting. Hopefully they can be made to work with additional camera servers too.
If you come up with a new or different template that works, please let me know the make and model number of your camera, the new template value (using the {camera_address} token for the base address of the camera), and which setting it changes and I'll see about adding a profile, or updating the default settings.